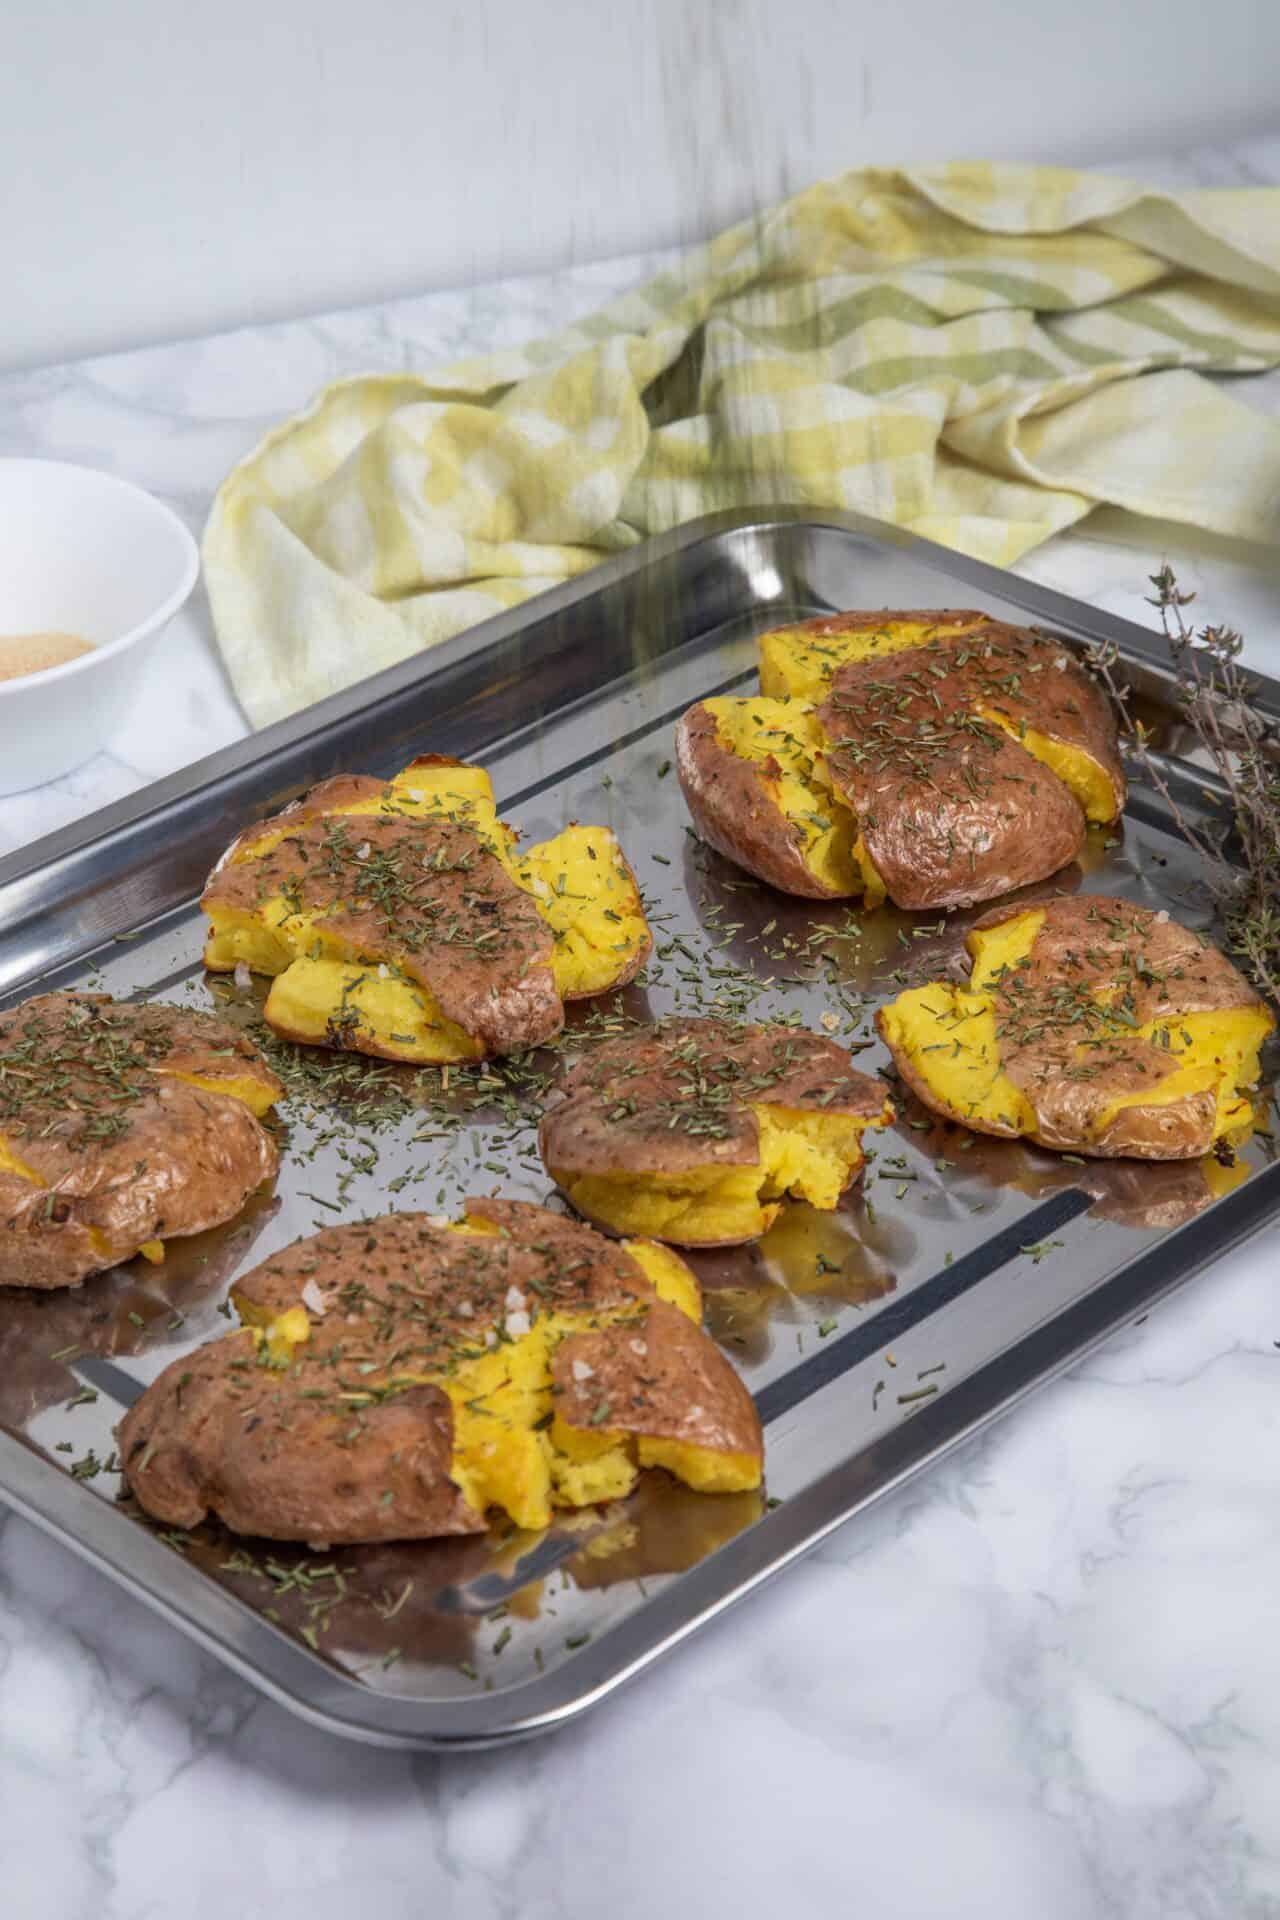
Everyone loves the comfort of roasted potatoes, but when you smash them and add a little salt, herbs, and olive oil, they’re elevated to a restaurant-quality side dish!

There’s never a bad time to eat a potato, but my life is full of perfect occasions to enjoy everyone’s favorite starchy tuber. Typically, I reach for the potatoes at the end of a hard week, after a bar trivia night, or when I’m in an especially good mood. Heck, if I’m in a mediocre mood, I’ll take a side of fries or some hash browns. Essentially, if I wake up on any given day, I’m down for a potato.
Due to who I am as a person (as described above), I have a secret stash of tater recipes that I can pilfer through when I start to get a hankerin’. Do I want home fries? Crispy frites? A beautifully golden Hasselback potato? Garlic mashed taters with Parmesan? If you can dream it and it contains potato, I probably have a recipe for it.
Today, I’m sharing one of my favorite potato dishes ever: smashed fingerling potatoes. Don’t let the name fool you—they might sound simple, but the secret to these potatoes is their crispy golden edges, made possible by first boiling the potatoes so you can smash them right on the baking sheet before they go into the oven. The potatoes are oiled so that they catch all the crispiness they can muster during the bake! A little salt, pepper, garlic, and thyme flavor this glorious side dish, and they go with just about anything!

Getting every potato crispy
The pleasure of this dish is in the crispy edges, so let’s make sure every edge has the opportunity to crisp up!
- Use similarly-sized potatoes: You’ll want to ensure all your potatoes are roughly the same size so that both boiling and baking result in equally cooked potatoes.
- Make sure the potatoes are dry before you smash: When you boil the potatoes they will have excess water on them, which will turn to steam and stop your potatoes from getting crispy. So, before you smash them on a tray, dry them completely. You can do this by placing them in a colander until all the water has evaporated and dripped off.
- Consider adding a little cooking spray: The recipe calls for oiling the whole potatoes prior to smashing them, and usually that’s fine. But if you want that extra crisp, consider spraying a little cooking spray onto the edges after you smash the potatoes.

How do I store leftovers?
These potatoes are best served straight out of the oven, but you can store the leftovers in an airtight container in the fridge for up to 3 days. These potatoes are the crispiest when served fresh, but if you eat them as leftovers, use a toaster oven or air fryer to reheat. This will bring back some of the crispy texture.
Serving suggestions
These potatoes are an easy and delicious side dish, and they pair well with many meals, but I particularly love pairing them with Smash Burgers and Air-Fryer Everything Chicken Fingers With Honey Mustard Dip. For an elevated plate, try pairing them with a Filet Mignon or a flavorful Chimichurri Steak.

Smashed Fingerling Potatoes Recipe
Ingredients
- 1 pound fingerling potatoes well-scrubbed
- ½ teaspoon kosher salt plus extra, for seasoning
- 3 tablespoons extra-virgin olive oil
- ½ teaspoon garlic powder
- 1 tablespoon fresh thyme leaves
- ¼ teaspoon freshly ground black pepper
- 1 tablespoon fresh chives finely chopped (optional, for garnish)
Instructions
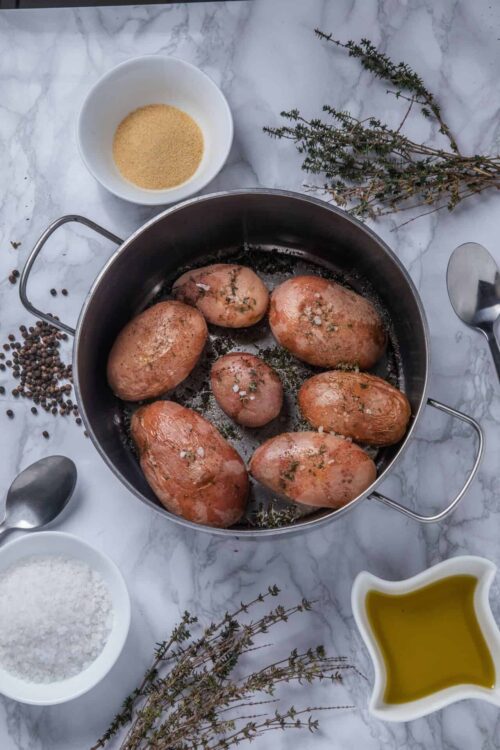
- In a medium pot, cover the fingerling potatoes with cold water by an inch and stir in a pinch of kosher salt. Bring to a rolling boil, then reduce heat to a simmer. Cook until the potatoes are just tender enough to be pierced with a fork, about 15-20 minutes. Keep an eye on them; smaller potatoes will cook faster.

- Once tender, drain the potatoes and let them sit in the colander for a couple of minutes to allow excess moisture to evaporate. You can also pat them dry. This step ensures a crispier finish. While the potatoes are drying, set your oven to 450°F.
- Return the potatoes to the pot. Drizzle with olive oil, and sprinkle with garlic powder, chopped thyme, salt, and pepper. Toss gently to coat. Arrange the seasoned potatoes in a single layer on a baking sheet, leaving some space between them for even crisping.
- With the bottom of a cup or a potato masher, press down on each potato until it's about ½-inch thick. If the potatoes stick, dab your masher with a bit of oil. This is where the magic happens, creating those lovely, crispy edges!

- Slide the baking sheet into the preheated oven. Roast for 20-25 minutes, flipping halfway through, until you see a beautiful golden-brown crust form.
- Sprinkle with chives for a pop of color and freshness right before serving. These potatoes are delightful on their own or with a side of sour cream or your favorite dipping sauce.
Leave a Comment