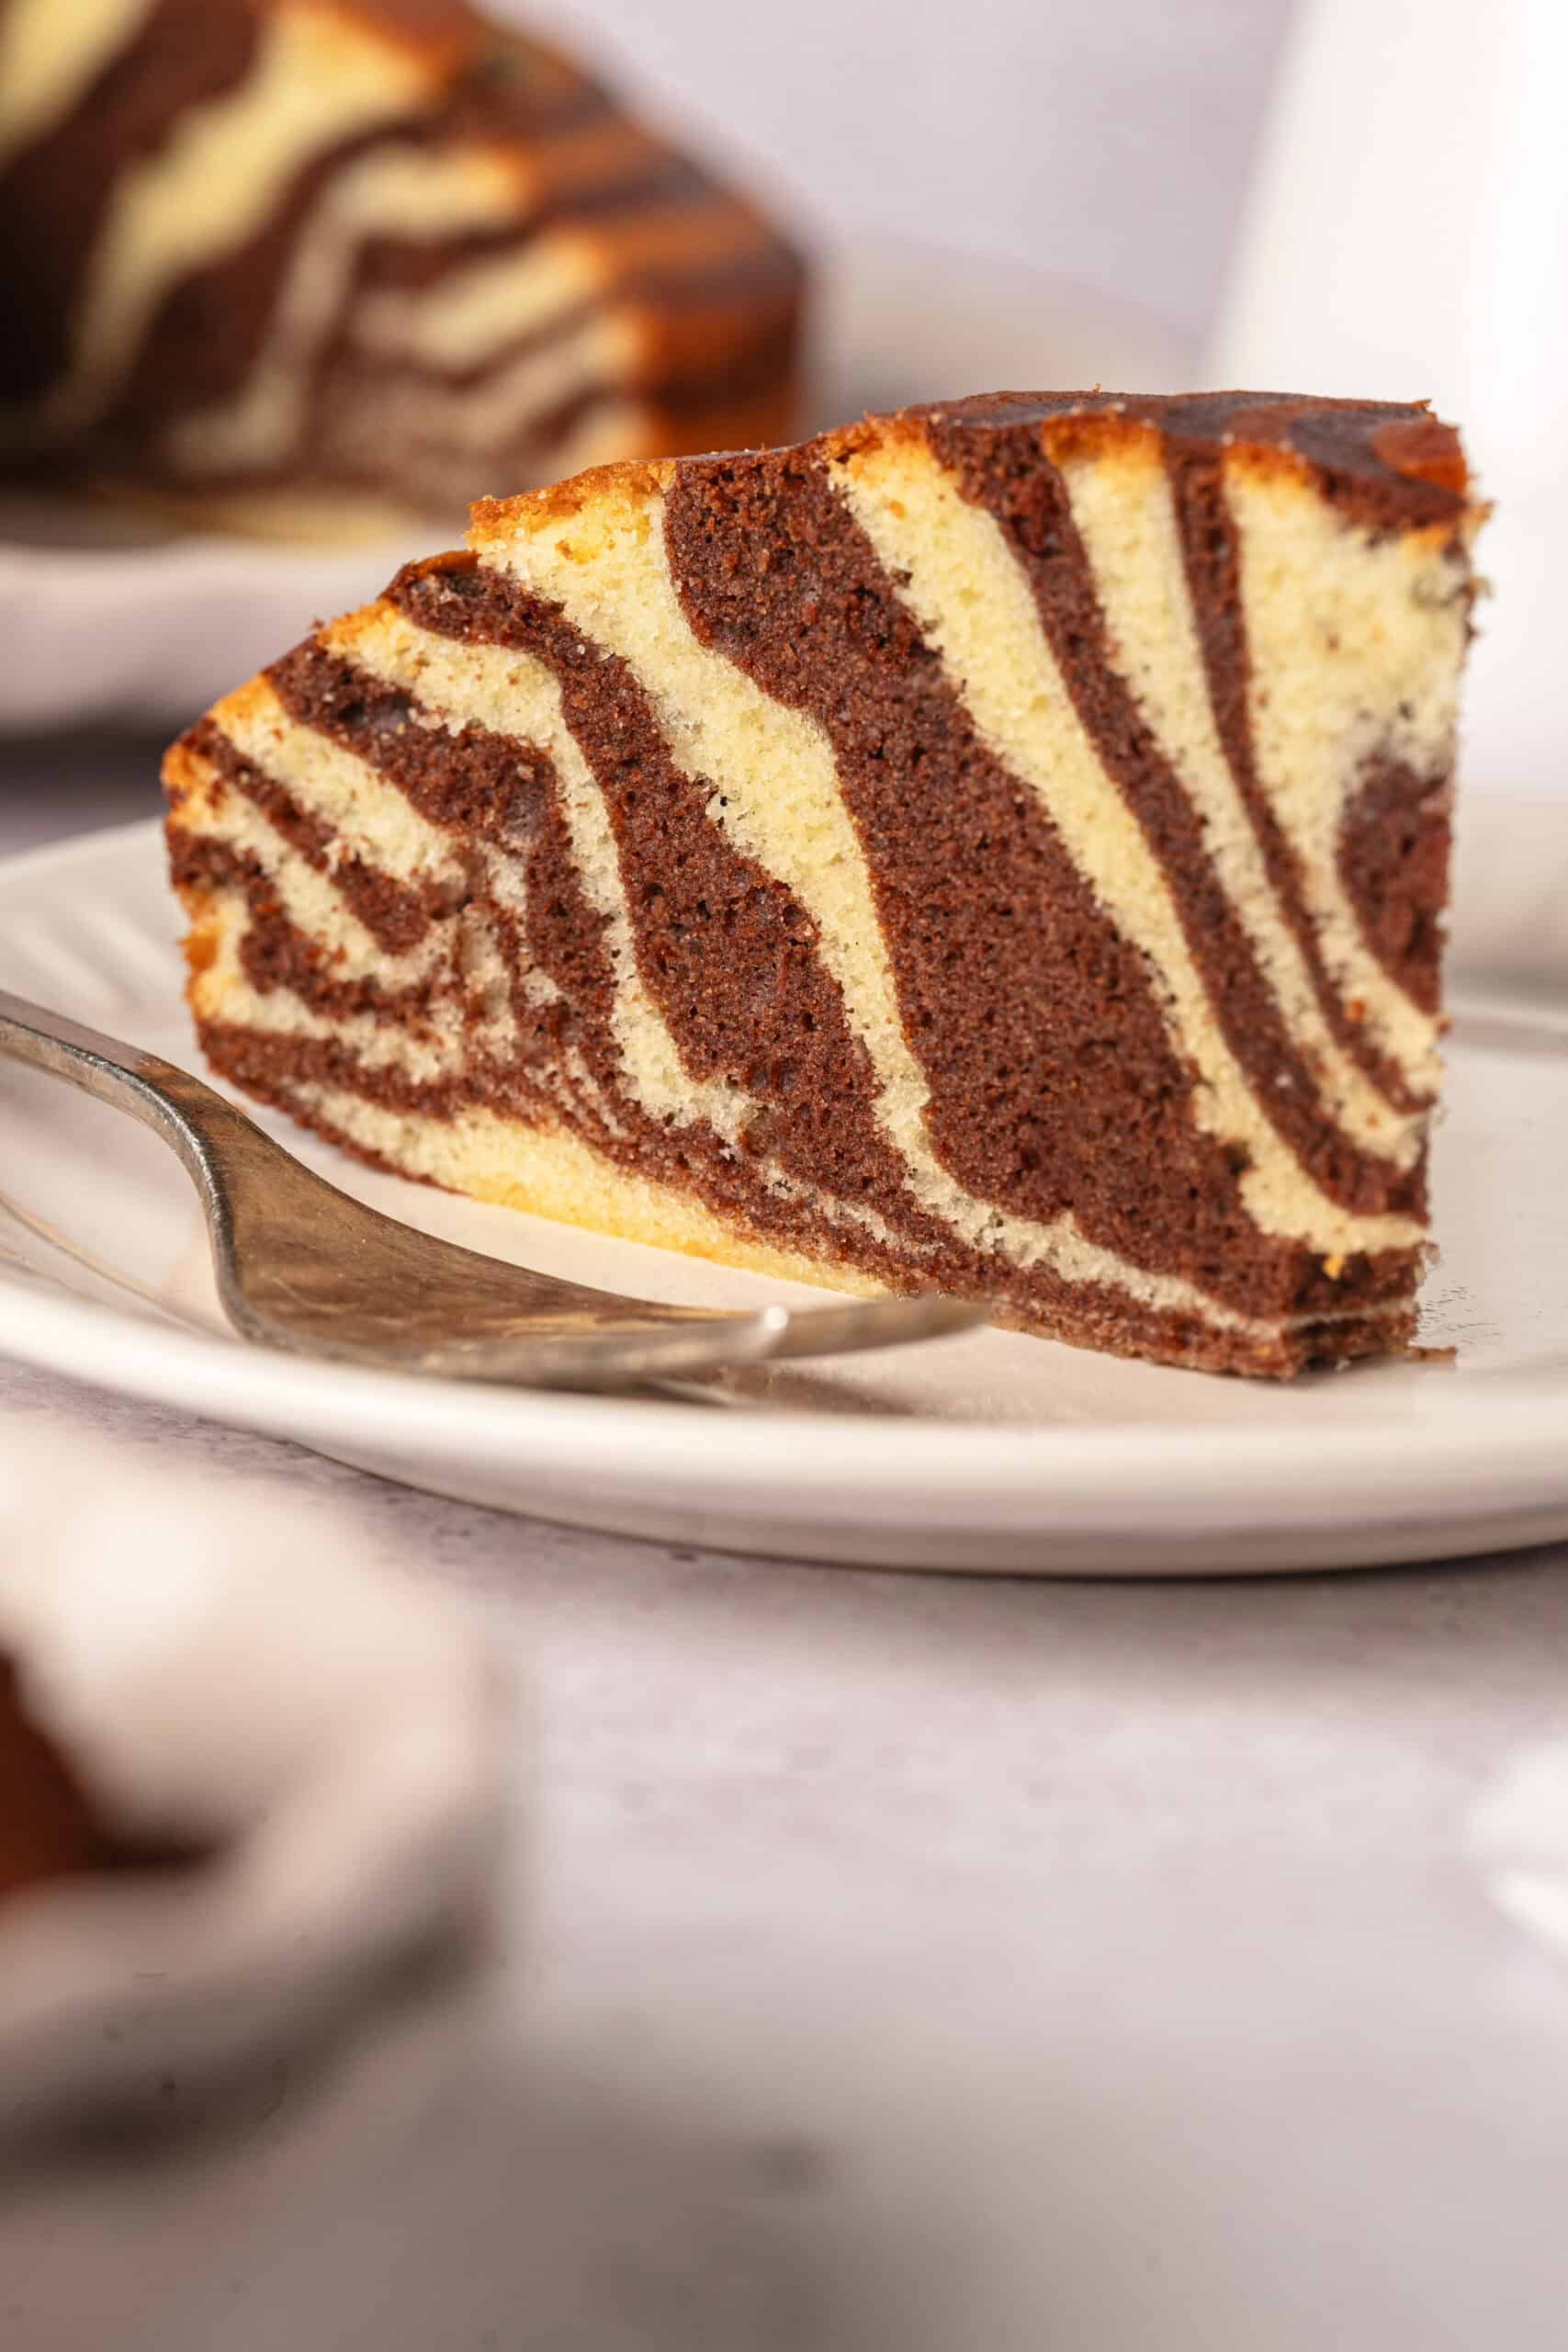
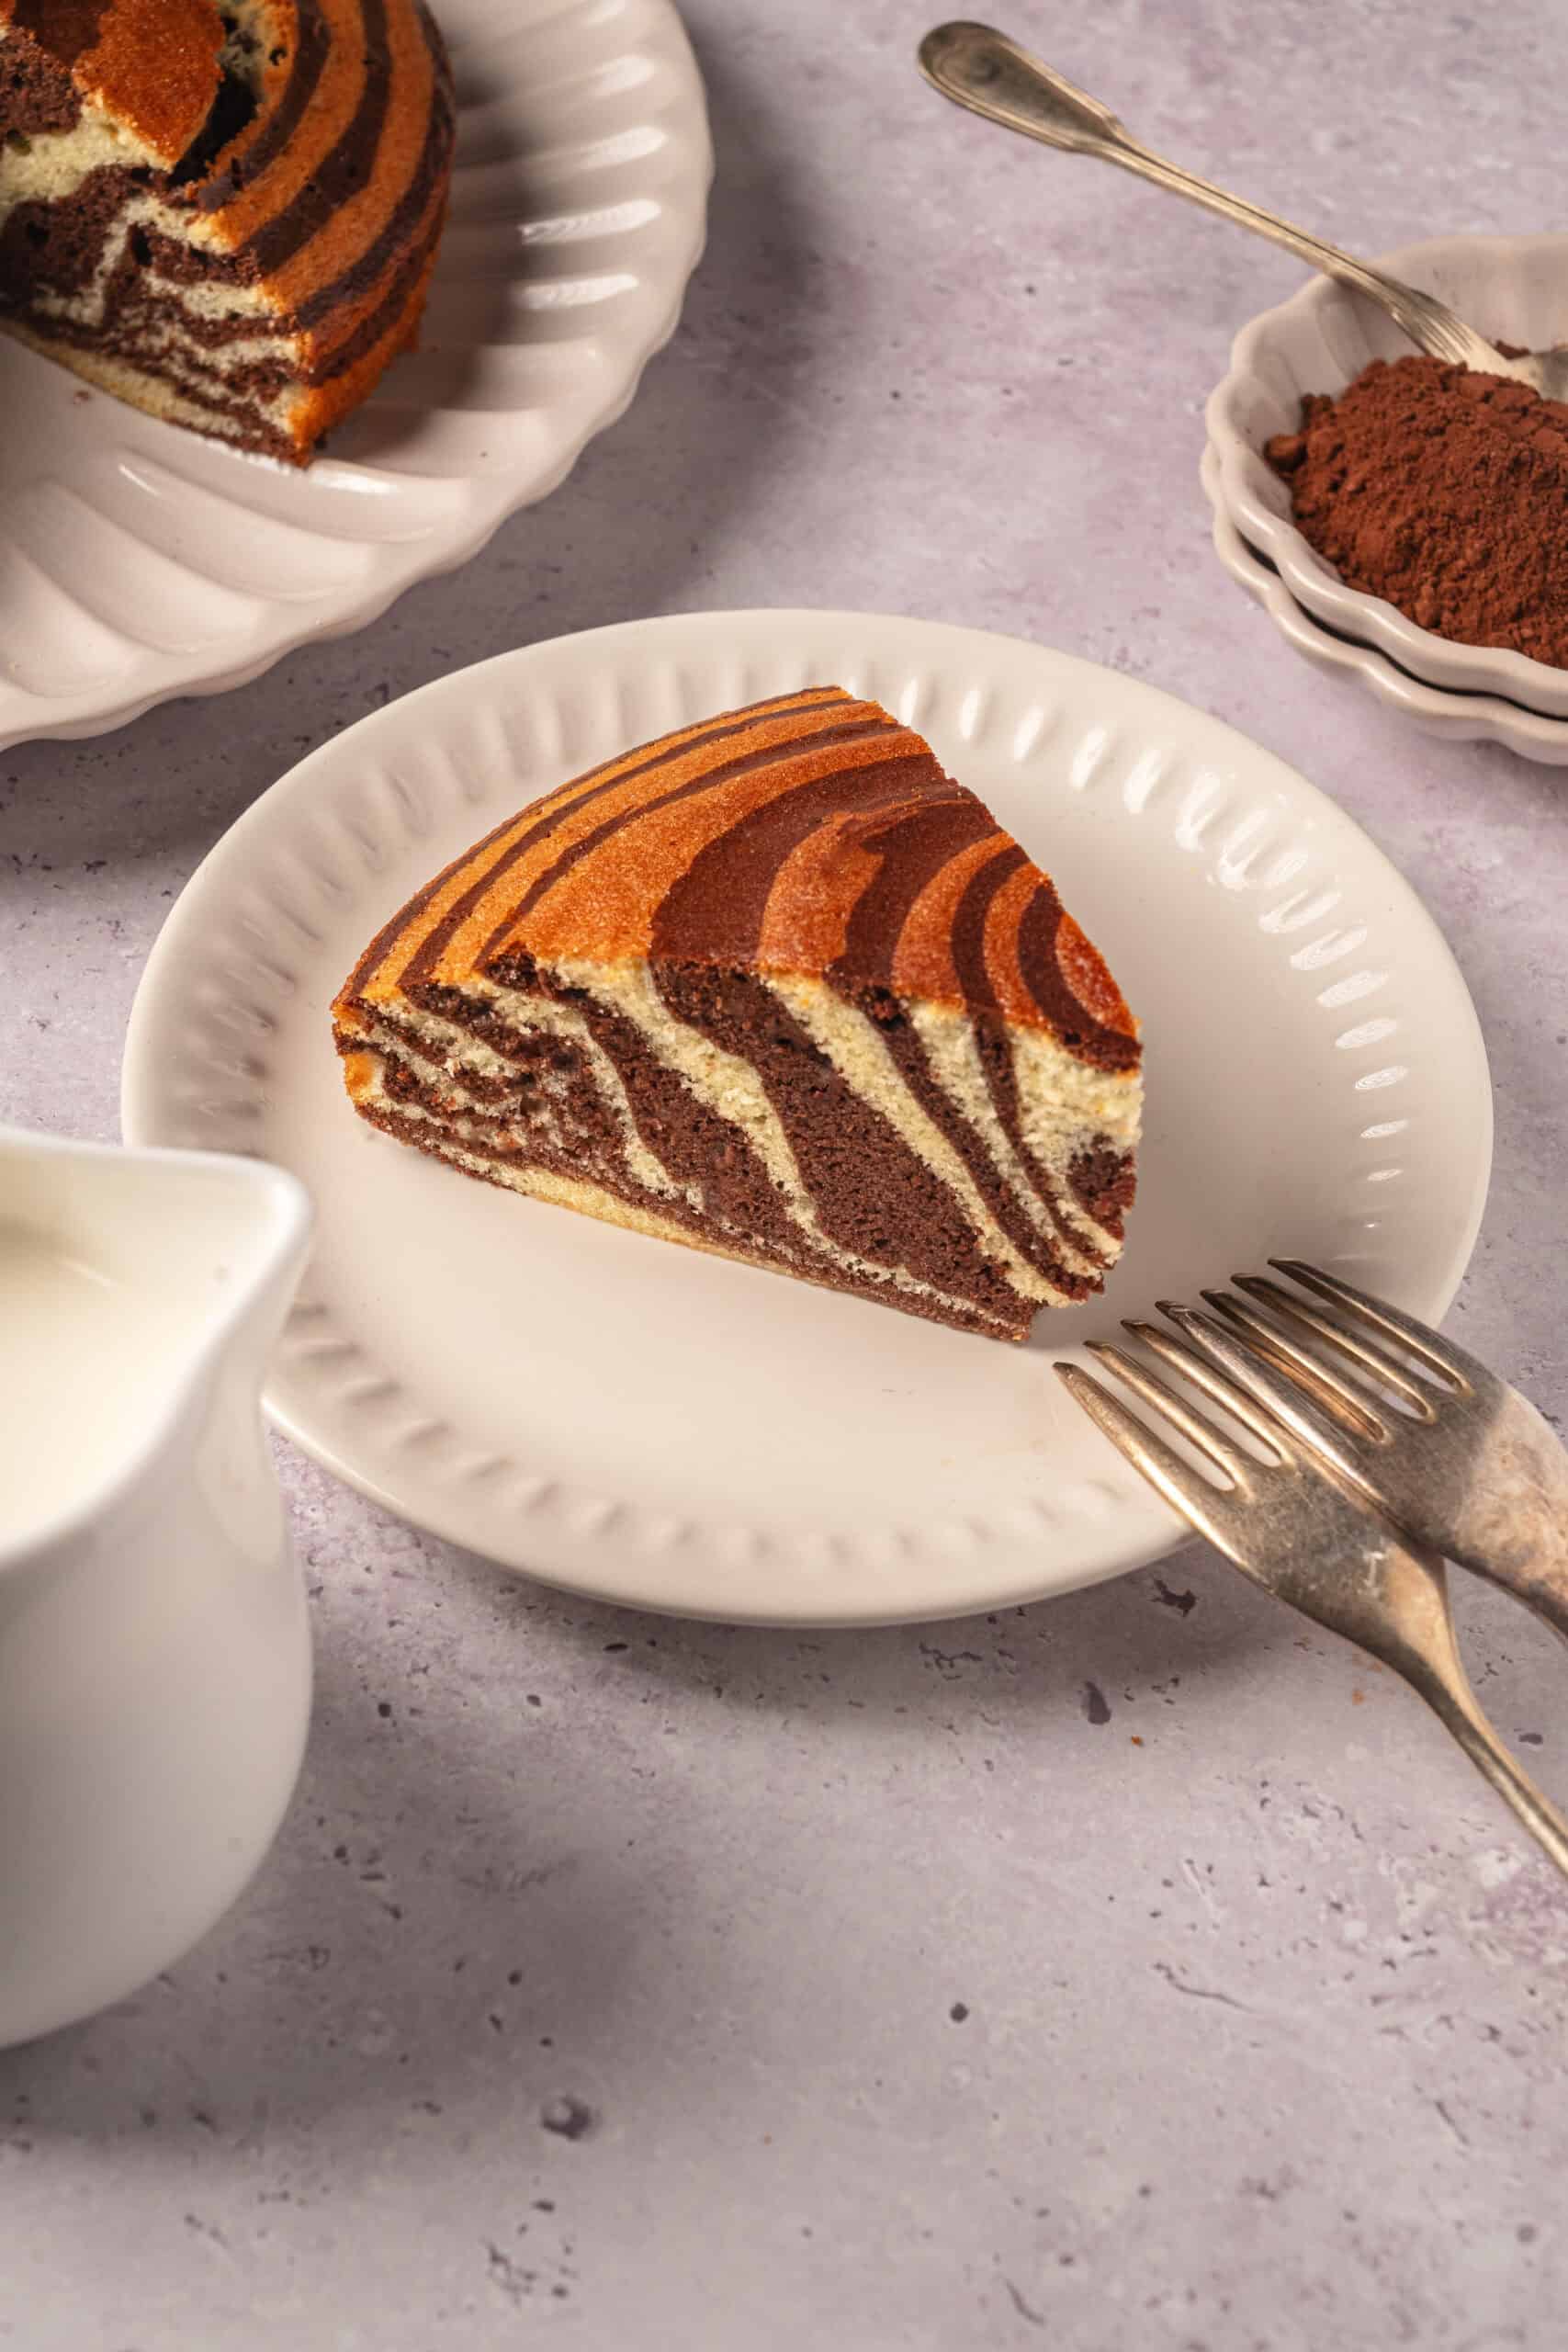
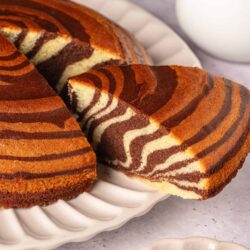
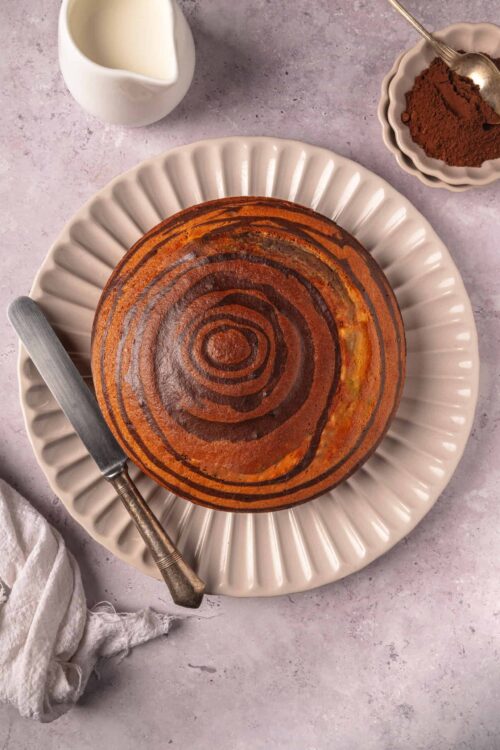
Zebra Cake is the answer to the age-old debate of chocolate vs. vanilla. You can have both!

In African folklore, one story of how the zebra got its stripes depicts a battle between a crafty baboon and a young hotshot zebra. The baboon sets a fiery trap, and the zebra briefly gets caught in it, leaving burn marks on his white fur. Like the zebra in this fable, the zebra cake starts out vanilla, and instead of scorch marks, the “stripes” are rings of chocolate batter. Sounds difficult, right? Wrong. Keep reading.
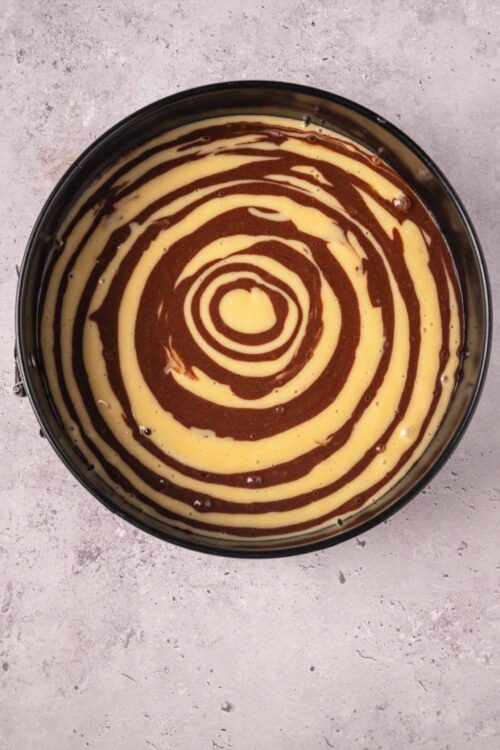
Even if you are a novice baker, you can make a zebra cake. It may surprise you to learn that it is a one-batter cake! You simply make a vanilla cake batter, divide it, and add cocoa powder to one half. The stripes are actually rings of batter that you pour into the pan one at a time. The magic happens in the oven, where those rings bake up into stripey layers, creating a zebra-like pattern that is beautiful and delicious.
If you like the best of both worlds, zebra cake is for you. You get the chocolate and vanilla flavors, a stunning presentation with the striped, finished cake, and a versatile cake that can go simple or fancy. Zebra cake is a surprisingly easy cake that can be served as a single-layer cake with little to no decoration, or you can frost with traditional frosting for a birthday cake.
Zebra cake vs. marble cake
Zebra cake and marble cake are closely related. They both involve taking a vanilla and chocolate batter and making a pattern that bakes up to look (and taste) beautiful. For marble cake, the chocolate batter is swirled through the vanilla batter after pouring the portions in, creating a slightly different pattern than the zebra stripes. So which came first? Probably the marble cake. Marble cake’s roots go back to Germany, where medieval bakers created a marble cake with vanilla and spice cake. Eventually, this led to the vanilla-chocolate combo, and German immigrants brought their recipes with them to the States during the immigration waves of the 19th century. Zebra cake is a variation on the marble cake.

How do I store leftovers?
To make ahead, just wrap the cooled cake first in plastic wrap and then in aluminum foil. Freeze for up to 3 months. Thaw overnight in the fridge before serving. To store leftover cake, simply cover or place it in an airtight container, and it will keep at room temperature for up to 2 days. You can also store it in the fridge for up to a week.
Serving suggestions
Zebra cake is delicious on its own, with no additions. However, you can always dust it with powdered sugar for a quick topping. If you want to increase the element of surprise, go ahead and frost it. This is a fun idea for a birthday cake, especially for a kids’ birthday party that is safari-themed. Once the cake is cooled, frost all over with Buttercream Frosting or Swiss Meringue Buttercream Frosting. You can also vary how the cake is shaped. You can make it a Bundt cake or use two eight-inch round pans and make it a layer cake.
As far as what to serve it with, White Dream Ice Cream or Chocolate Ice Cream (or both!) is always delicious. Topping the chocolate ice cream with White Hot Fudge Sauce is a fun touch as well. You can also continue the black-and-white theme by serving with other sweet treats like Black and White Cookies or Oreos.
Zebra Cake
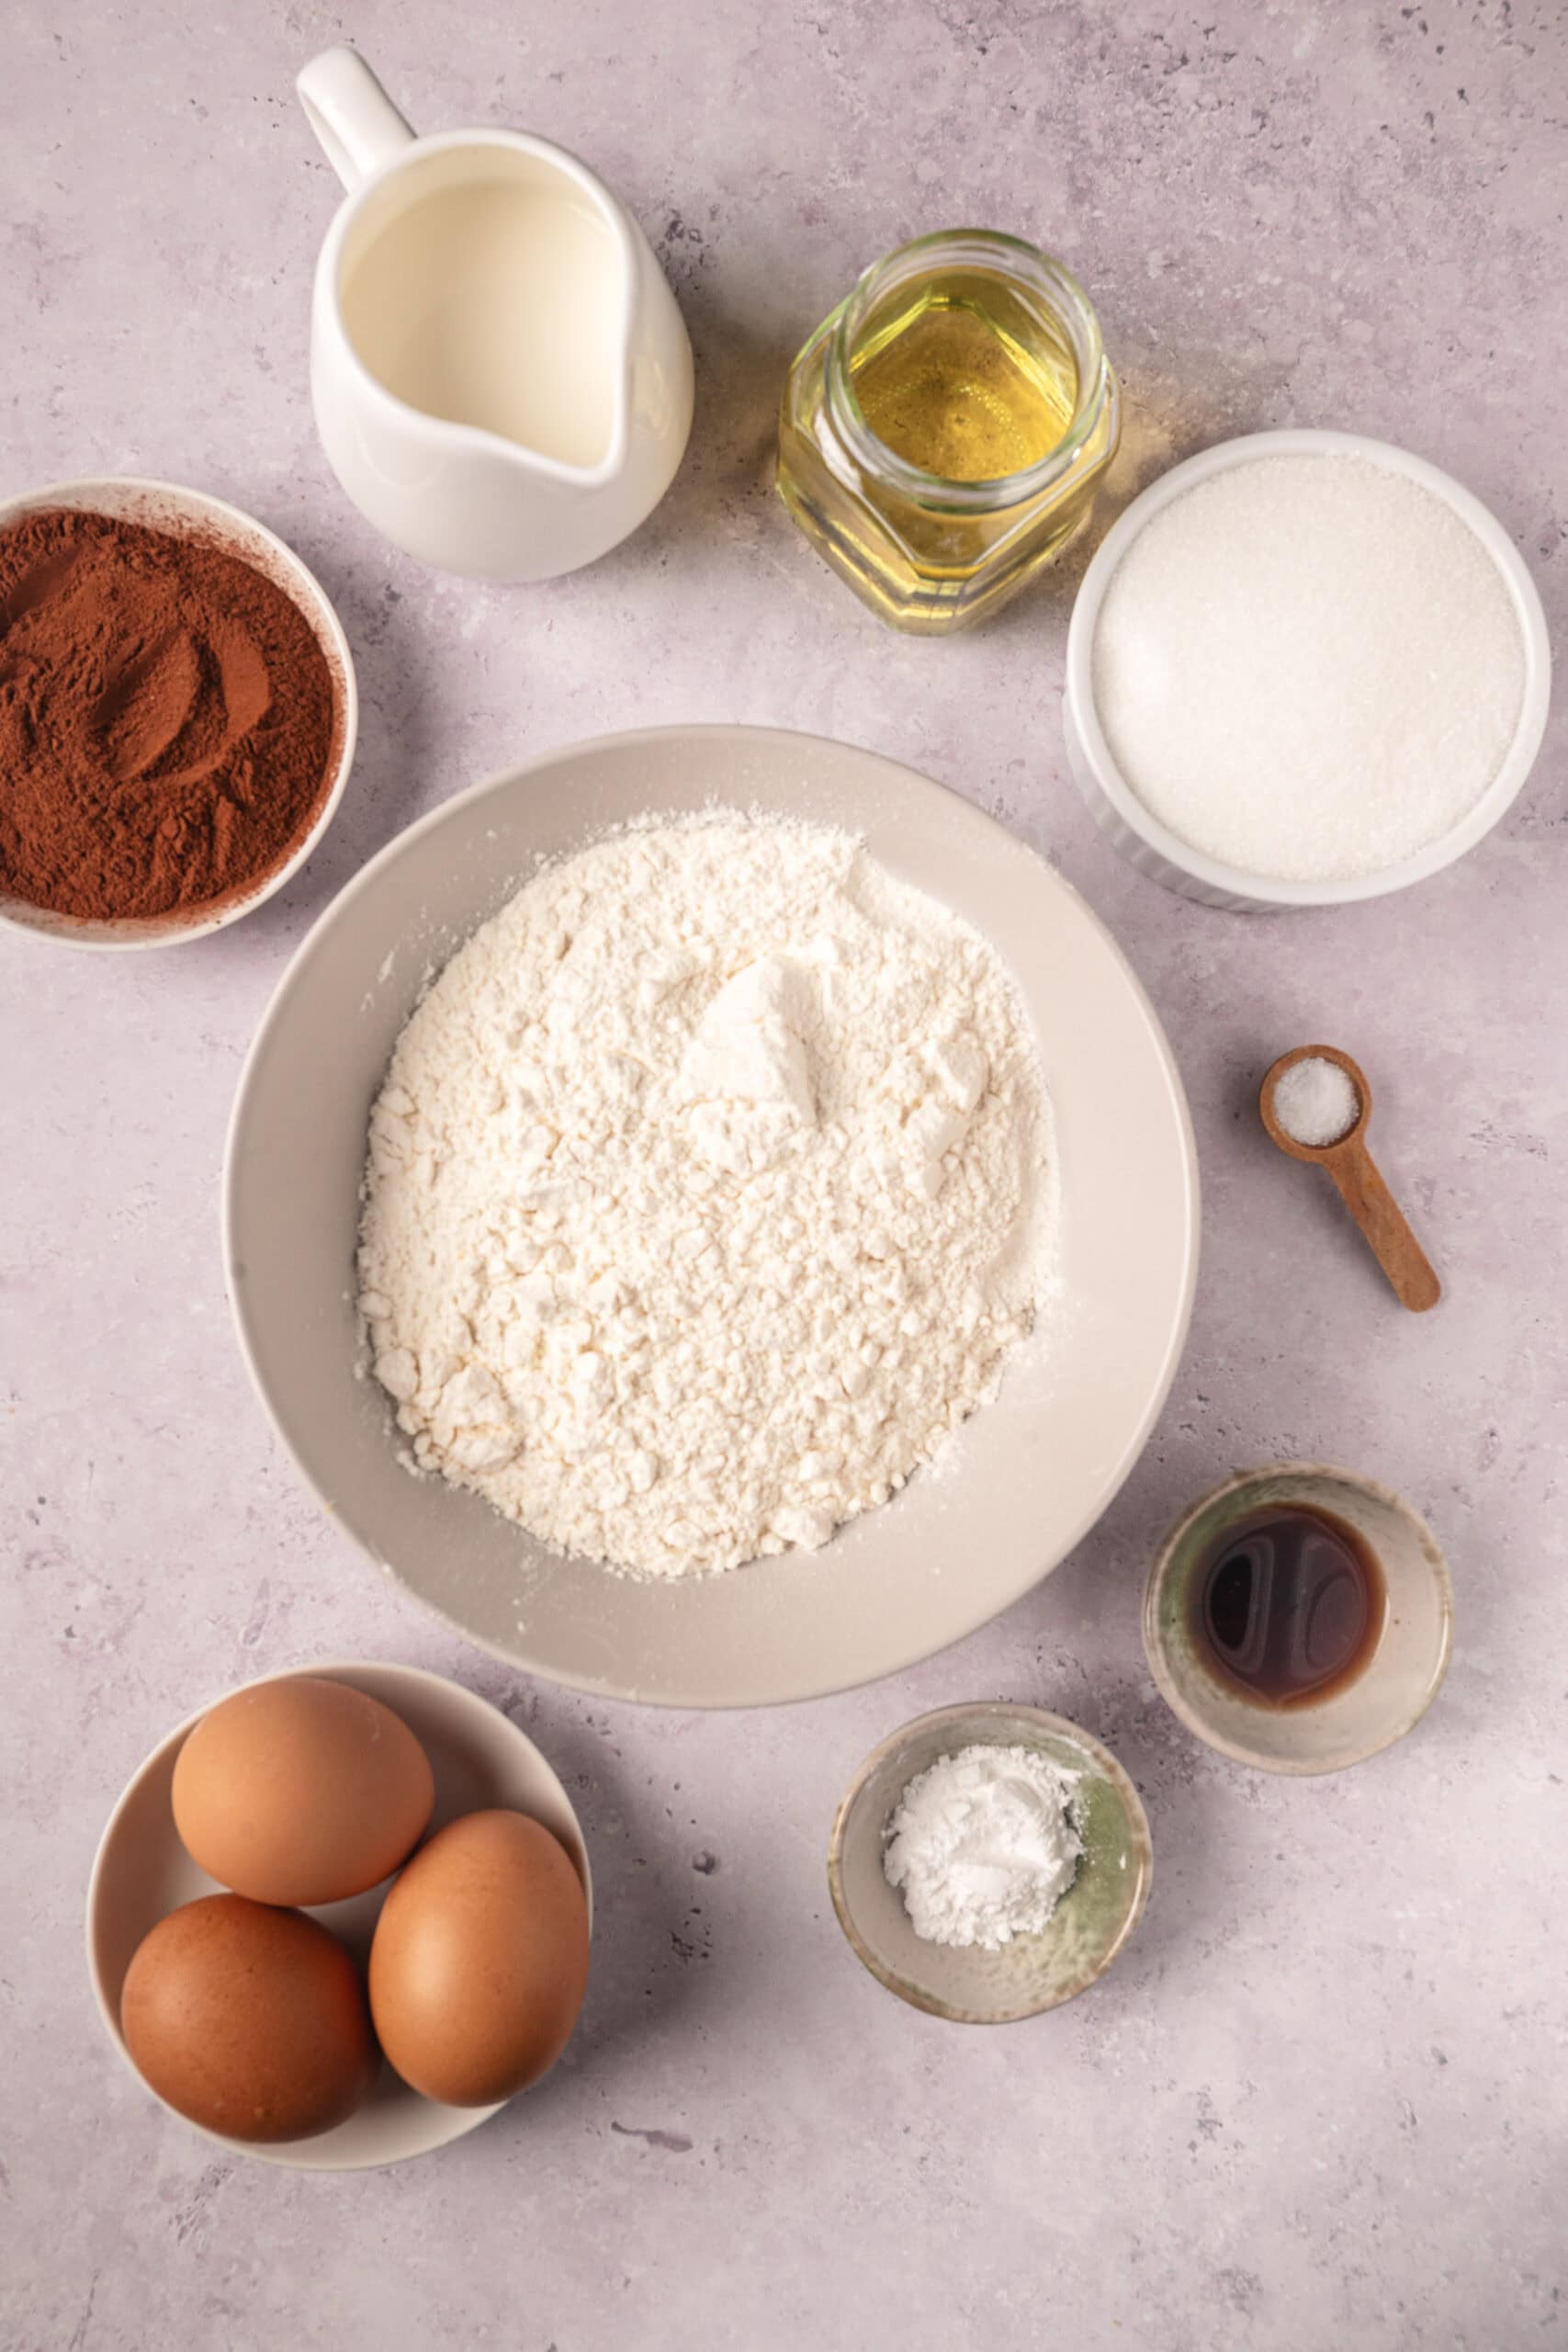
Ingredients
- 1 3/4 cups all-purpose flour
- 2 teaspoons baking powder
- 1/4 teaspoon salt
- 3 large eggs at room temperature
- 1 cup granulated sugar
- 3/4 cup whole milk at room temperature, divided
- 1/2 cup vegetable oil
- 1 1/2 teaspoons vanilla extract
- 2 1/2 tablespoons unsweetened cocoa powder sifted
Instructions
- Preheat your oven to 325°F and grease and flour an 8-inch round cake pan.
- In a large bowl, whisk together the all-purpose flour, baking powder, and salt. Set aside.
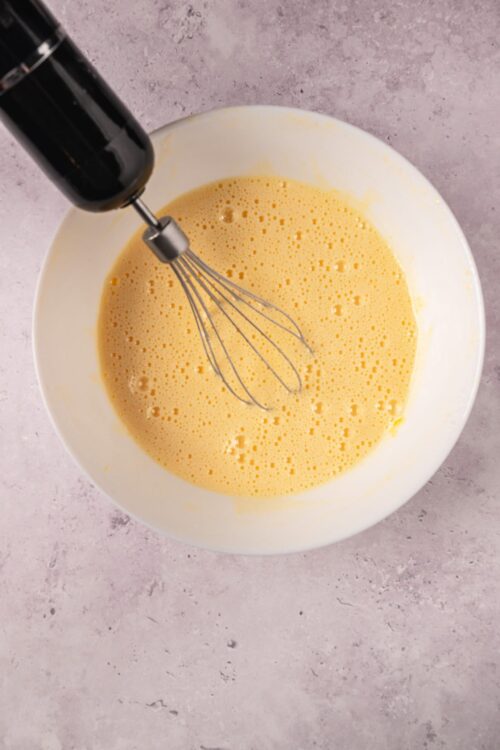
- In a large bowl, beat eggs and sugar with an electric mixer on medium speed until fluffy, about 2 minutes.
- Add 1/2 cup milk, vegetable oil, and vanilla extract to the egg mixture. Mix until well combined.
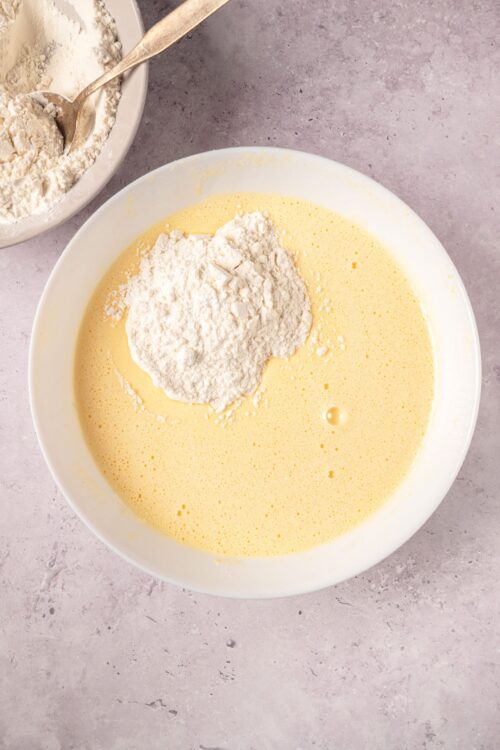
- Gradually add the dry ingredients to the wet ingredients, mixing until just combined. Do not overmix.
- Divide the batter evenly into two bowls.
- Mix cocoa powder with 1/4 cup milk to form a paste. Stir the paste into one bowl of batter to make it chocolate.
- Start by adding 1/4 cup of vanilla batter to the center of the prepared pan. Next, spoon 1/4 cup of chocolate batter on top of the vanilla layer. Keep alternating the batters, always pouring into the center, until you have used all the batter.
- Place in the preheated oven and bake for 35-40 minutes, or until a toothpick inserted into the center comes out clean.
- Allow the cake to cool in the pan for 10 minutes. Then, remove it from the pan and let it cool completely on a wire rack.
Leave a Comment