This recipe for Spatchcock Chicken will not only shorten your cooking time and enrich the flavors of your bird — it also enlivens your table with a classic spread that is sure to impress!
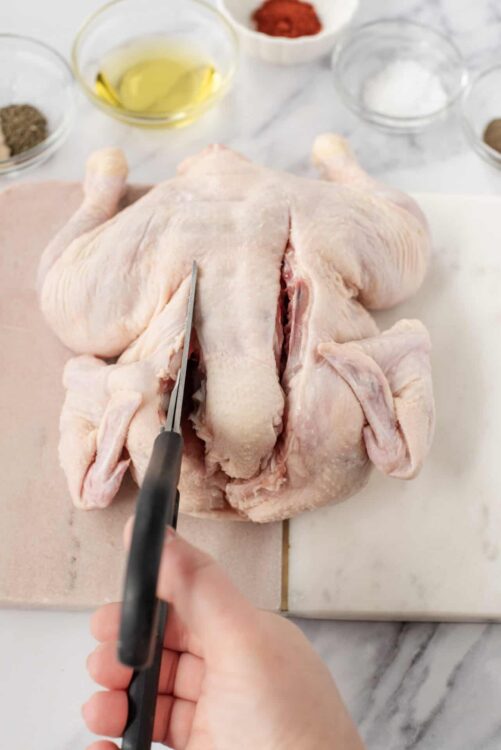
Since when did it become fancy to spatchcock a chicken? Maybe it has something to do with the name — spatchcock — which is a term that refers to removing the backbone of a chicken, and which is, in practice, super easy to do. All you need is a pair of kitchen shears, which are basically heavy-duty scissors, and you’re good to go. Just cut on either side of the backbone of the bird, pull out the backbone itself, and then press the chicken flat. You’ll probably hear a visceral snap as the support bones break, a somewhat violent gesture that might be unappealing to some, while being oddly satisfying to others.
Before we go any further, you might be wondering: Why is it called “spatchcock” anyway? Good question! While there is some debate over the origins of the word “spatchcock,” the most common explanation is that it dates back to 18th century Ireland and that it originates from the phrase “dispatch the cock” – as in, preparing the chicken for cooking.
These days, spatchcocking has become the kind of culinary practice that is often bunched up with other seemingly complex methods of cooking like sous vide, cold smoking, brining and others. For the life of me, I don’t understand why. That’s not to say those other methods of cooking are inherently difficult – some are downright easy, actually – but spatchcocking in particular is a method that was traditionally frowned upon. It was a cheap trick, an easy way to cook your bird faster, without worrying about how it looked. If you went to a fancy French restaurant a hundred years ago and ordered a whole bird, you best believe they would not be serving you a spatchcock chicken. Instead, it would be a whole roasted bird, its various thighs and breasts cooked perfectly even, despite the incongruous shape of the bird itself, and the fact that the chef managed to cook it evenly without messing with the shape of the bird was a testament to his skill.
But these days, spatchcocking has become the domain of the fancy chef, a move that seems impressive, even though it is objectively not at all. But hey, that’s the perk of this recipe! You can impress your friends, all while taking what has historically been a shortcut. Win, win!
How to Make Ahead and Store?
I like to store my chicken in two ways: big pieces in first, followed by shredded scraps. Take whatever big cuts you have and place them in an airtight container or a plastic bag. Then scrape the bones clean of any leftover meat. You can make sandwiches, tacos, wraps, salads and more with the meat, which should last about 3 days in the fridge.
What Should I Do With the Bones?
Don’t throw those bones out! You can make a delicious stock for soups or other sauces by simmering the bones in a pot for a couple hours. For better results, add some onions, carrots, celery or any herbs and veggies you have around, and cook them down into a broth.
Serving Suggestions
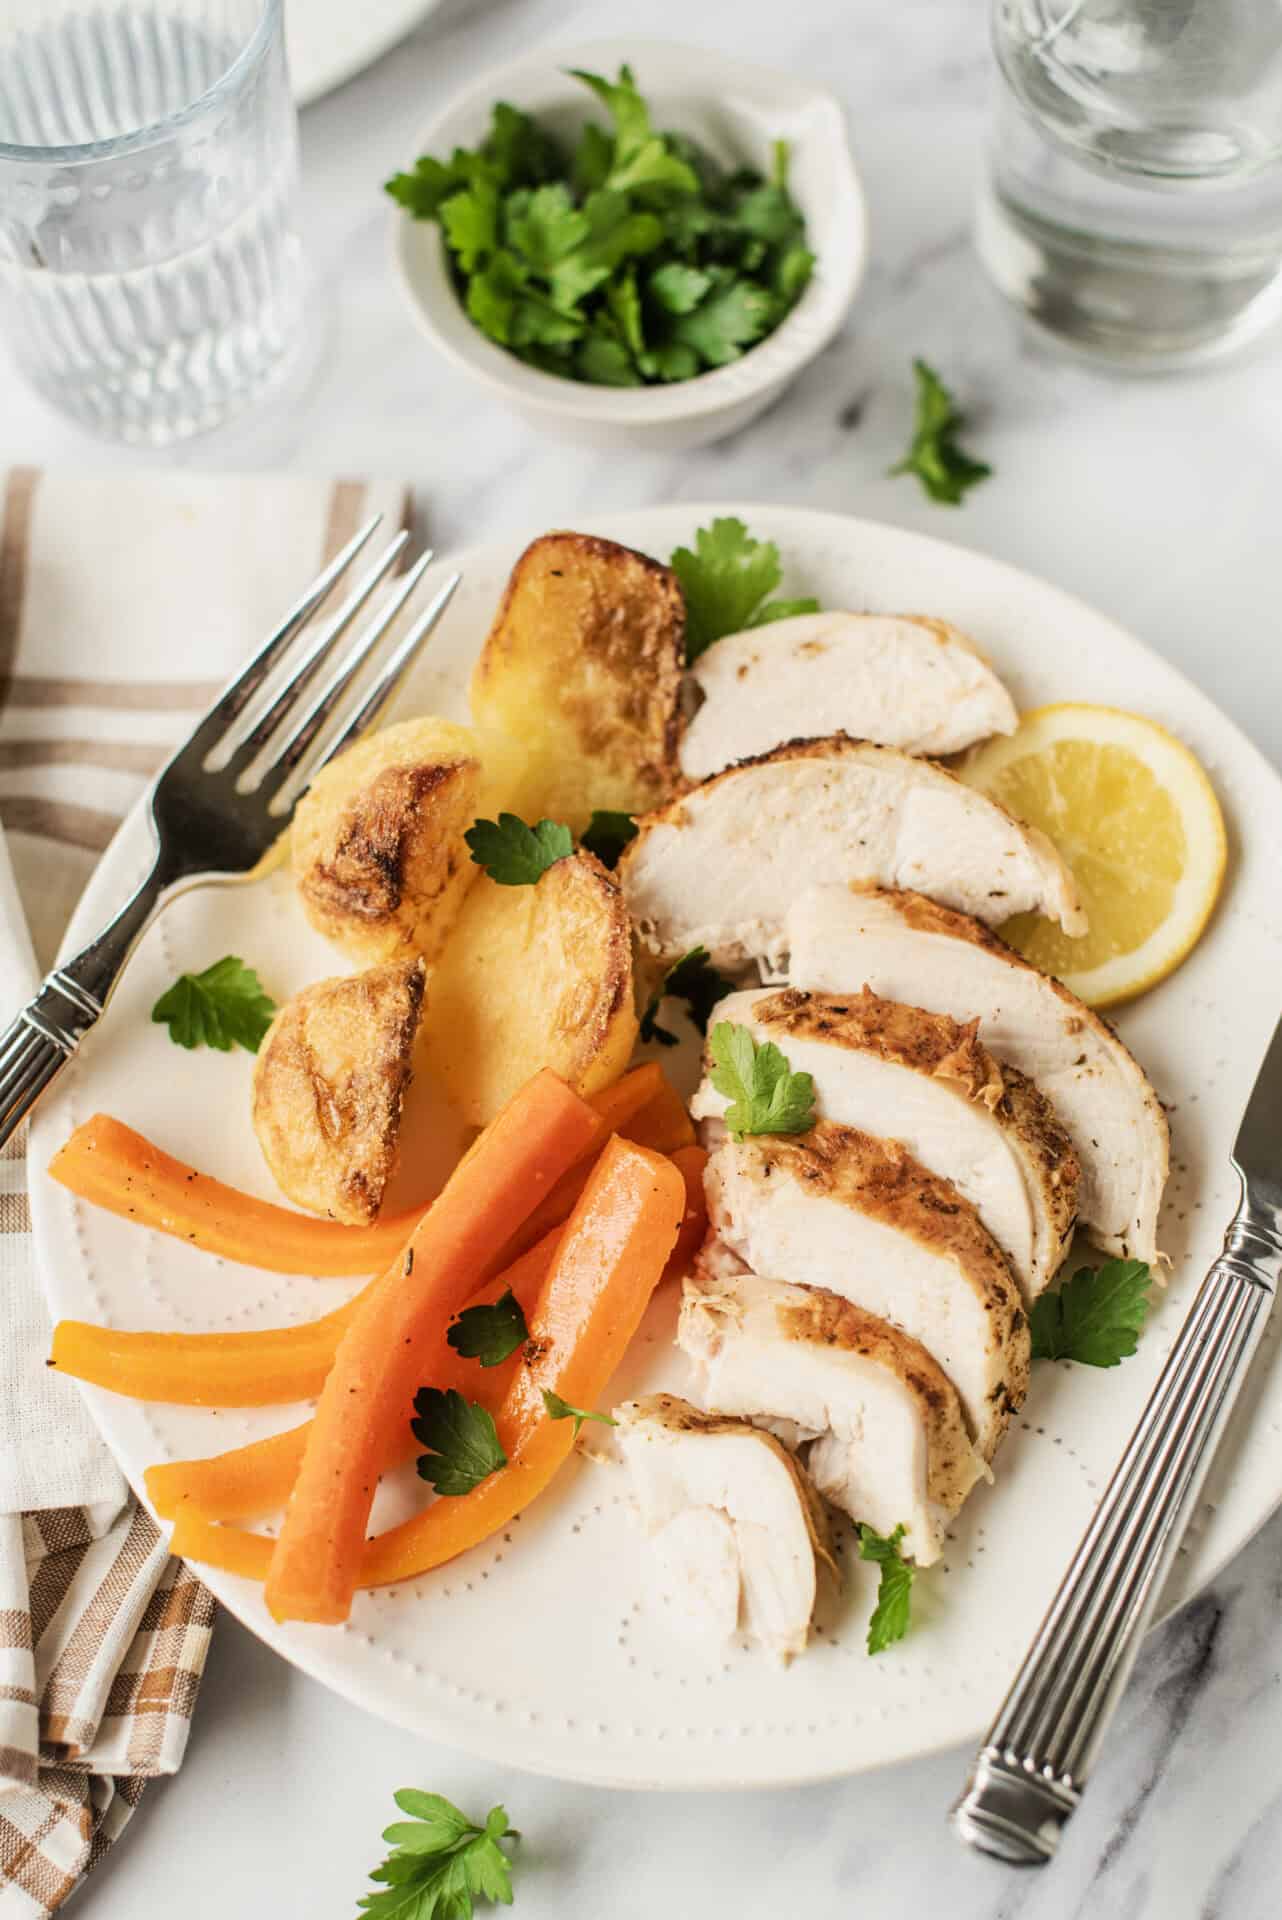
Roasted chicken is just about the king of meal-prep items, perfect for any dish you have in mind. My favorite meal-prep dish to make with leftover chicken is a classic Easy Baked Sweet Potato, which I make the standard way and then top with shredded chicken. I also love making stir fry using my leftover chicken. This recipe for Chicken and Broccoli is a great dish that’s super healthy and tasty.

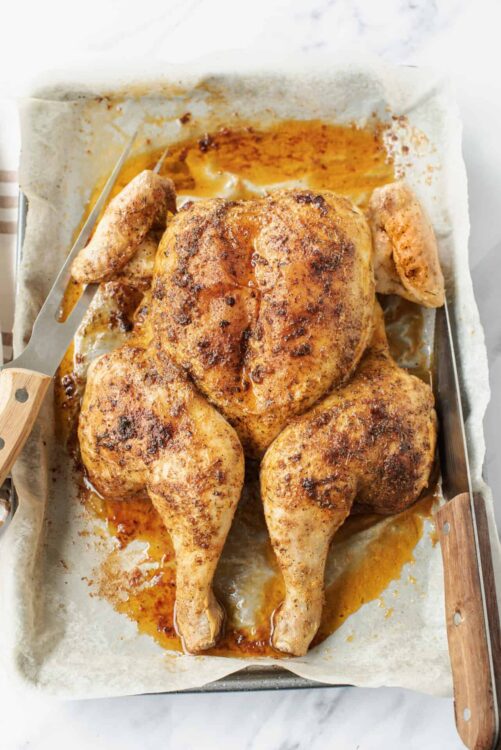
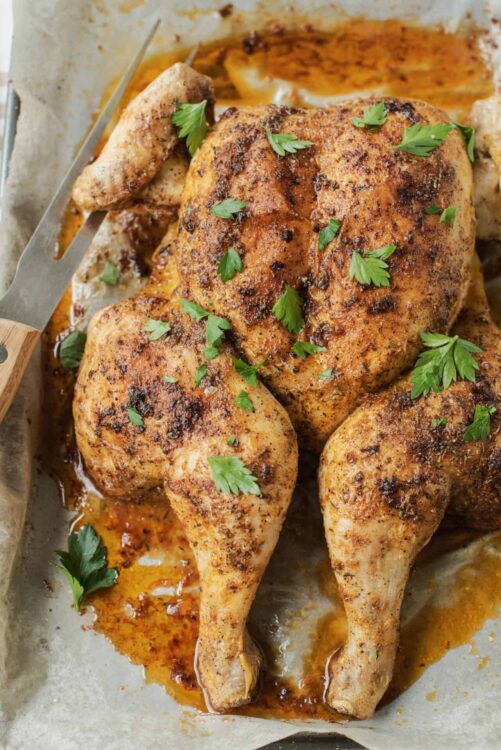
Spatchcock Chicken
Ingredients
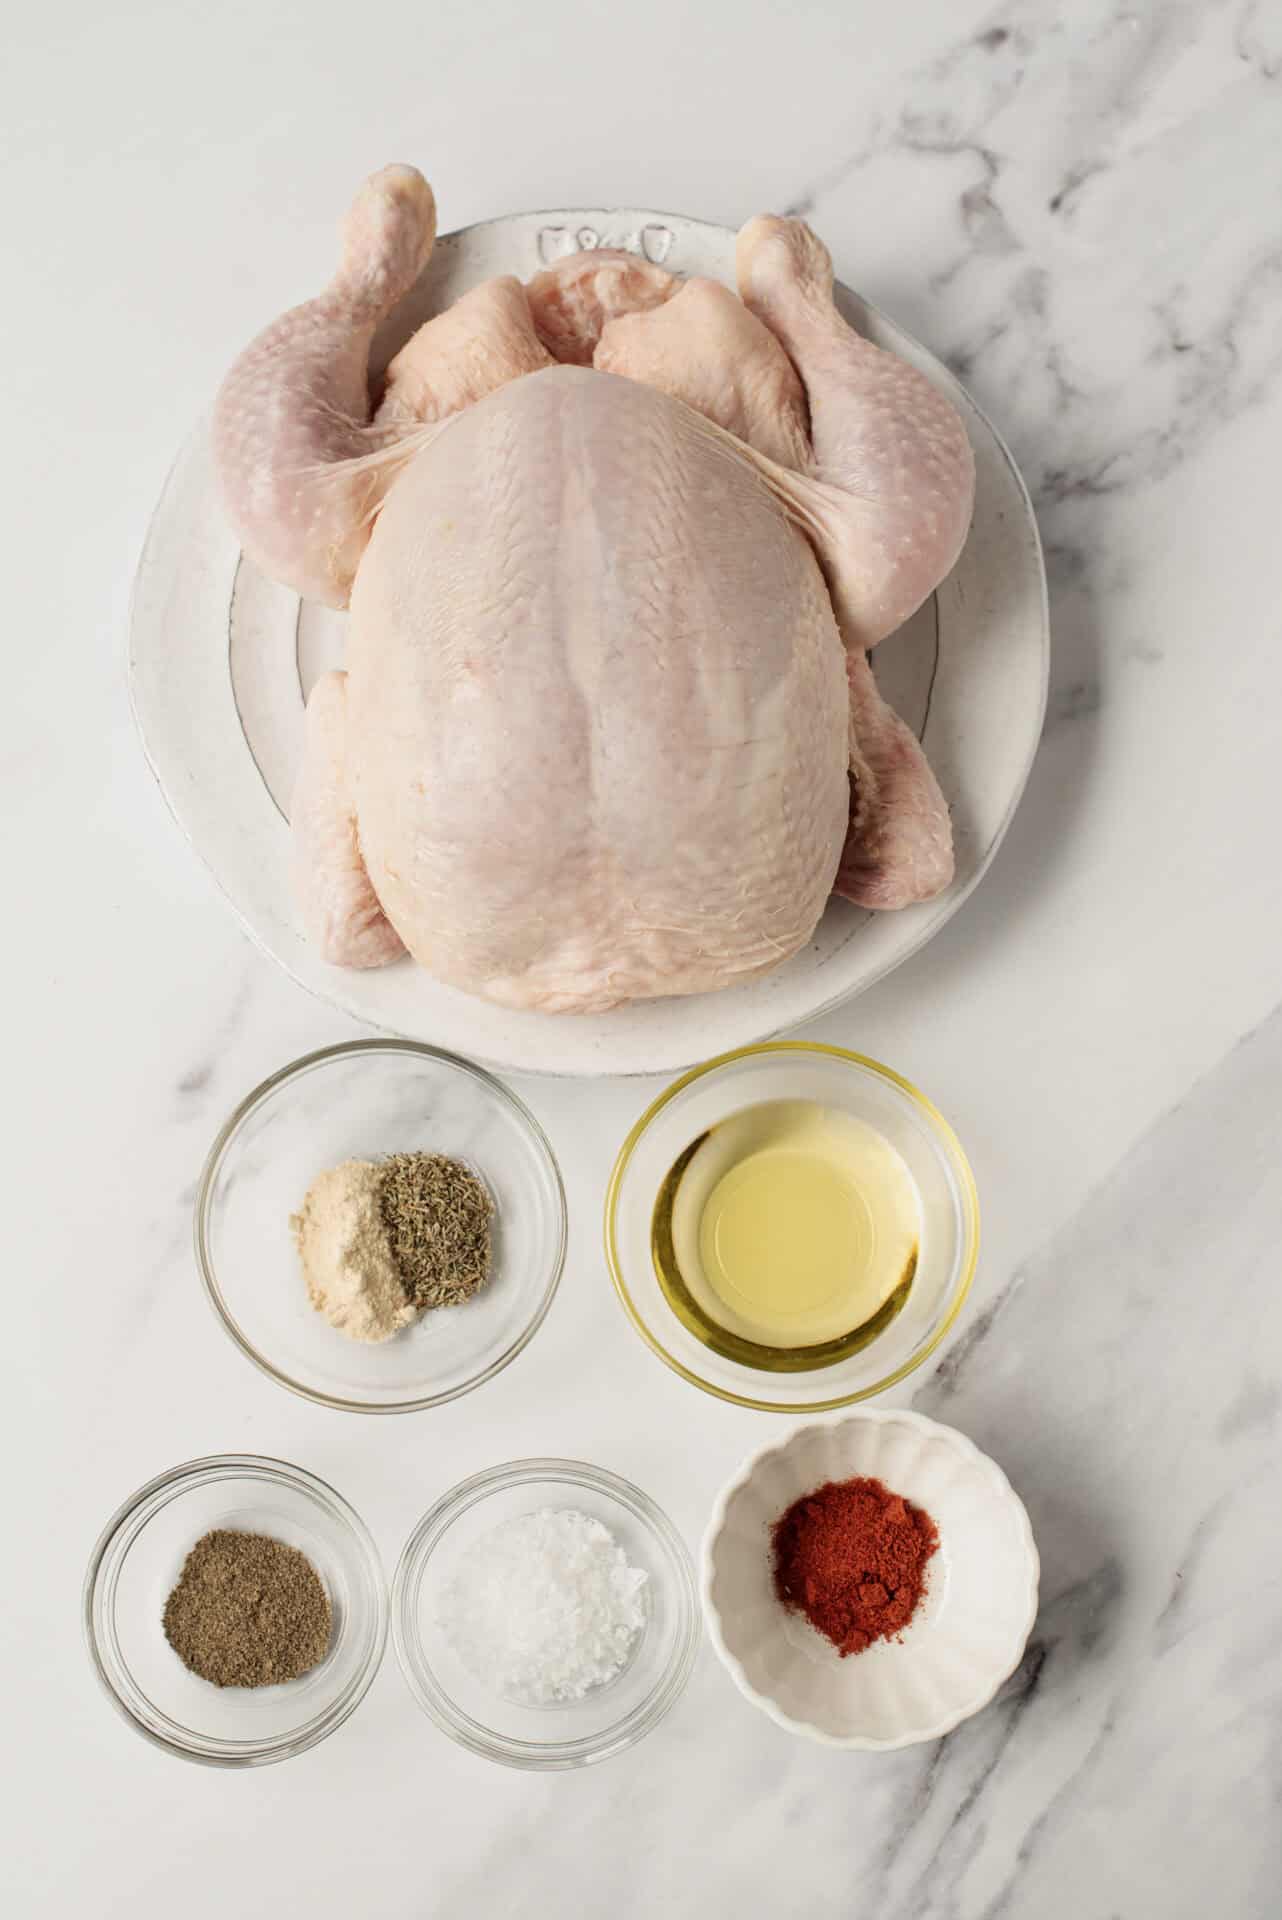
- 1 whole chicken about 4 pounds, giblets removed
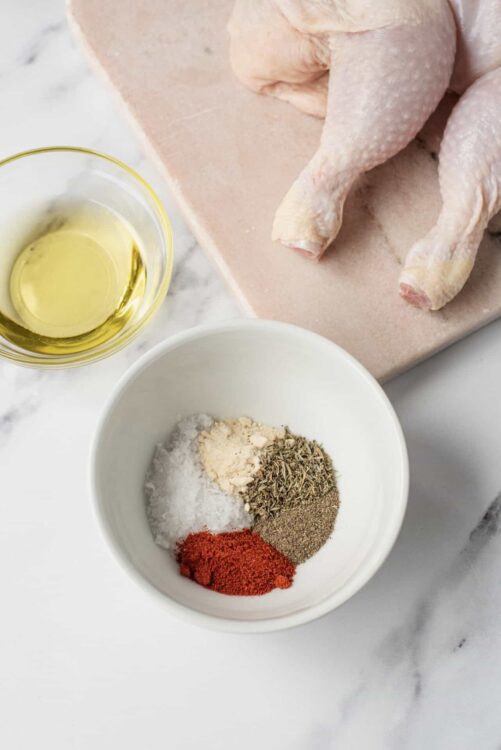
- 2 tablespoons olive oil
- 1 teaspoon kosher salt
- 1/2 teaspoon ground black pepper
- 1/2 teaspoon garlic powder
- 1/2 teaspoon smoked paprika
- 1/2 teaspoon dried thyme
Instructions
- Preheat your oven to 425°F.
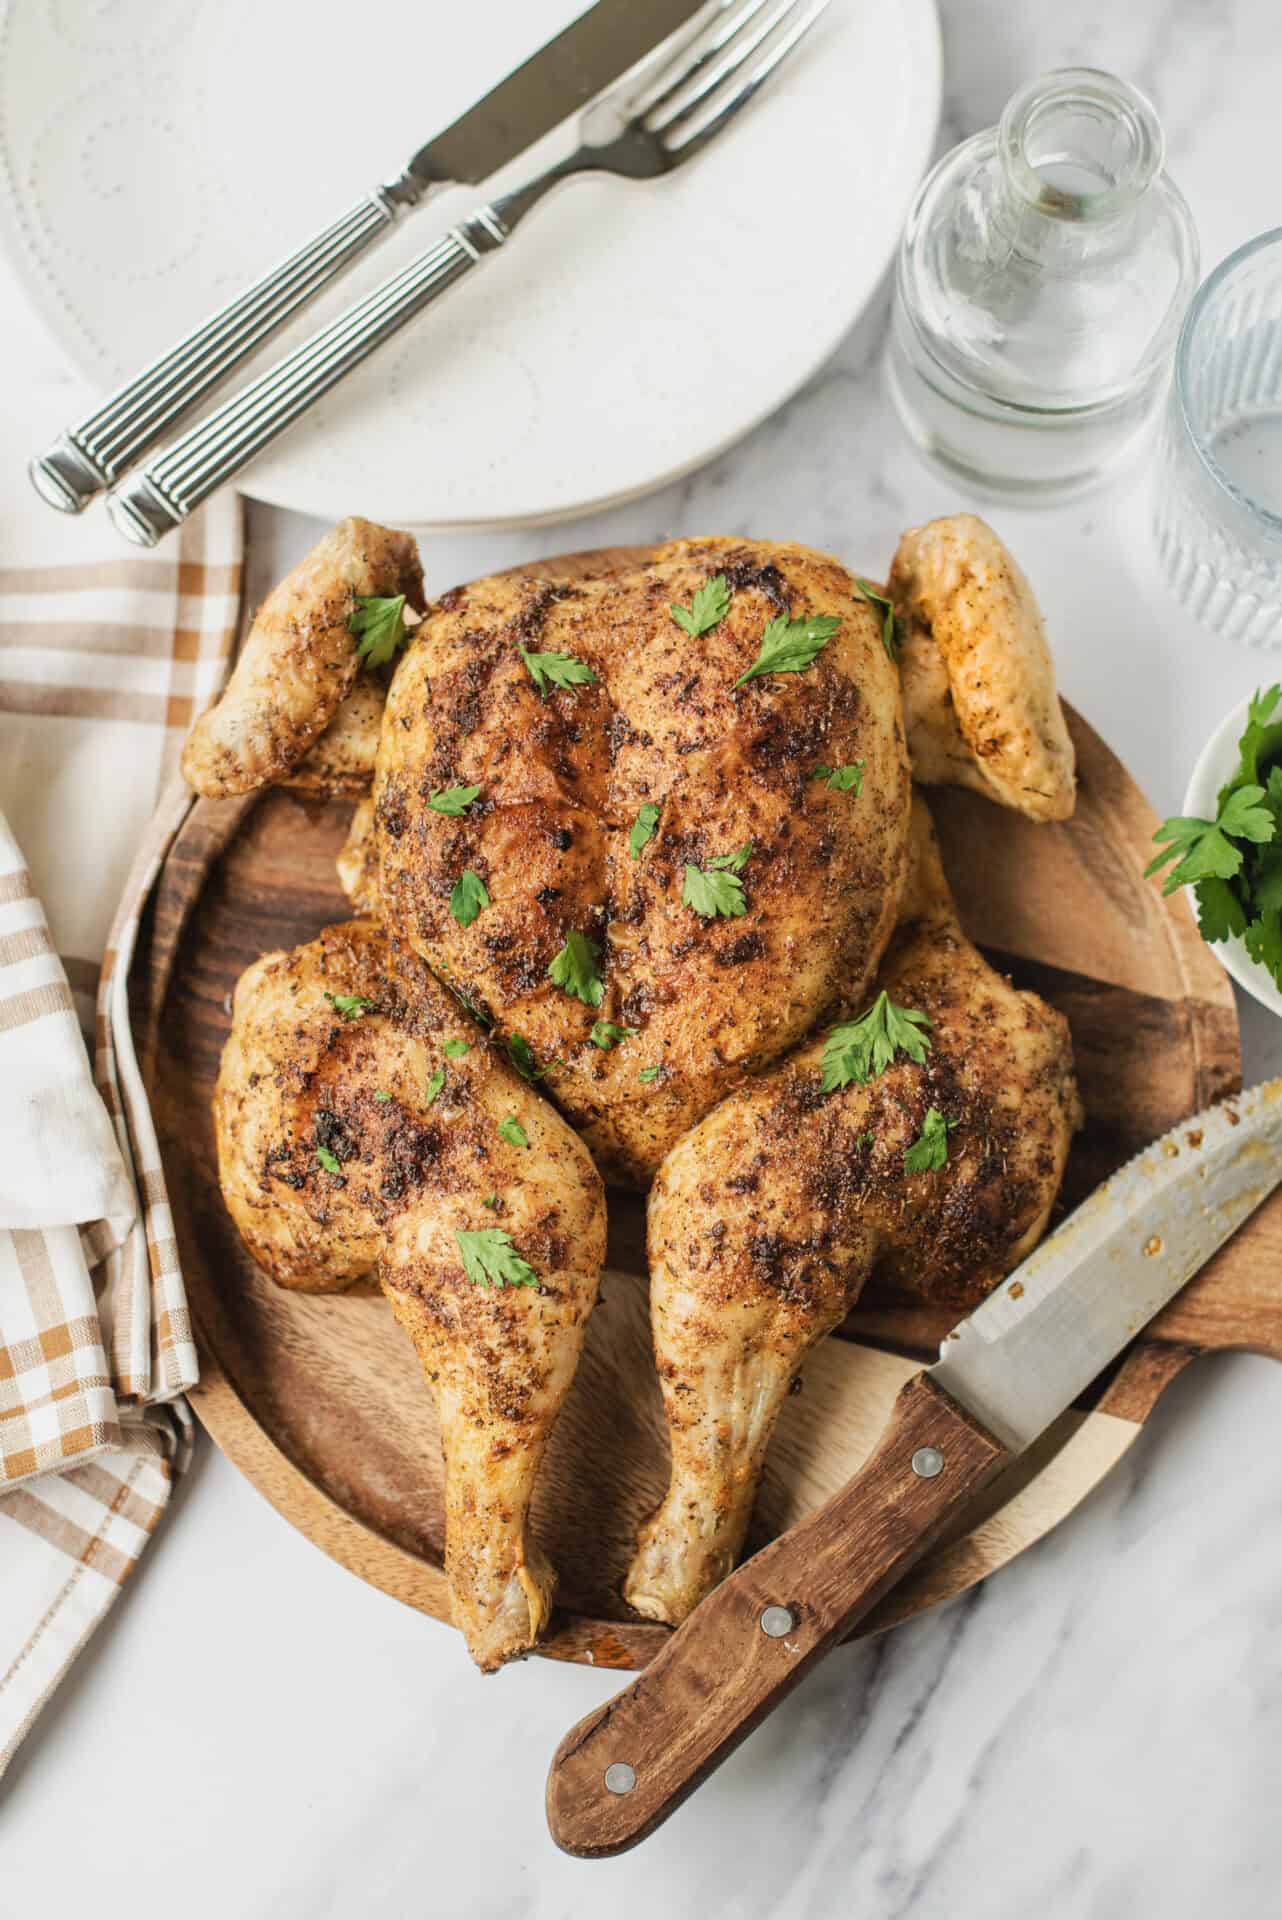
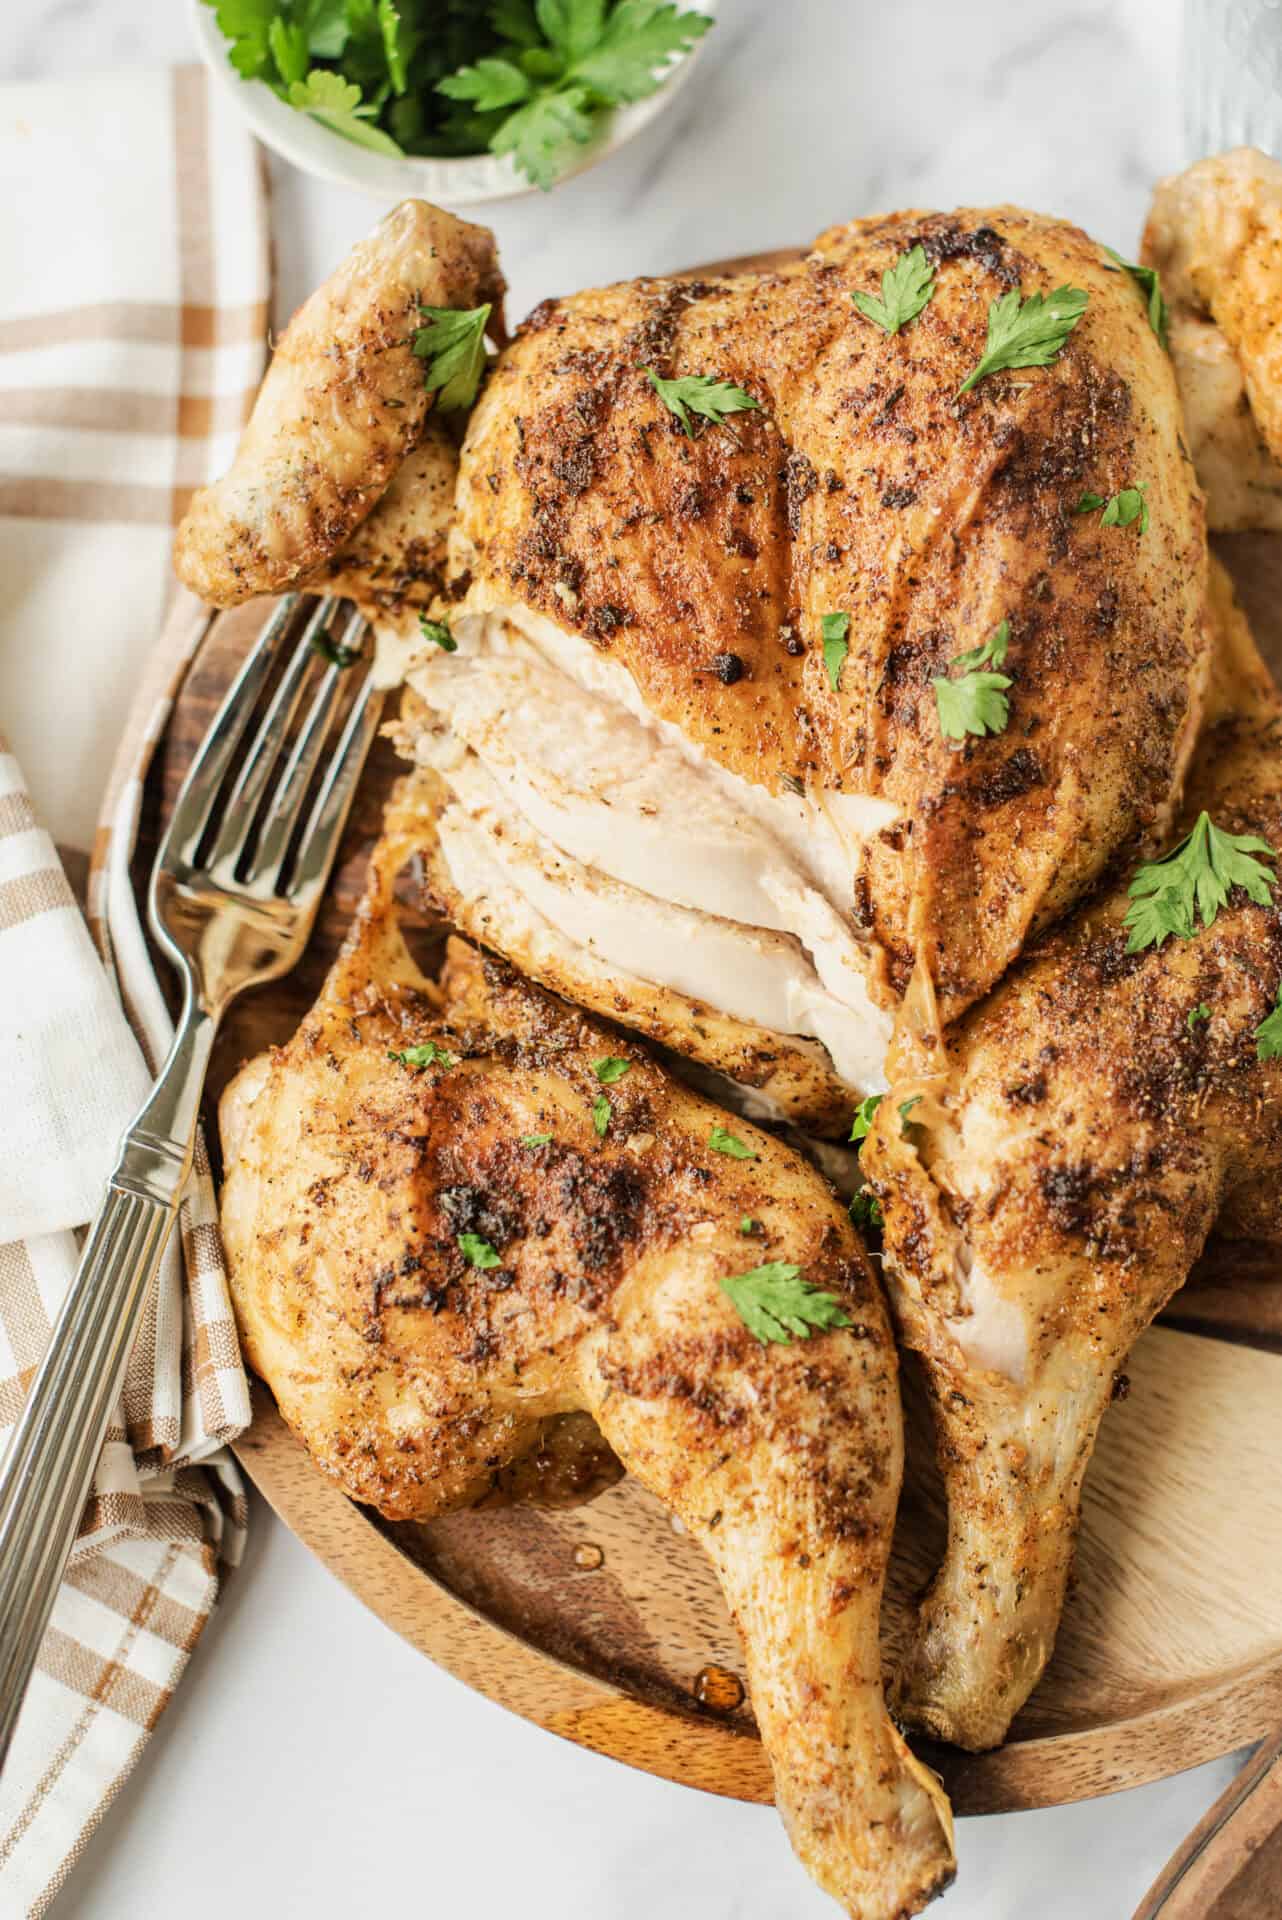
- Place the chicken breast-side down on a cutting board. Using kitchen shears, cut along both sides of the backbone to remove it. Flip the chicken over and press down firmly on the breastbone to flatten the chicken.
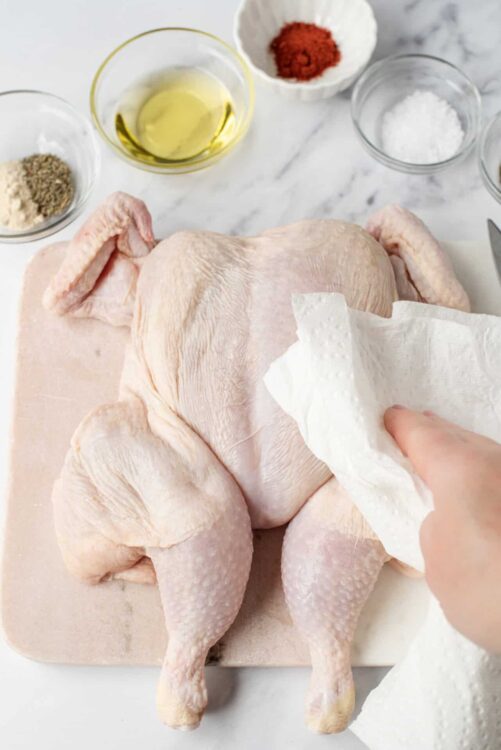
- Pat the chicken dry with paper towels. Rub the entire chicken with olive oil.
- In a small bowl, mix together the salt, pepper, garlic powder, smoked paprika, and dried thyme. Sprinkle the seasoning mix evenly over both sides of the chicken.
- Place the chicken breast-side up on a roasting pan or a baking sheet lined with foil.
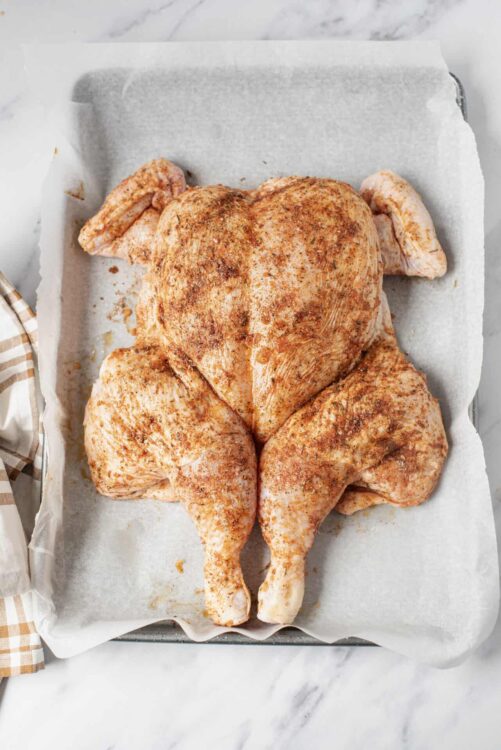
- Roast in the preheated oven for about 45 minutes, or until the internal temperature of the thickest part of the thigh reaches 165°F.
- Remove the chicken from the oven and let it rest for 10 minutes before carving and serving.

Leave a Comment