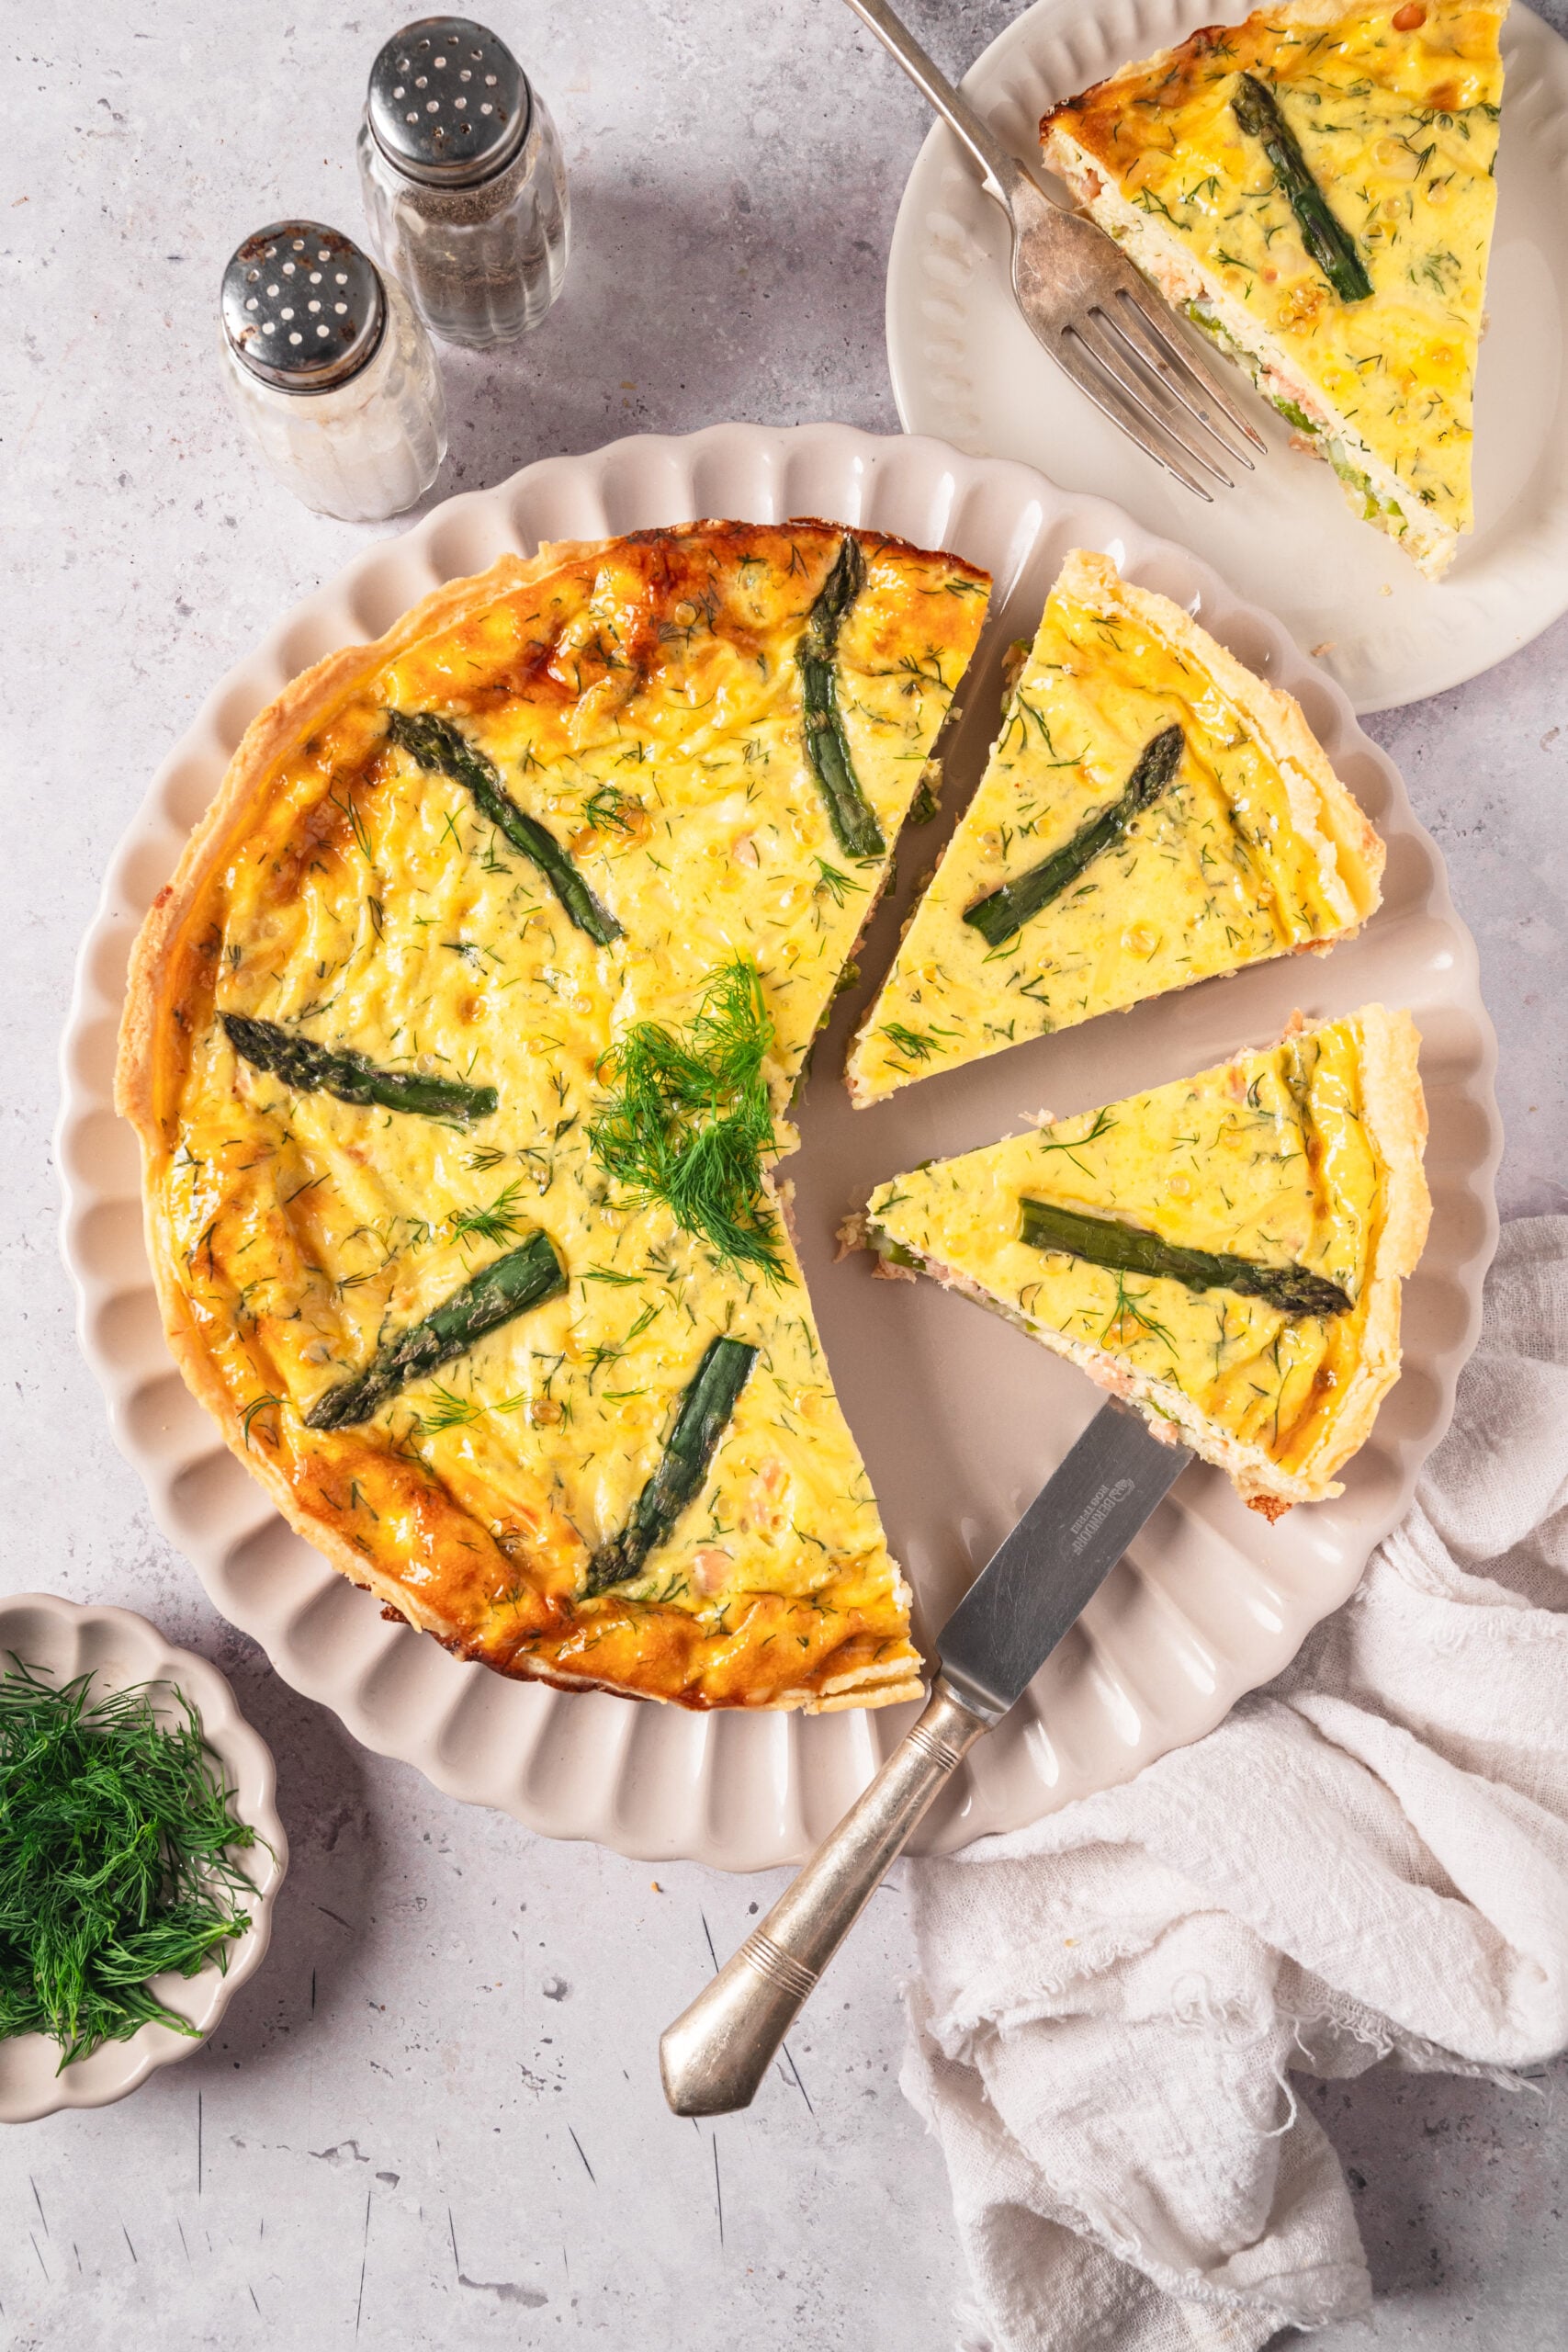
Pretend you’re dining in a bistro in France and try making this delicious Salmon Quiche for lunch this week!
A few summers ago, I spent June through August in a small beachside town in Brittany, France. I was working at a little farm as the head sous chef. During my days off, I rode around on my rusty vintage bike, exploring charming French villages and hidden beaches away from the throngs of tourists. One afternoon, I stumbled upon a tiny little bistro in the town of Névez, and all they were serving for lunch was salmon quiche with a side salad. With a strong love for quiches, I immediately sat down and ordered one without hesitation. The moment I took my first bite, I knew I had to recreate it back home one day.
Last week, I came across this recipe and knew immediately what I wanted to make for dinner that evening. This scrumptious salmon quiche recipe felt like the perfect way to bring back the memories of dining in Névez right into my kitchen. Everything from the creamy custard, the smoky salmon, the tender asparagus, and the perfectly crispy crust was complete perfection. The smell of quiche baking in your oven will perfume your house like a French bistro and make your mouth water. So, why not transport your taste buds to France this week and make this salmon quiche for yourself?
How can I make the crust super crispy and golden brown?
To ensure the crust is crispy and golden brown, we’re blind baking it first before adding the filling. This will prevent the bottom of the pie crust from becoming too soggy, and will ensure the quiche has a tender, flaky texture throughout. You can use pie weights on top of the crust, which you can find at most culinary stores, or instead use a layer of aluminum foil weighed down with dried legumes or uncooked rice.
How do I store leftovers?
Once it’s cooled completely, you can store it in an airtight container in the refrigerator for up to 3 days. You can also store any leftover quiche in the freezer for up to 3 months. Just make sure to wrap it tightly in plastic wrap or aluminum foil first and place it in a freezer-safe container. Allow it to thaw overnight in the fridge, and then you can reheat it in an oven set to 350°F for about 10-12 minutes until it’s warmed throughout.

Serving suggestions
I love making quiches, whether it’s for lunch or dinner—it’s the perfect way to satisfy my cravings. Last week, I whipped this up for lunch and served it with this tasty Kale Salad and a crusty baguette. It would also be lovely paired alongside Roasted Red Potatoes or some Roasted Carrots And Parsnips. Whichever side dishes you decide to serve it with, I highly recommend having it with aioli to drizzle on top of it.

Salmon Quiche
Ingredients
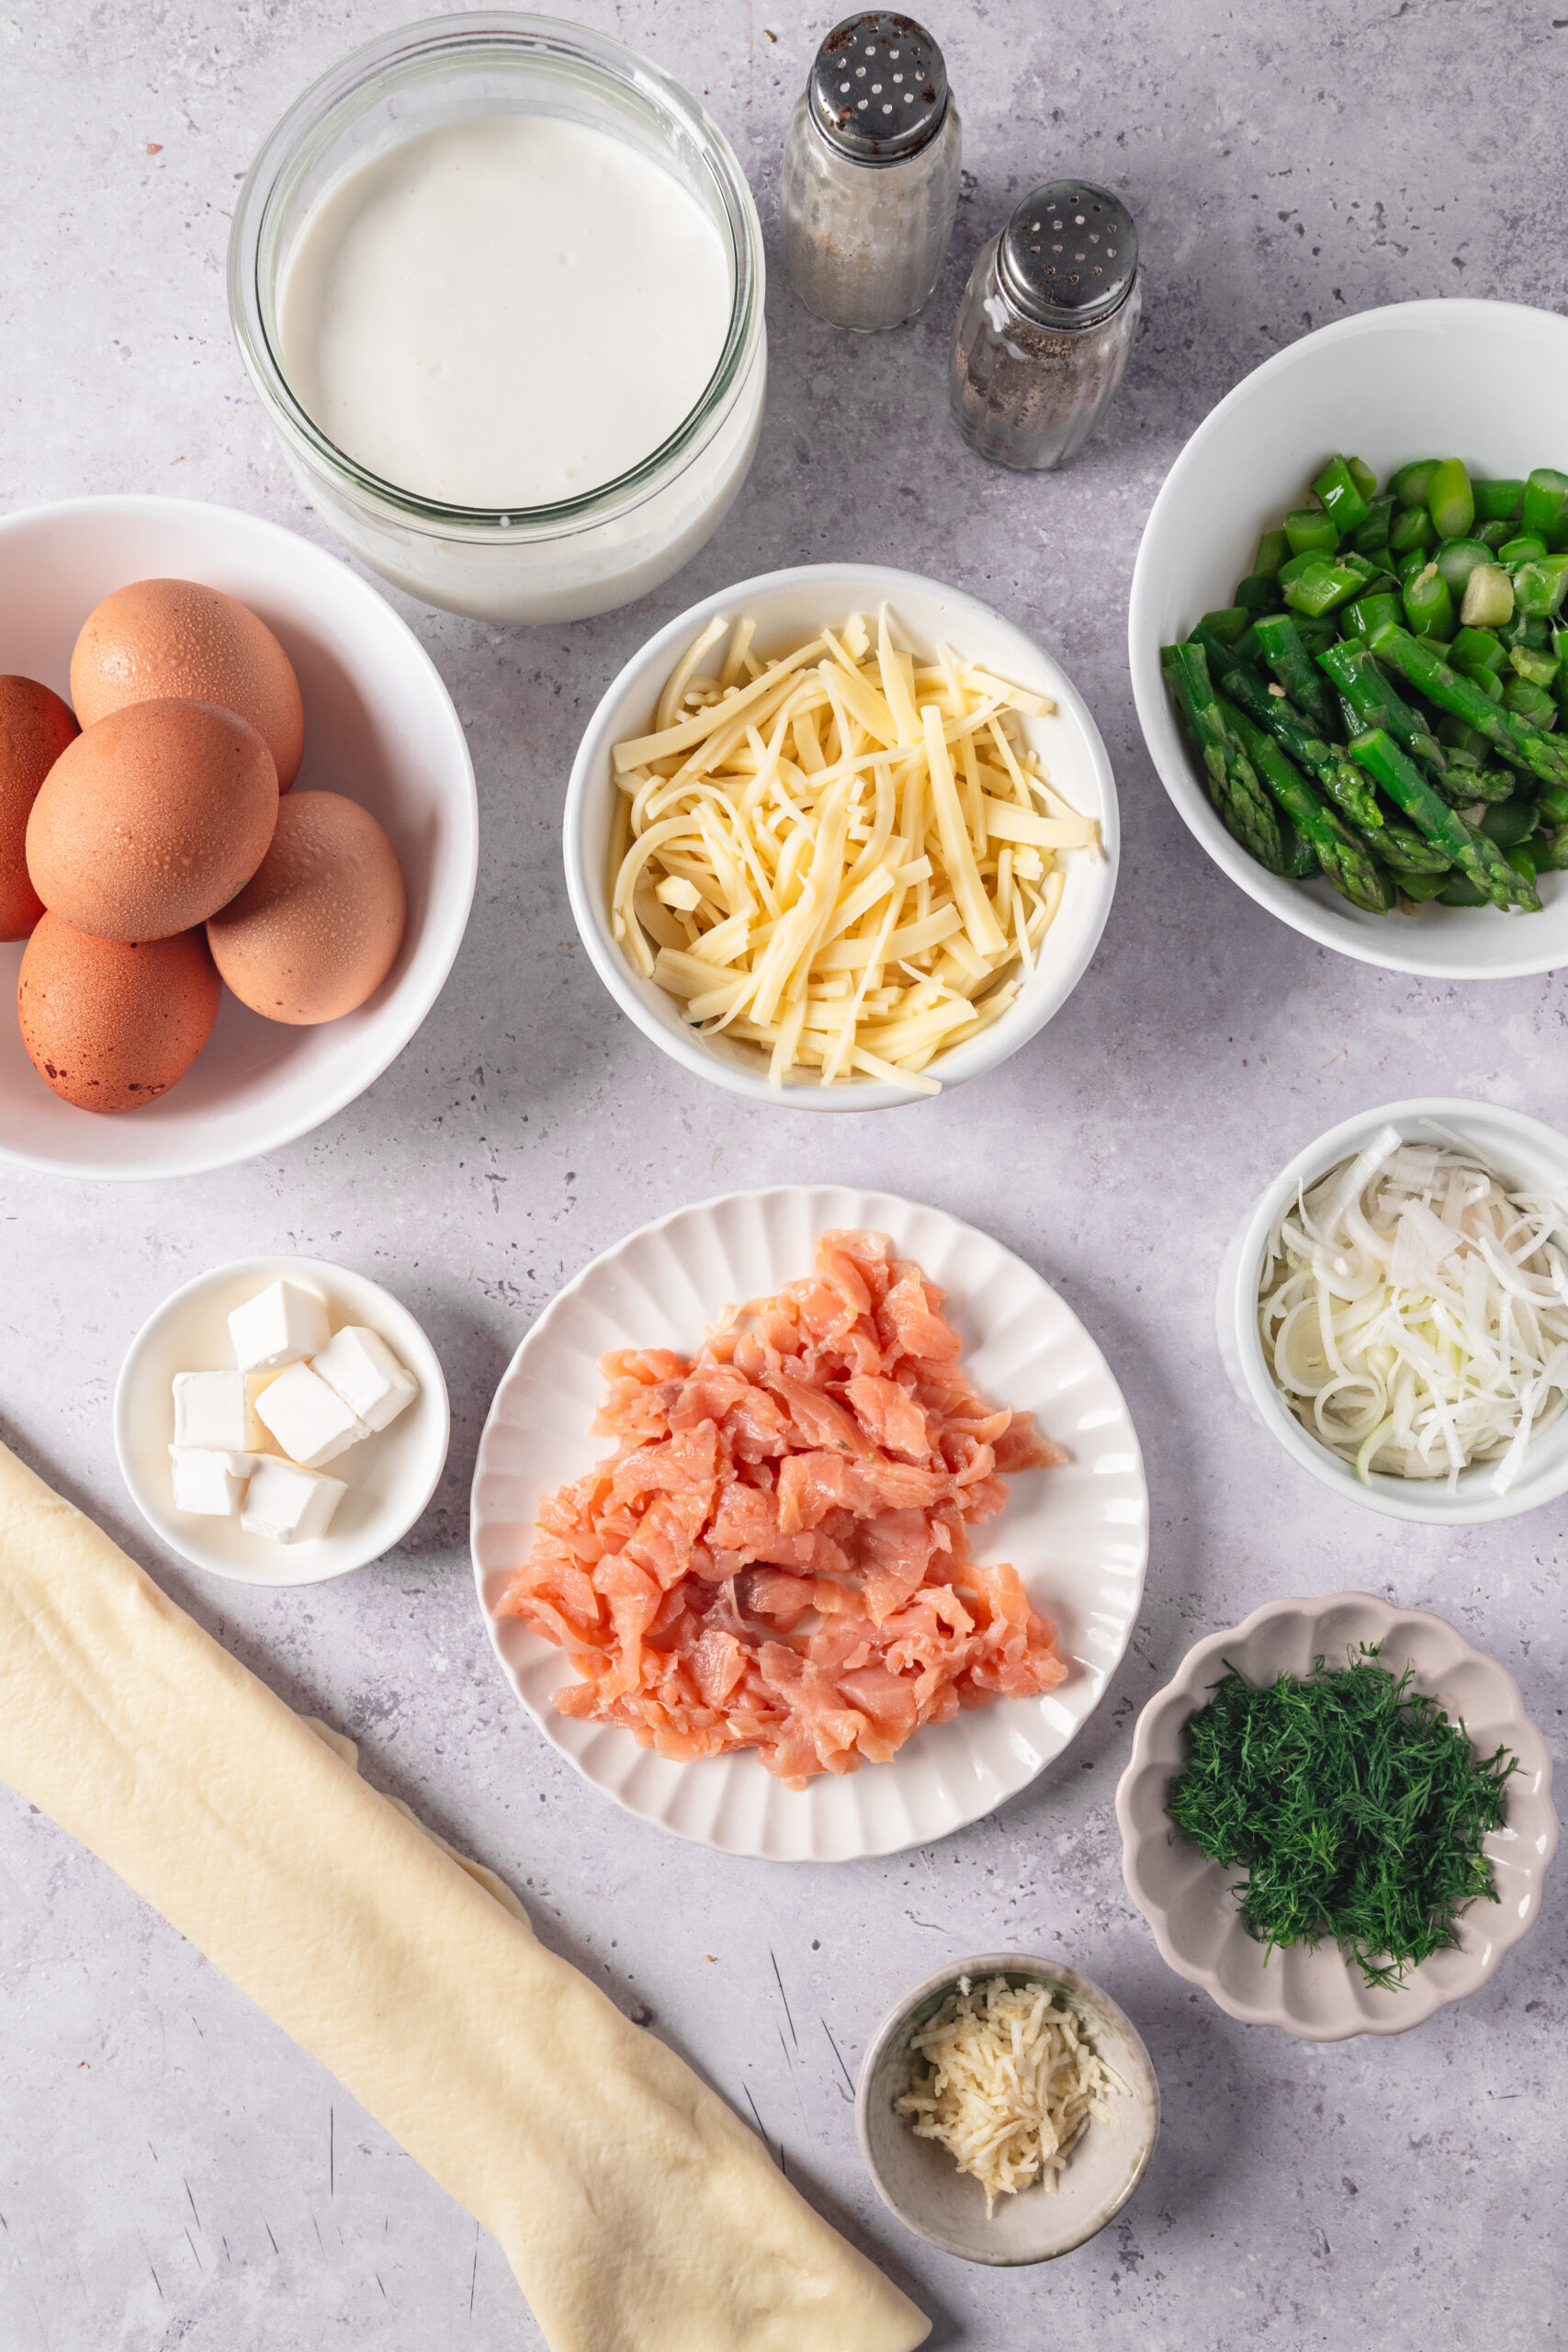
- 1 9-inch frozen pie crust
- 1 tablespoon unsalted butter
- 1 leek white part only, thinly sliced
- 3 garlic cloves minced
- 8 asparagus spears trimmed; chop stems and reserve tips
- 6 ounces smoked salmon cut into pieces
- 5 large eggs
- 1 1/3 cups heavy cream
- 1/2 teaspoon salt
- Pinch of black pepper
- 1 1/2 tablespoons fresh dill chopped (plus more for garnish)
- 3/4 cup shredded Gruyère cheese
Instructions
- Preheat your oven to 350°F. Place the frozen pie crust in a 9-inch pie dish. Poke a few holes in the bottom with a fork and bake for 10 minutes to firm up the crust.
- In a skillet, melt the butter over medium heat. Add the sliced leek and minced garlic, and cook for 2 minutes until softened. Stir in the chopped asparagus stems and cook for another minute. Remove from heat.
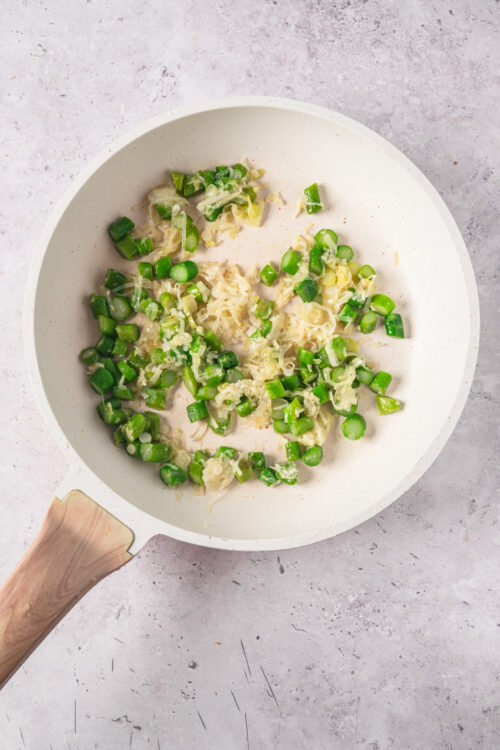
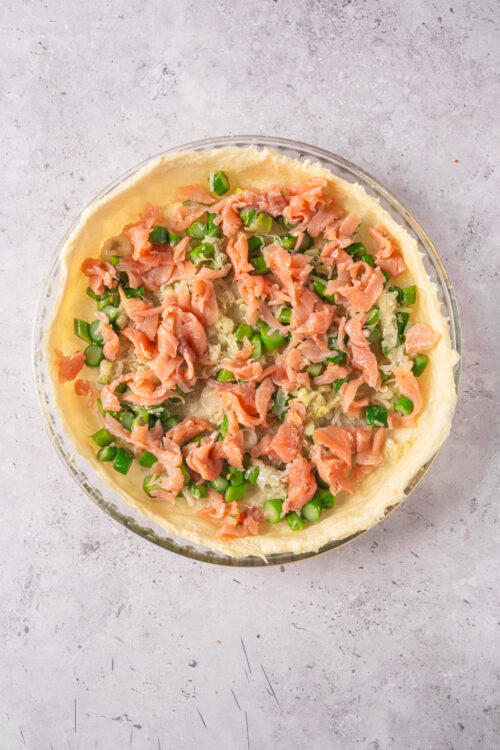
- Evenly spread the sautéed leek, garlic, and asparagus stems over the pre-baked crust. Then, scatter the smoked salmon pieces across the crust.
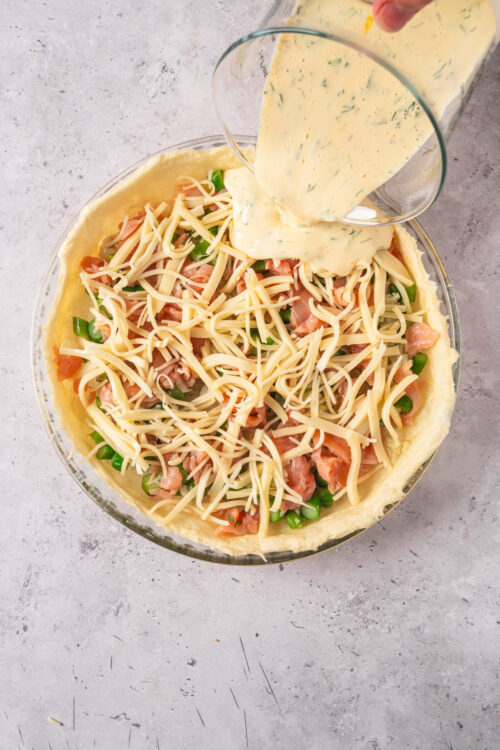
- In a bowl, whisk together the eggs, heavy cream, salt, black pepper, and chopped dill. Sprinkle the shredded Gruyère cheese over the salmon and vegetables.
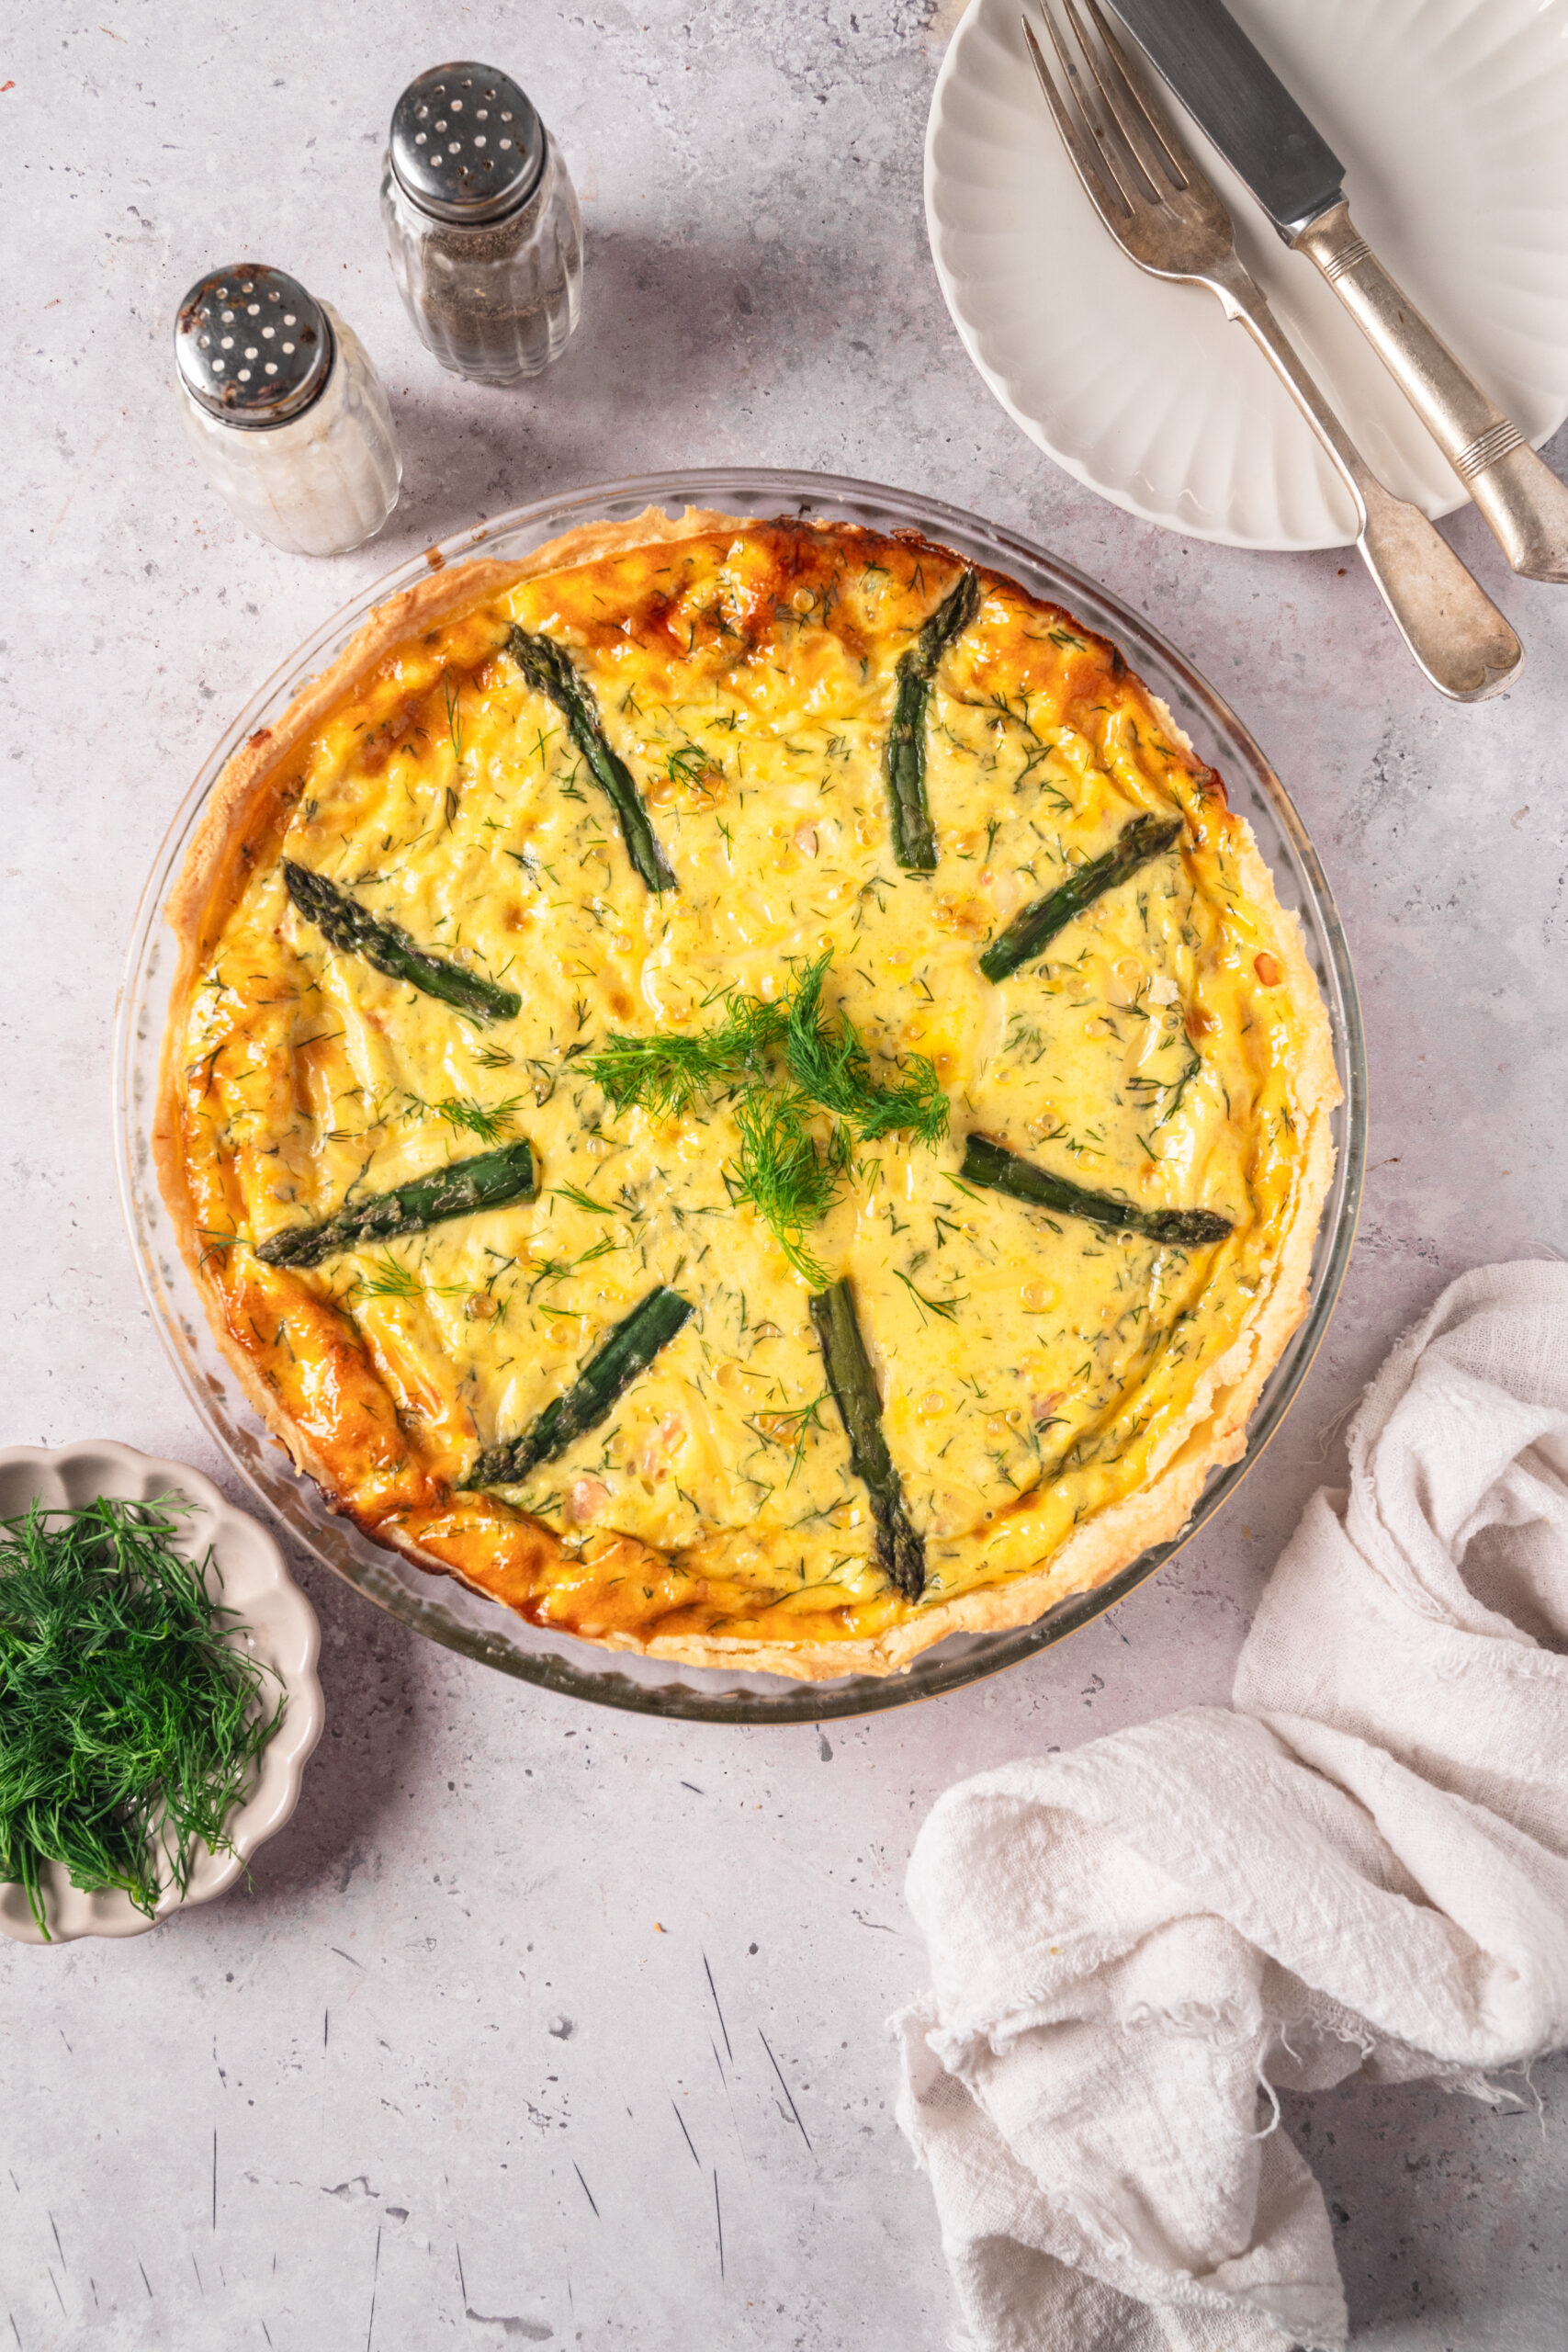
- Pour the egg and cream mixture evenly over the filling. Arrange the reserved asparagus tips on top for a decorative touch. Bake for 35-45 minutes, or until the center is set and the top is lightly golden. Let the quiche rest for 10 minutes before slicing and serving. Garnish with additional dill.

Leave a Comment