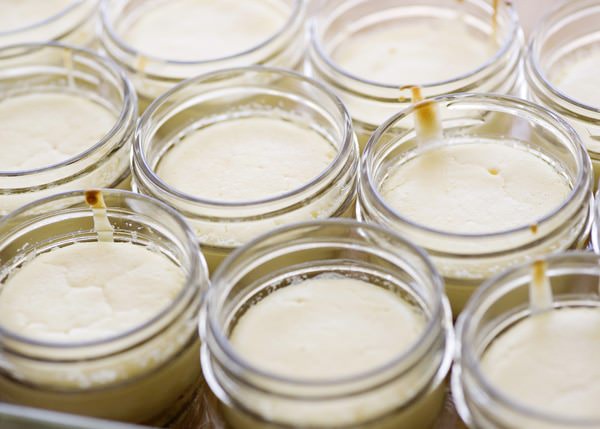
Create a delicious and portable dessert that’s also super cute with this recipe that harnesses a water bath and Mason jars!

Taking a dessert to a party can be stressful. You’ve got to make sure it’s pleasing for most palates, easy to make ahead of time, and—perhaps most importantly—transportable in a way that will still look pretty when you get there.
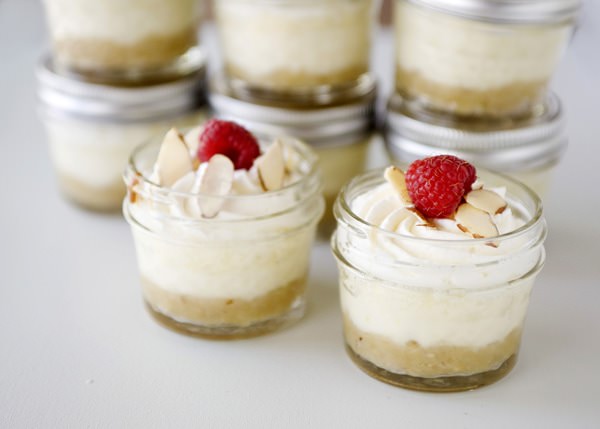
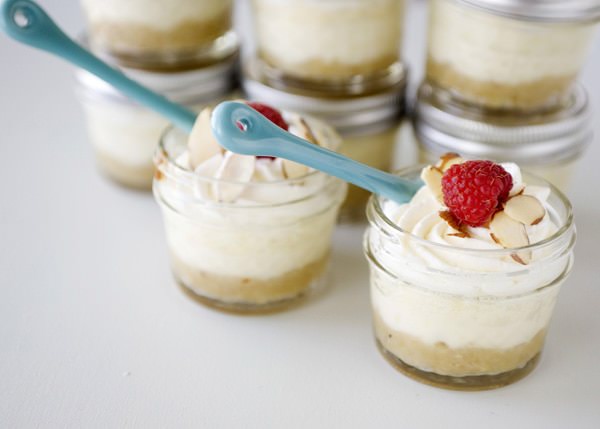
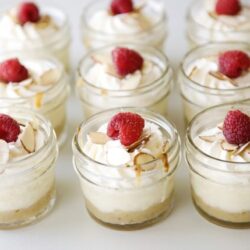
This recipe for mini almond cheesecakes baked in a jar ticks all those boxes! Cheesecake is a very popular dessert choice, and the almond notes in this recipe are subtle enough to please even picky kids. The cooling and chilling times involved align with most cheesecake recipes—which makes cheesecake the ultimate make-ahead treat! As for portability, you cannot get more portable than little jars with lids. They are literally designed to keep whatever’s inside clean and contained. Plus, they’re super cute and show off the delectable layers of this dish!
If you’ve never cooked with a water bath, please don’t be intimidated. I promise it’s not as fussy or difficult as you think! And it’s actually the secret to achieving ultra-creamy, crack-free results in jars like these. Surrounding the jars with hot water helps the custard bake slowly and evenly, so the edges don’t overcook before the centers are set. Instead of thinking of it as a chef-level restaurant technique, treat it as a simple insurance policy. Once the jars are nestled in a pan and the water is in place, the oven does the rest!
Three keys to foolproof water-bath baking
- First, set the pan of filled jars on the oven rack before adding the hot water, so you’re not carrying a sloshing pan across the kitchen.
- Second, pour the hot water in carefully from a kettle or spouted pitcher until it comes about halfway up the sides of the jars—high enough to cushion the cheesecakes, but not so high that it risks splashing into them.
- Third, avoid pouring directly over or near the rims of the jars. Aim for the empty spaces between jars so no stray drops of water land in the custard.
How do I store leftovers?
Store your mini almond cheesecakes—without toppings—tightly sealed either with lids or plastic wrap in their mason jars in the fridge for up to 5 days. This dessert also freezes well for up to 1 month. Press plastic wrap directly onto the surface of each chilled cheesecake (to prevent freezer burn), then screw on the lids and store them in the freezer. Thaw overnight in the fridge. Enjoy straight from the fridge, or let sit at room temp for about 10–15 minutes so the filling softens slightly and the flavors open up.
Serving suggestions
Serve your mini almond cheesecakes alongside an array of homemade toppings. Swap the fresh raspberries for a spoonful of Strawberry Compote or some Sugared Cranberries. Add Toasted Almonds instead of plain slivered nuts for extra crunch and flavor, then top with Homemade Whipped Cream. For serious indulgence, drizzle with Bourbon Caramel Sauce and finish with Chocolate Whipped Cream.
Mini Almond Cheesecakes Baked In A Jar
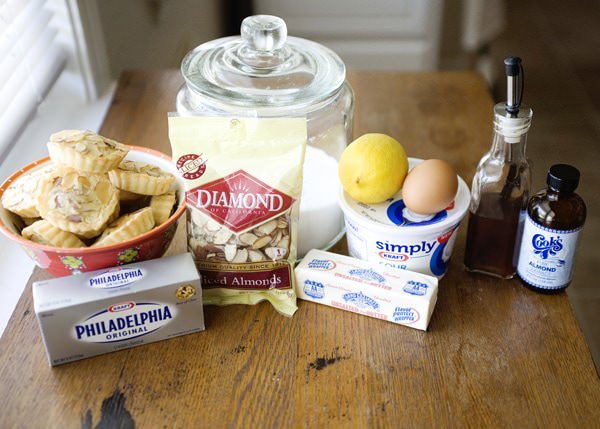
Ingredients
For The Crust:
- 12 French almond cakes or 6-7 ounces of almond-flavored cake or madeleines
- 2 tablespoons butter melted
For The Filling:
- 12 ounces cream cheese at room temperature
- 1/2 cup granulated sugar
- 1 egg
- 1 lemon zested
- 1 tablespoon sour cream
- 1 teaspoon vanilla extract
- 1/2 teaspoon almond extract
- 1/4 teaspoon salt
For Topping:
- Whipped cream
- Raspberries
- Sliced almonds
Instructions
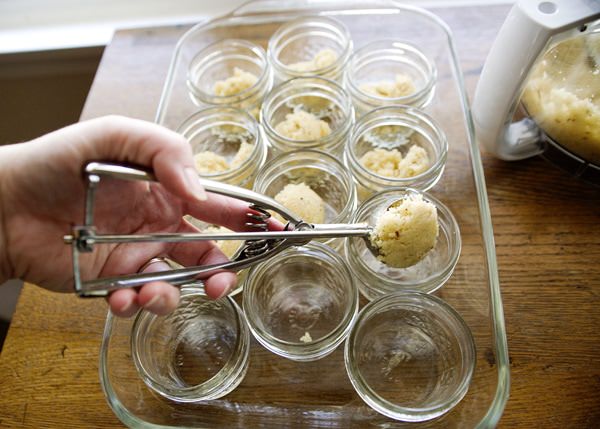
- Preheat oven to 350°F. Arrange 12 clean half-pint (8-ounce) mason jars in a deep 9×13-inch baking dish or roasting pan and set aside.
Make The Crusts:
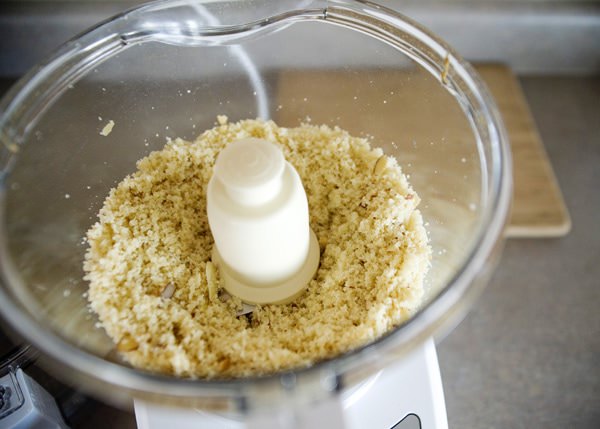
- Place the French almond cakes in the bowl of a food processor. Pulse until they form fine, even crumbs that resemble moist sand.
- Add the melted butter and pulse just until the mixture is evenly moistened and clumps together when pressed between your fingers.
- Divide the crumb mixture evenly among the jars (about 1-1 1/2 tablespoons per jar). Use the back of a spoon or a small tamper to press the crumbs firmly into an even layer on the bottom of each jar.
- Bake the crusts for 8 minutes. Carefully remove the pan from the oven and let the jars cool slightly while you prepare the filling.
Make the Filling:
- Reduce the oven temperature to 325°F.
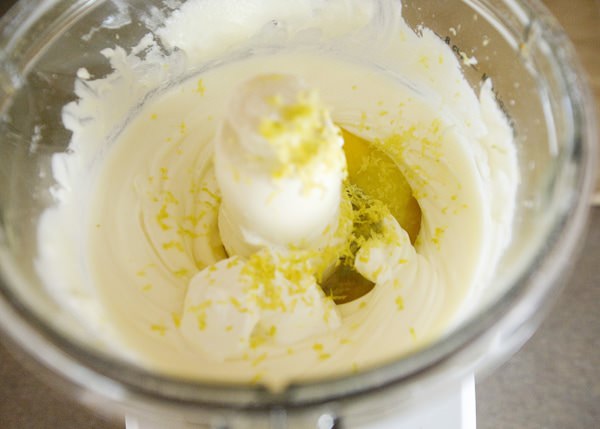
- In a clean food processor or in a large mixing bowl with a hand or stand mixer, beat the cream cheese and sugar together until completely smooth and no lumps remain, scraping down the bowl as needed.
- Add the egg, lemon zest, sour cream, vanilla, almond extract, and salt. Mix on low speed or pulse just until incorporated and the batter is smooth; avoid whipping in too much air.
- Divide the cheesecake batter evenly among the jars, spooning or pouring it over the baked crusts and leaving about 1/2 inch of headspace at the top of each jar. Gently tap the pan on the counter to release any large air bubbles.
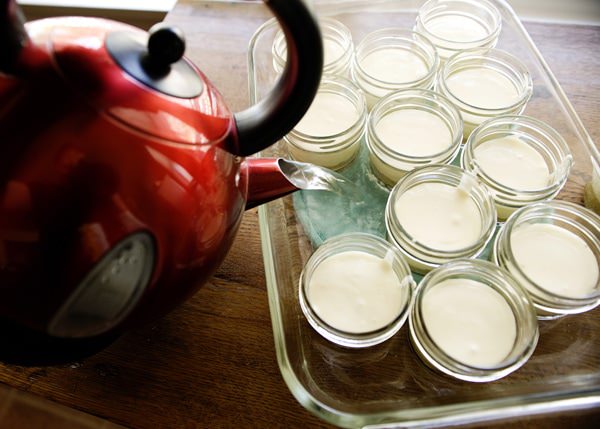
- Bring a kettle or small pot of water to a boil, then reduce to a simmer.
- With the jars still in the 9×13-inch pan, carefully pour the hot water into the pan until it comes about halfway up the sides of the jars, taking care not to splash water into any jars.
- Transfer the pan to the oven. Bake for 25-30 minutes, or until the cheesecakes are puffed around the edges and the centers still have a slight jiggle when gently nudged. They should not look wet or liquid in the middle.
- Turn off the oven and crack the door open for 5 minutes to let the cheesecakes begin to cool in the water bath, which helps prevent cracking.
- Carefully remove the pan from the oven. Use tongs or an oven mitt to lift the jars out of the hot water and place them on a wire rack. Cool to room temperature, 45-60 minutes.
Chill, Garnish, And Serve:
- Once the jars are at room temperature, cover each with a lid or plastic wrap and refrigerate until fully chilled and set, at least 4 hours or overnight.
- Just before serving, top each mini cheesecake with a swirl of whipped cream, a single raspberry, and a sprinkle of sliced almonds. Serve cold.
Leave a Comment