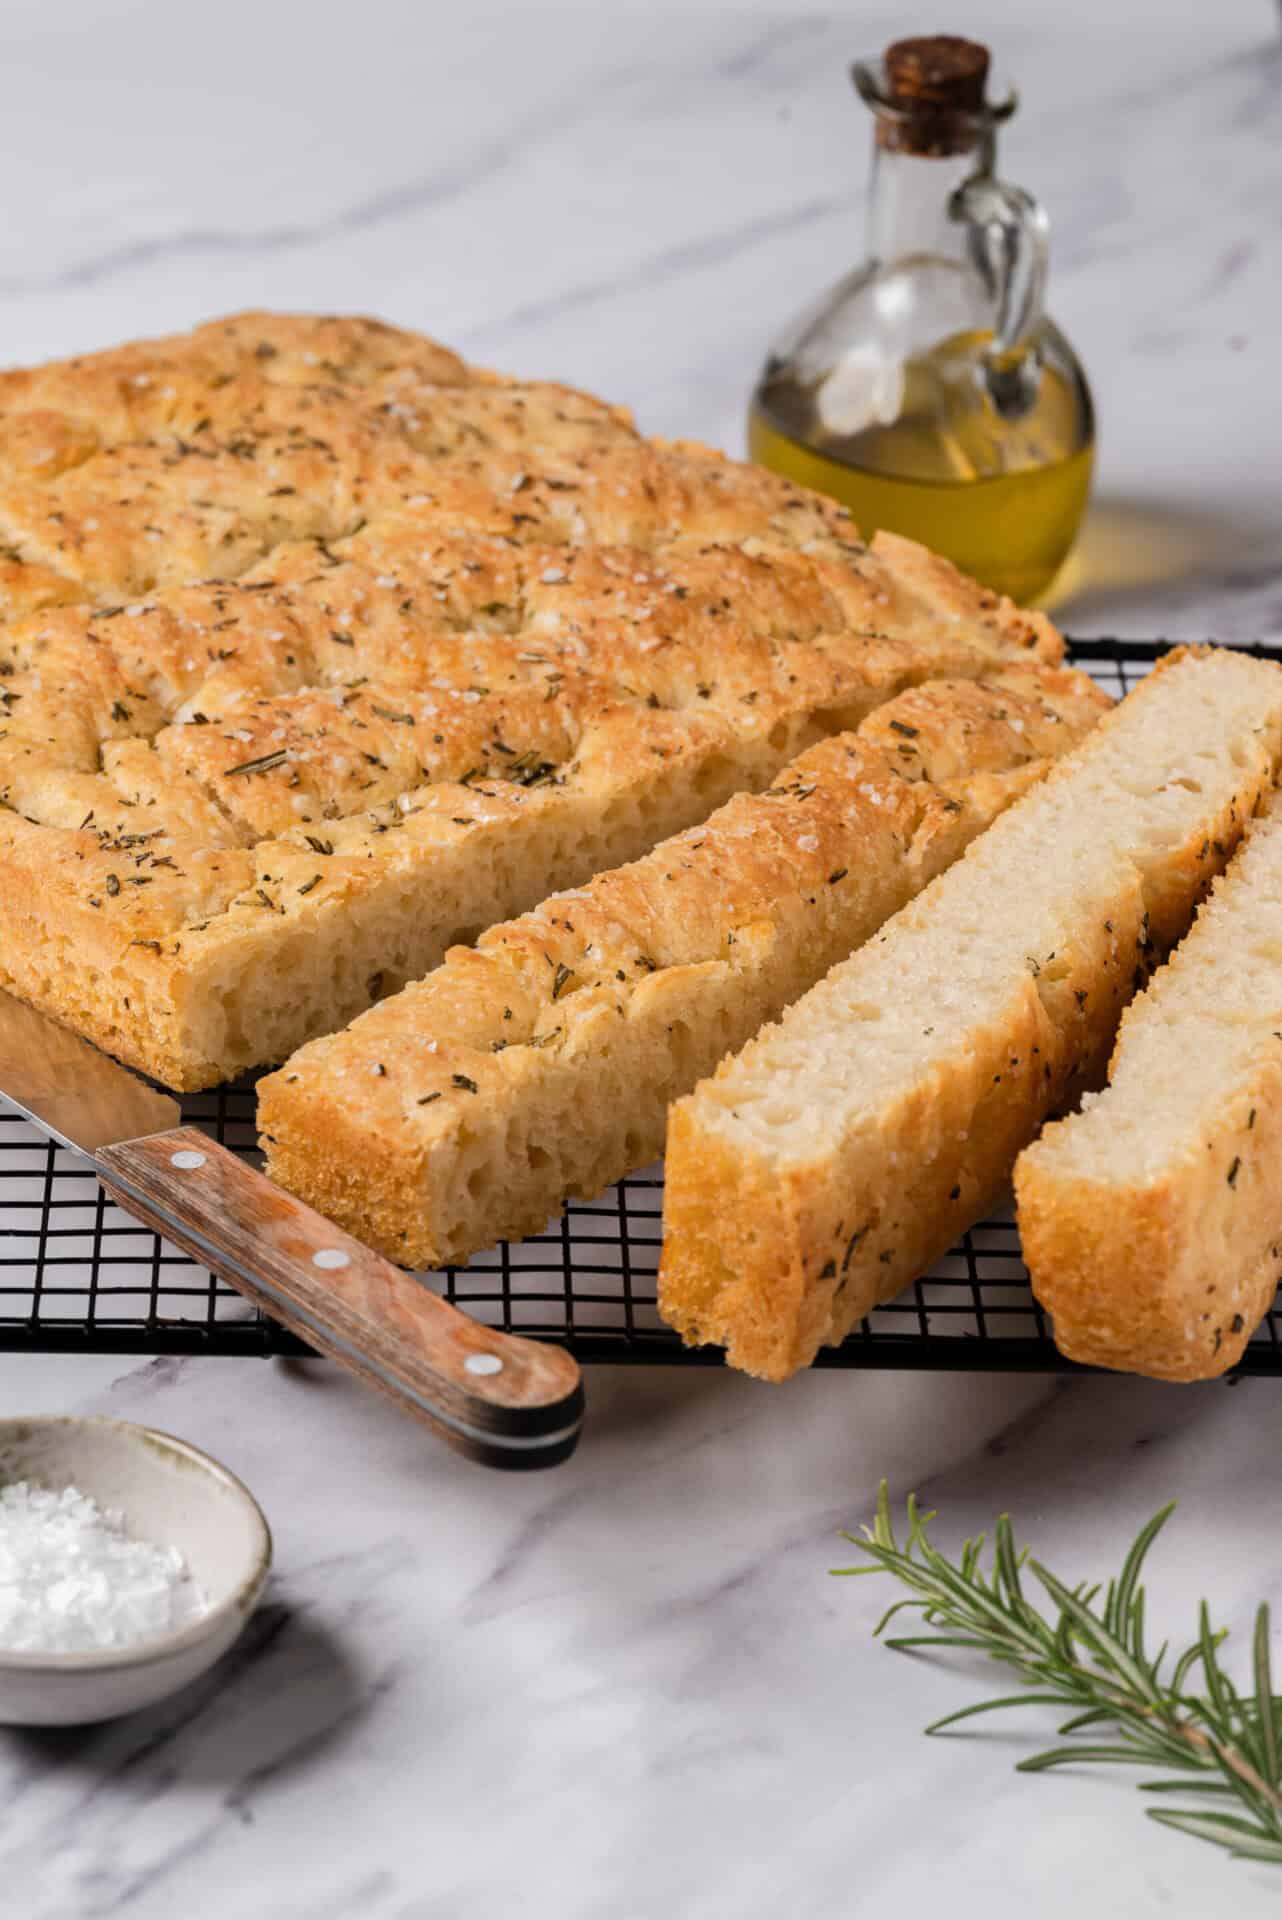
You won’t believe how simple it is to make your own crispy and chewy authentic Focaccia!
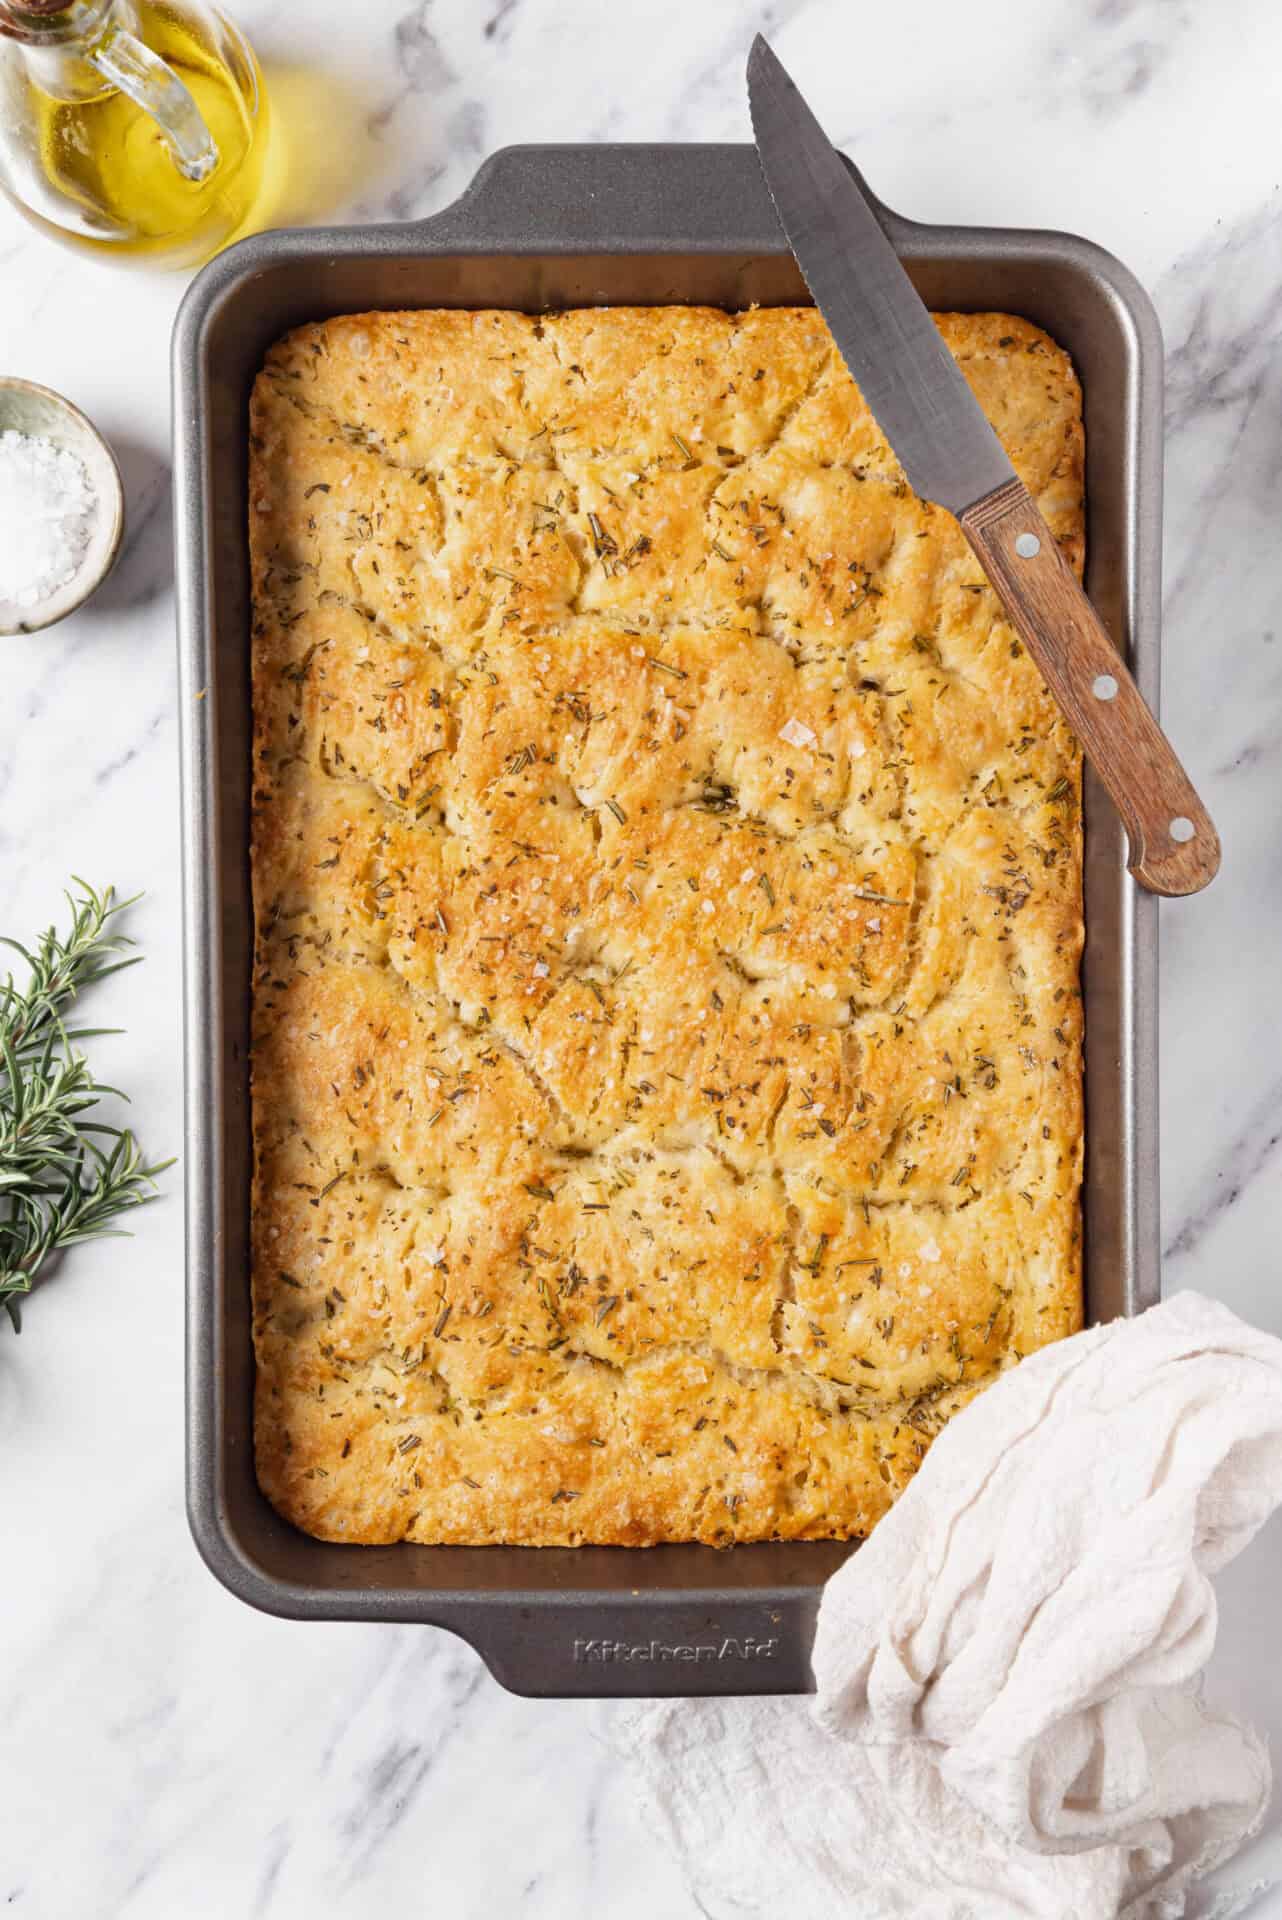
Let’s talk about carbs. Specifically bread. Some people swear it off entirely, while others preach the adage “bread is life,” which is where I land: I believe in another adage, “everything in moderation,” So while I acknowledge that too many carbs can be a problem, for me no carbs is a bigger one, especially if it meant I could never have one of the most dazzling breads there is: Focaccia. With its crispy crust, salty top, soft, chewy middle, and delicious olive oil flavor, there’s no better way to get your bread fix.
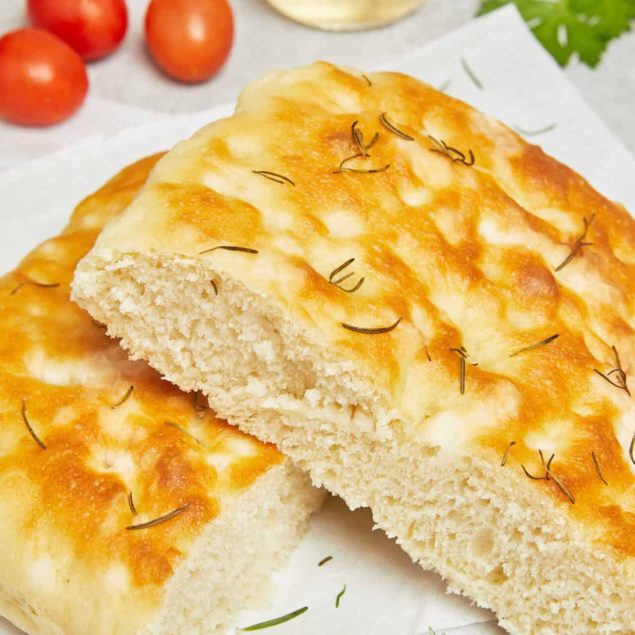
Focaccia has certainly stood the test of time. Most of the foodie historians agree that it either originated in north central Italy before the Roman Empire or in Ancient Greece, though similar flatbreads also have a very long history in the Middle East. And, yes, Focaccia is a sort of flatbread, but it distinguishes itself by not being completely flat, by the way the olive oil flavors it, by its signature dimples, and by a light, almost cake-like interior surrounded by a golden brown crust. Sometimes people confuse Focaccia with Ciabatta, another well-known and delicious Italian bread. There are some similarities, but Ciabatta is baked in loaves, and, although it also has an airy interior like Focaccia, Ciabatta’s texture is more dense and chewy.
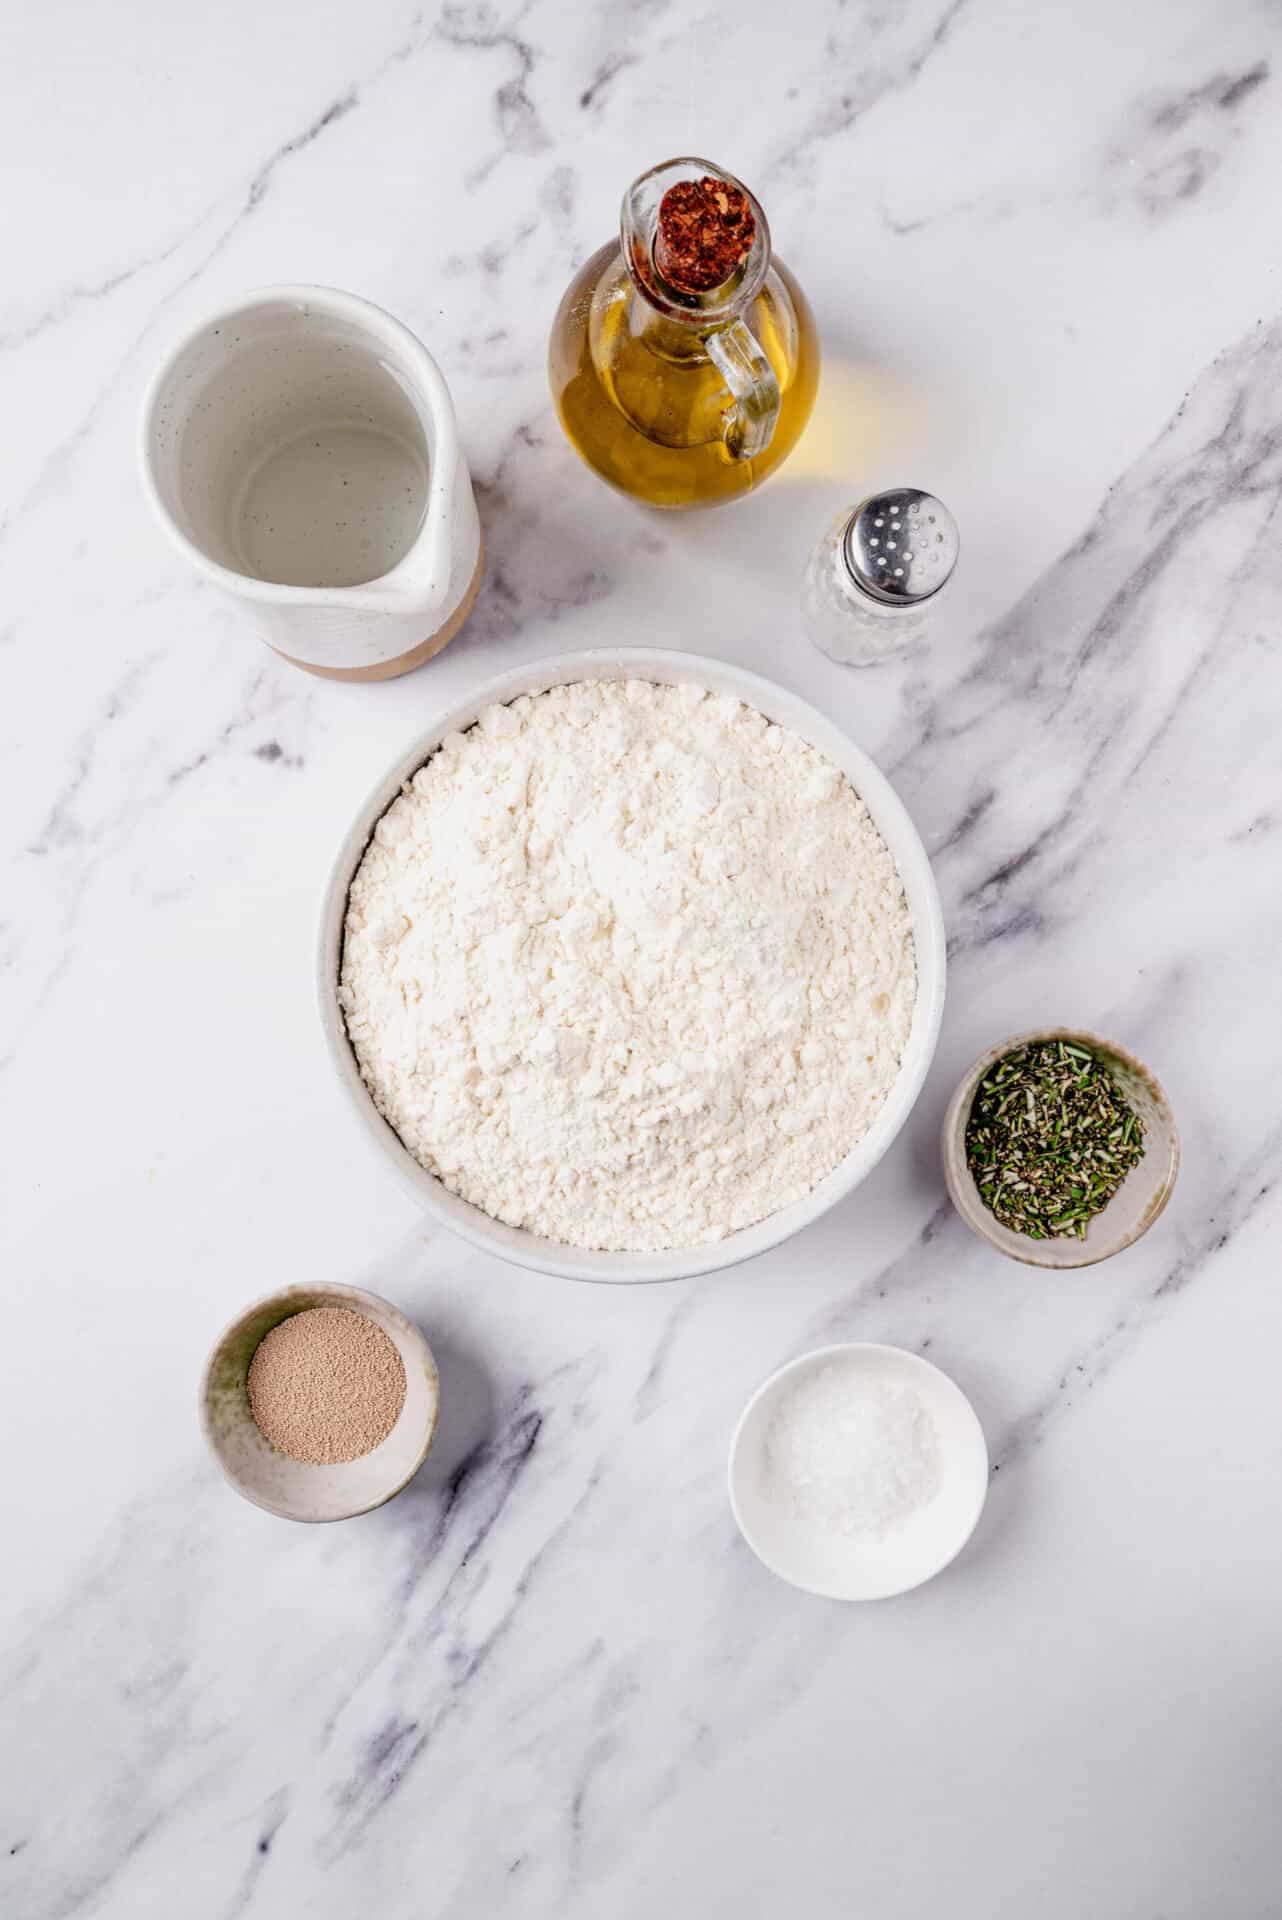
The beauty of this recipe for Focaccia is that it appeals to new and seasoned bakers alike. It’s basically a one-bowl, 5-ingredient wonder, (and one of those ingredients is water!). At the end, you’ll add some sea salt and fresh rosemary, which is optional. However, we highly recommend it, as it gives the Focaccia a wonderful herbaceous taste. If you don’t have a lot of experience making bread, you’ll love how the dough comes together in just two steps—no kneading required!—and if you’re an experienced baker, you’ll love this part, too. The process does take some time because the dough must rise twice, but hey, you’re making your own homemade bread! After all, Rome wasn’t built in a day (sorry about all these cliches today, but you have to admit they’re working…).
One of Focaccia’s early uses was to dip into soup; that tradition remains. In fact, a perfect dinner is a big pot of Minestrone, fresh Focaccia right out of the oven, and a simple salad tossed in Italian Dressing. So good.
Secrets to a Perfect Focaccia
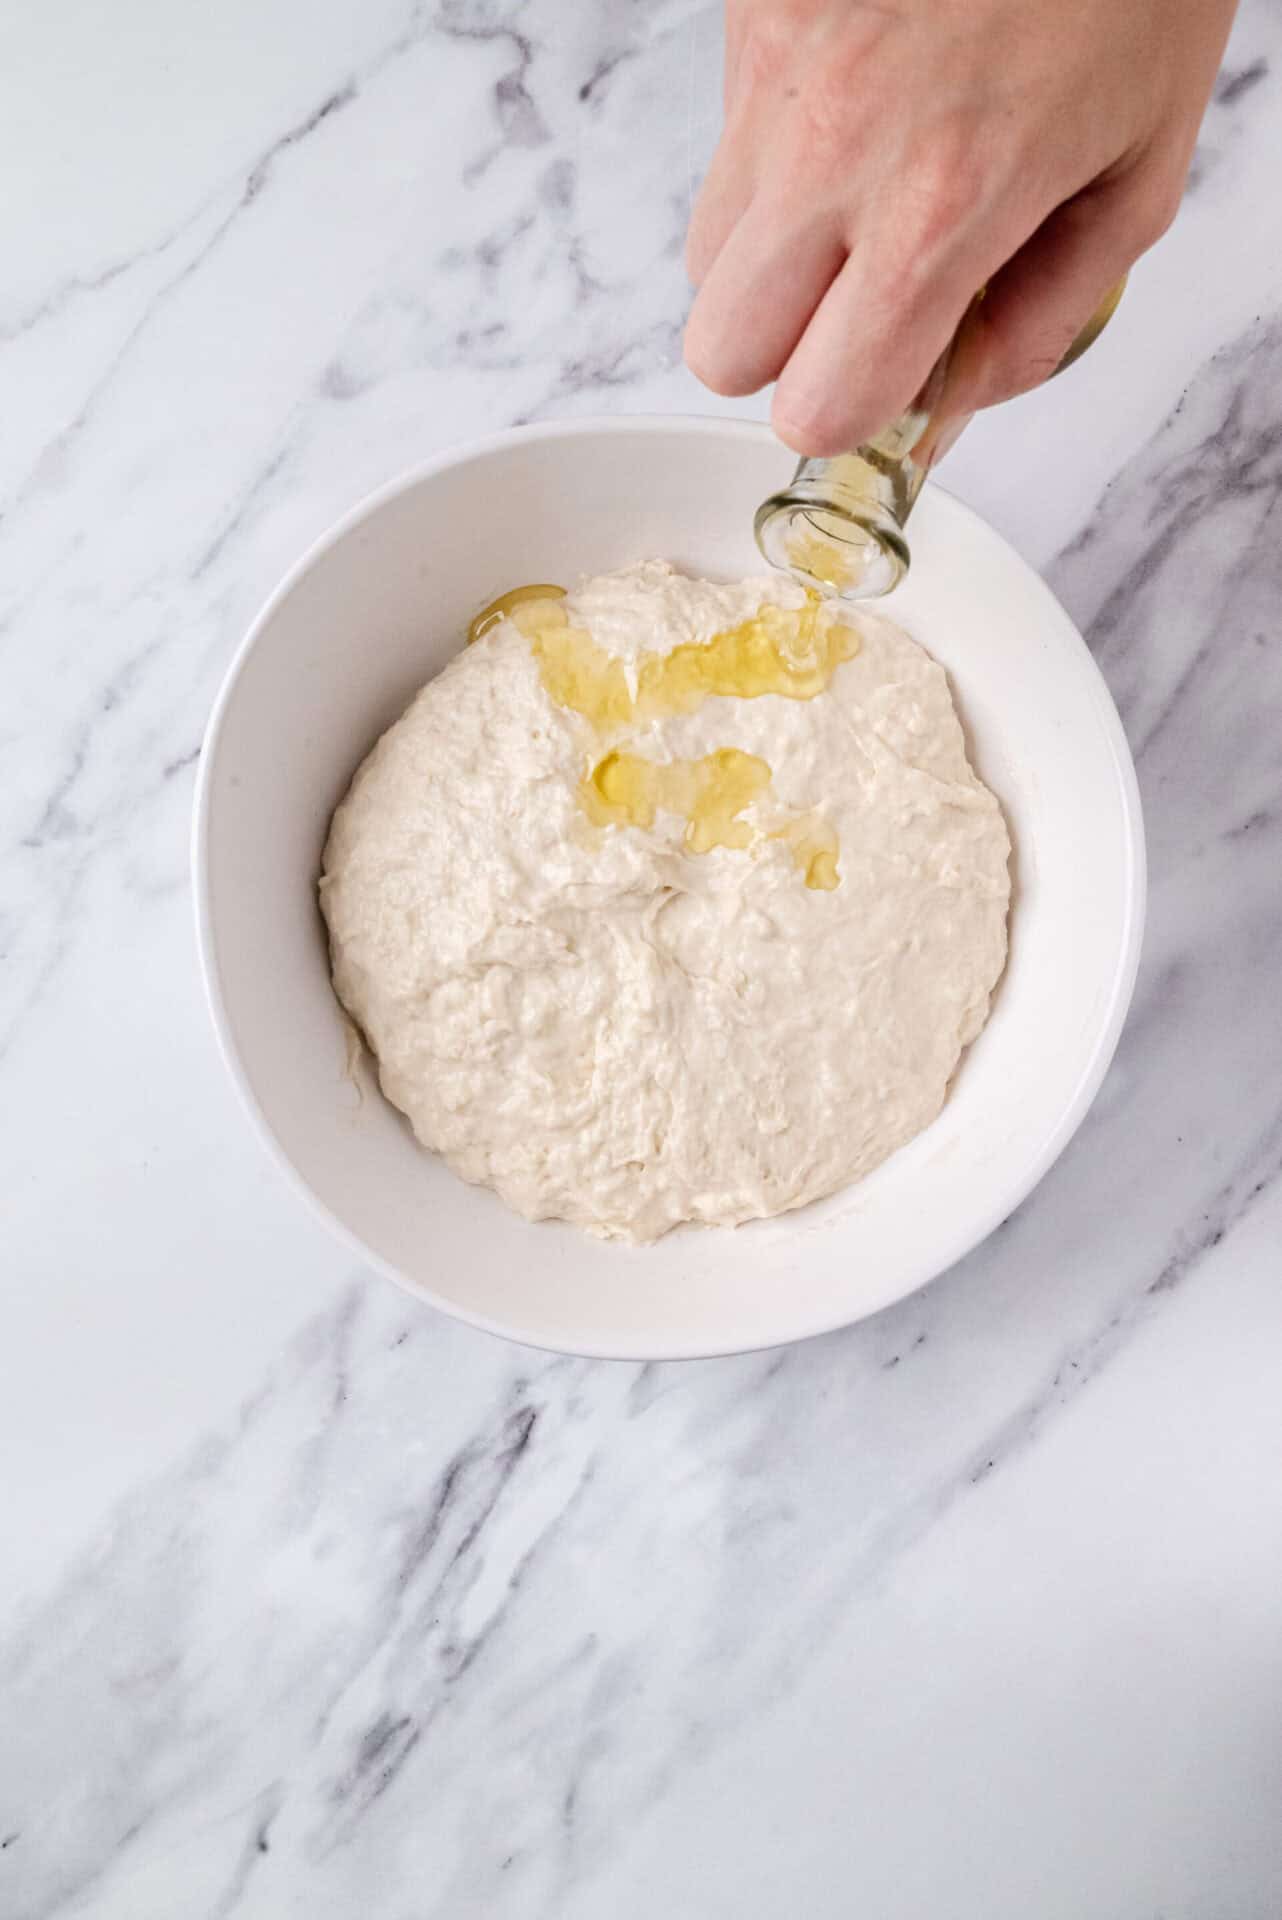
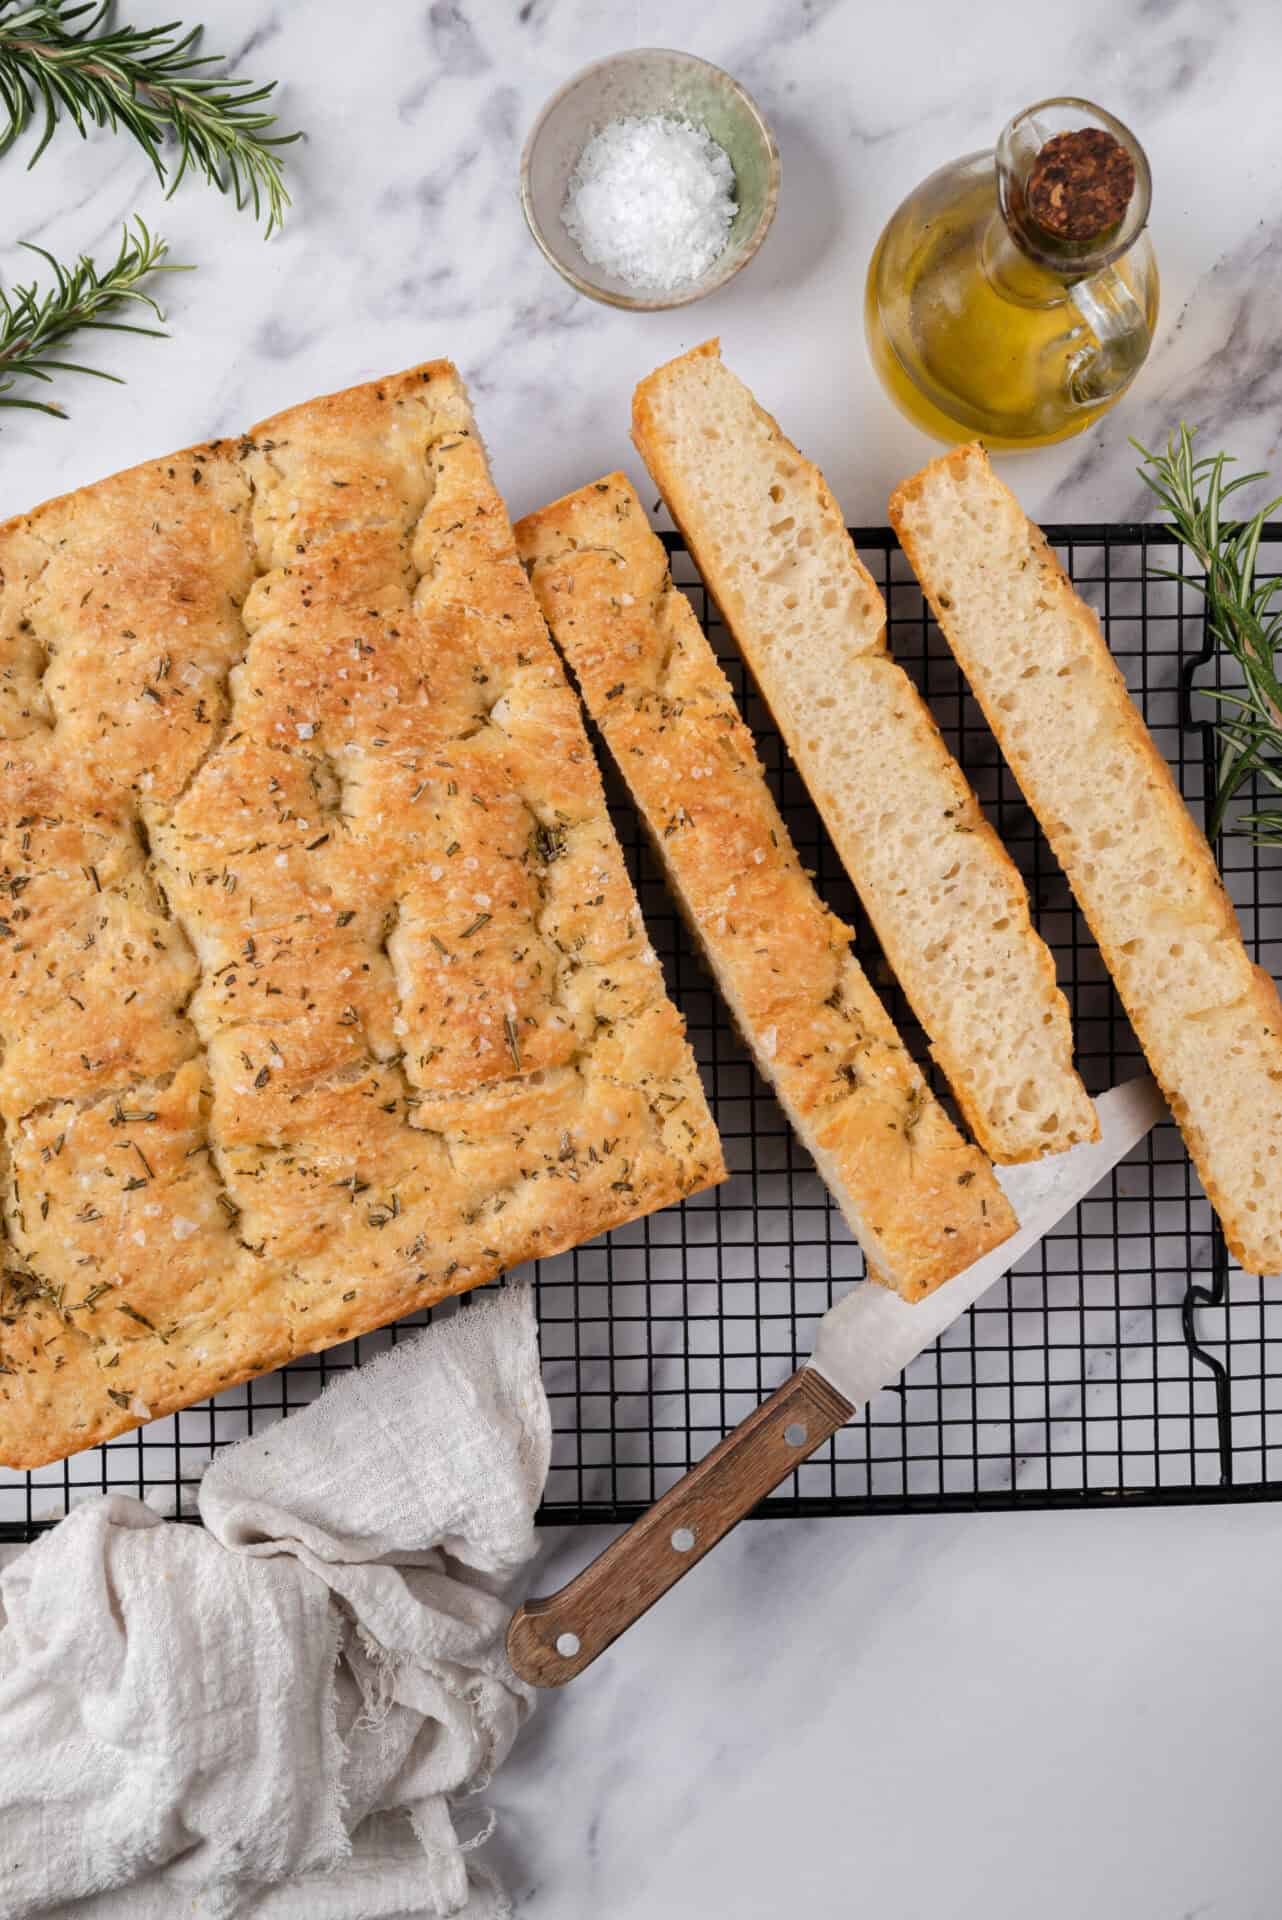
While this recipe is very straightforward, there are a few things to keep in mind. First, make sure your mixing bowl is big enough to accommodate the dough doubling in size during the first rise. Next, your water must be lukewarm because that is how your yeast will be activated: too cold and it will slow that process down; too hot, and it will kill the yeast (and the dough won’t rise). Next, stop mixing once you can no longer see any flour. The dough won’t be completely smooth: that’s what is meant by shaggy. For your first rise, cover the dough and set the bowl in a warm place; we recommend an hour for this rise, but if the dough has not doubled in size, leave it until that happens. After the second rise, when the dough is in the baking pan, it’s time for the dimpling (this part is fun!). Basically, you’re going to use your fingers to poke little indentations all over the top of the dough, which will release gas and air during the baking process. If you want some additional olive oil flavor, you can spread a little more olive oil over the top so that it sinks into the dimples before adding the rosemary and salt.
FAQs & Tips
How to Make Ahead and Store?
Cooled Focaccia can be stored in an airtight container at room temperature for up to 2 days. You can also refrigerate it for up to 1 week or freeze it for up to 3 months if you want to extend its shelf life.
Can I use my stand-mixer for this recipe?
Yes, you can! You can use the flat-paddle attachment to mix the dough. Or, if you have one, the dough hook. Just remember to stop mixing when the flour is no longer visible and the dough is not quite totally smooth.
Would whole wheat flour work in this recipe?
We like all-purpose flour for this Focaccia, but whole wheat flour does work, as does bread flour if you like working with that.
Serving Suggestions
There are so many things you can do with Focaccia, but let’s start at the beginning. Dips and spreads. Slices of Focaccia are the perfect vehicle for something as simple as Whipped Butter or Whipped Ricotta (and if you do this, top it with Roasted Peppers or Sauteed Onions), but don’t stop there! Try it with Homemade Pesto or Spinach Artichoke Dip. Or, really, any other dip or spread that you love.
But wait, there’s more! True to its Italian roots, Focaccia is a natural match with Meatballs and this homemade Tomato Sauce, or, of course, as a side with any great pasta dish, like Lasagna. Or instead of slicing it, use the full Focaccia as a base for pizza; one thing we love at my house is a Mexican pizza using Focaccia as a base and then topping it with Mexican Pulled Chicken, Fajita Vegetables, some shredded cheese, Enchilada Sauce, and a dollop of Mexican Crema.
Focaccia Recipe
Ingredients
- 4 cups all-purpose flour
- 2 teaspoons kosher salt
- 2 1/4 teaspoons instant yeast
- 2 cups lukewarm water
- 4 tablespoons olive oil divided
- 1 teaspoon fresh rosemary leaves chopped (optional)
- Flaky sea salt for topping
Instructions
- In a large mixing bowl, combine flour, kosher salt, and instant yeast.

- Add lukewarm water to the dry ingredients and mix until a shaggy dough forms.
- Drizzle 2 tablespoons of olive oil over the dough. Cover the bowl with plastic wrap and let it rest at room temperature for about 1 hour or until doubled in size.

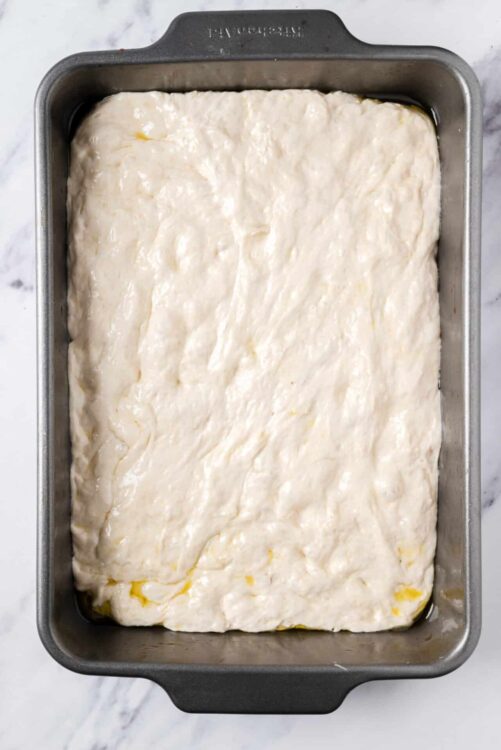
- After the dough has risen, use the remaining 2 tablespoons of olive oil to grease a 9×13 inch baking pan.
- Transfer the dough to the greased pan, spreading it out evenly. Cover and let it rise for another 30 minutes.
- Preheat your oven to 425°F.
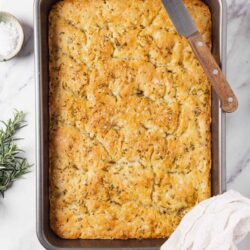
- Use your fingers to dimple the dough, creating small indentations. Sprinkle chopped rosemary and flaky sea salt over the top.
- Bake in the preheated oven for 20-25 minutes, or until golden brown and cooked through.
- Remove from the oven and let cool slightly before slicing and serving.


Leave a Comment