Skip the fancy bakery—your kitchen is about to turn out a golden-crusted, crackly loaf with nothing more than a Dutch oven and a few pantry staples.
I still remember the first time I made bread in a Dutch oven. My grandmother, a no-nonsense home cook, handed me a worn-out cast iron pot and told me to trust the process. “Just let the pot do the work,” she said. Skeptical but curious, I followed her simple instructions. A few hours later, I pulled out a perfectly crusty loaf, something that looked straight out of an artisan bakery. Since then, Dutch oven bread has been my go-to method: no fancy equipment, no complicated steps, just reliable results every time.
Dutch ovens have been used for centuries, originally designed for cooking over an open flame. Their thick walls and tight-fitting lids create an ideal environment for baking bread, trapping steam to produce a crisp crust and airy interior. Long before modern ovens, bakers relied on similar techniques to create hearty, flavorful loaves.
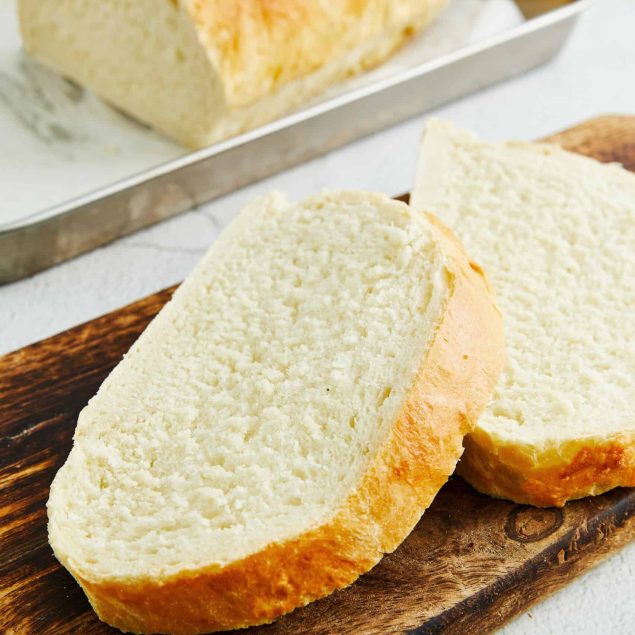
Dutch oven bread is as simple as it gets: mix flour, water, yeast, sugar, and salt, and let time work its magic. Whether you’re making a classic white loaf or experimenting with whole wheat or add-ins like nuts and herbs, this method delivers consistent, bakery-quality results.
The Magic Of Steam
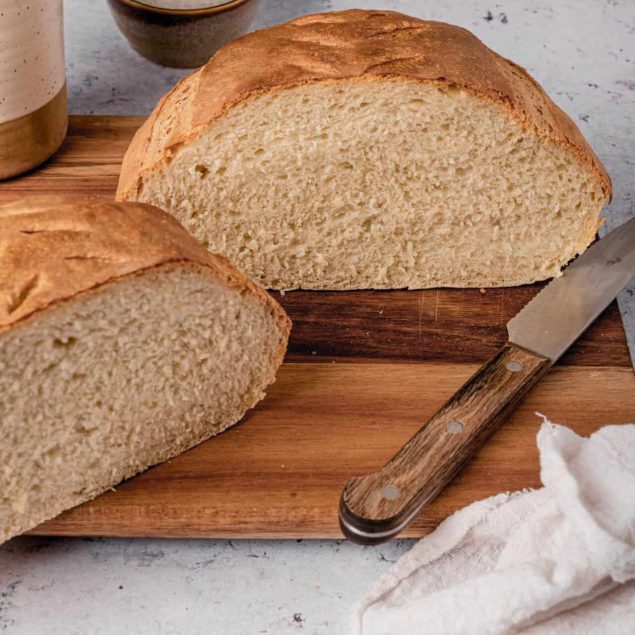
Why does a Dutch oven work so well for bread? It’s all about the steam. When the dough is placed in a preheated Dutch oven and covered, moisture from the dough is trapped inside. This keeps the crust from forming too soon, allowing the bread to rise fully. Once the lid is removed, the dry heat creates a crisp, golden crust.
Baking with steam is a trick used by professional bakers, but it’s tough to replicate in a regular home oven. The Dutch oven solves that problem, giving home bakers bakery-quality results without any special equipment.
Ingredients
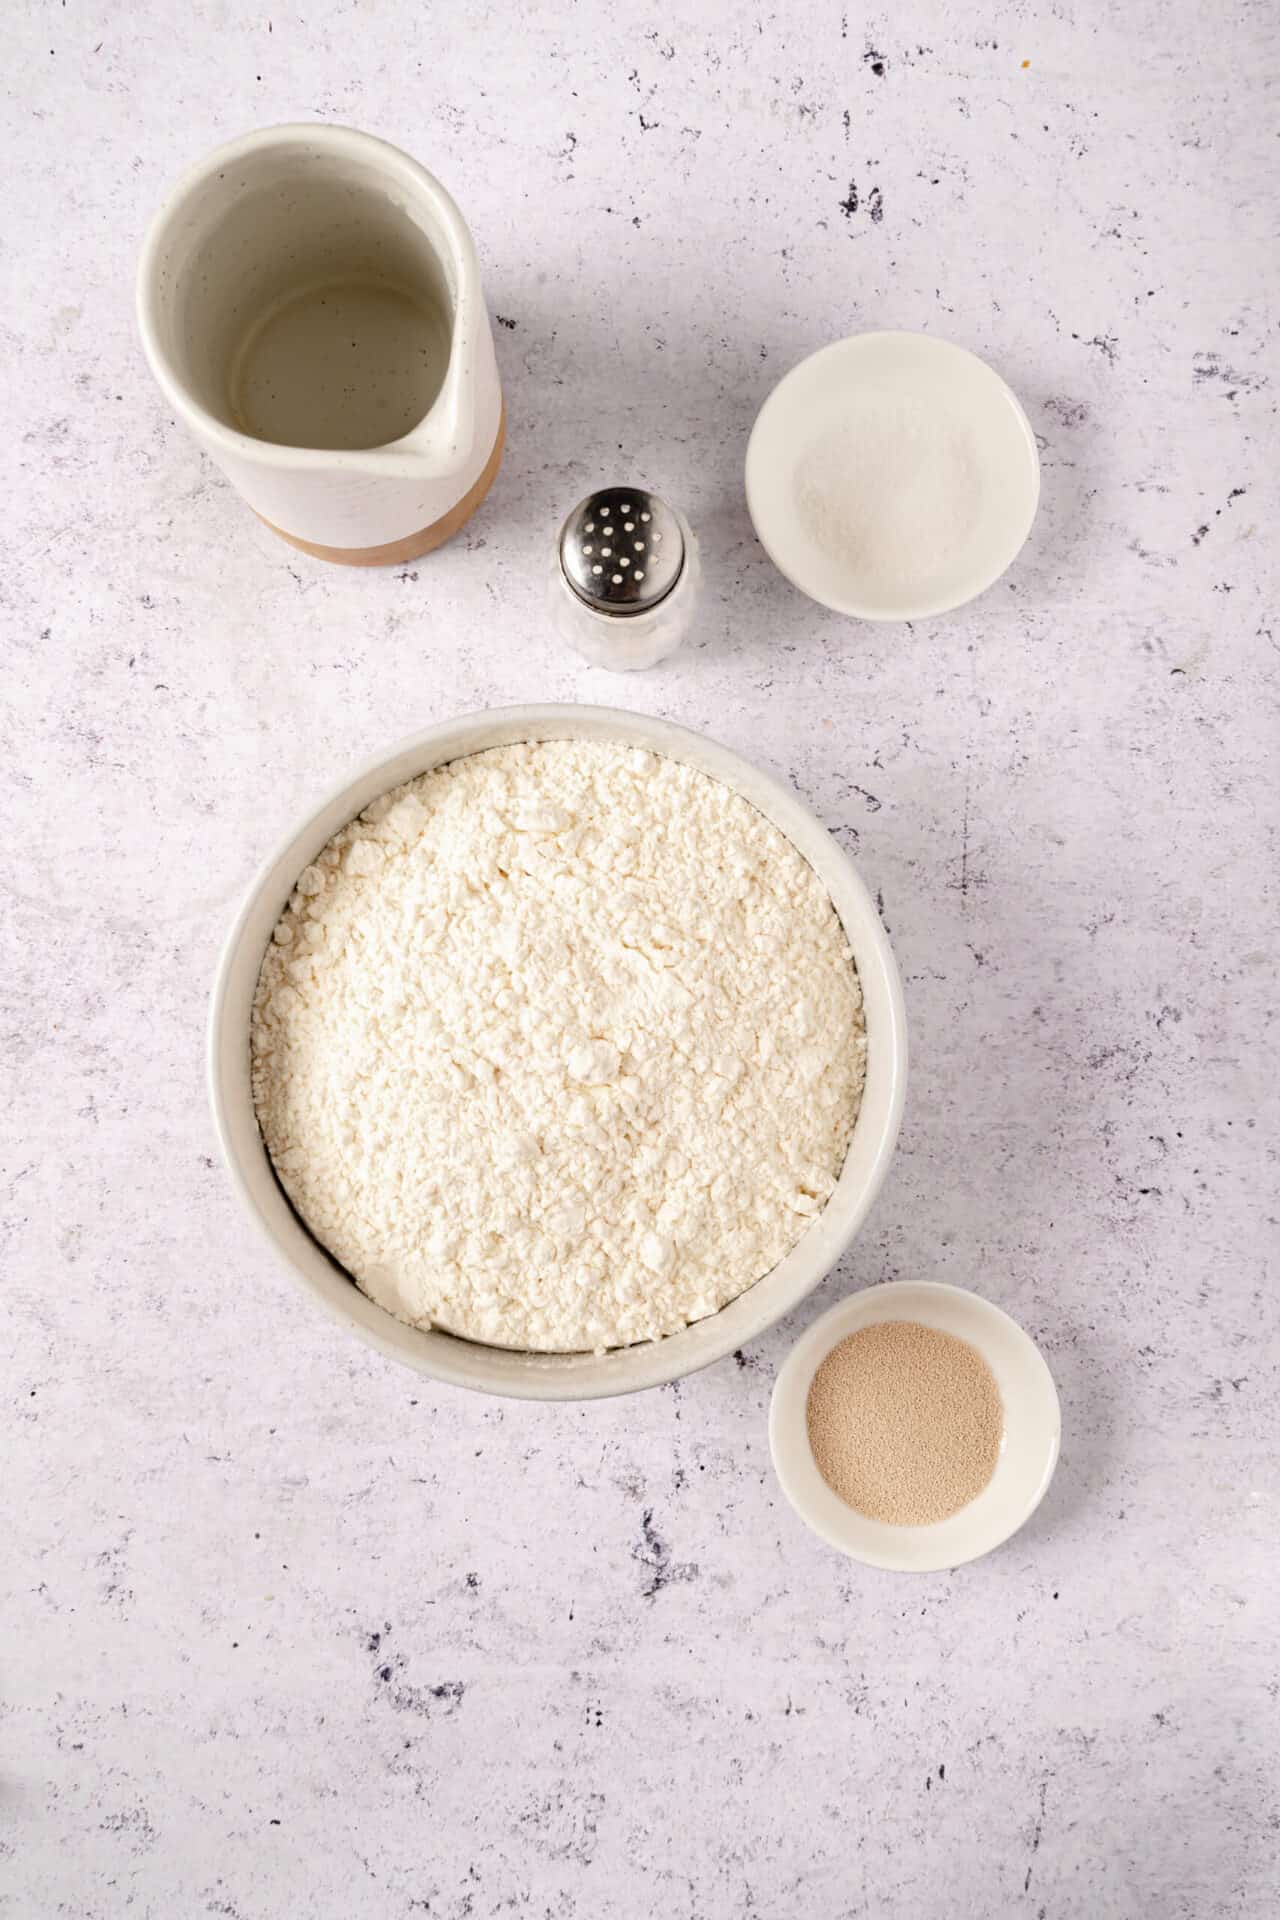
- 3 1/4 cups all-purpose flour
- 1 1/2 teaspoons kosher salt
- 2 pinches granulated sugar
- 1 packet active dry yeast (2 1/4 teaspoons)
- 1 1/2 cups warm water
How To Make Dutch Oven Bread
Step 1: In a large bowl, combine the flour, salt, sugar, and yeast. Gradually add the warm water and stir until a sticky dough forms. If the dough seems dry, add 1 more tablespoon of water at a time until it’s no longer dry.
Step 2: Cover the bowl with a clean, damp dish towel and set it in a warm place to rise for 2 hours or up to overnight in the fridge. If the dough is refrigerated overnight, let it sit at room temperature for about 30-45 minutes before baking.
Step 3: About 30 minutes before the dough is done rising, preheat your oven to 450°F, placing a covered 2 3/4 quart Dutch oven (or similar size baking dish) inside to preheat.
Step 4: Place a large square of parchment paper on the counter and sprinkle it with flour. Transfer the dough to the floured parchment paper, gently folding it on top of itself a few times to form a round loaf. Let it rest on the parchment while the oven finishes preheating.
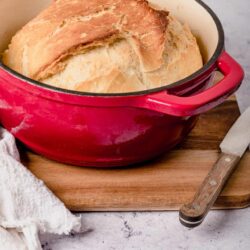
Step 5: Carefully remove the hot Dutch oven from your oven. Using the parchment paper, transfer the dough into the Dutch oven and replace the lid.
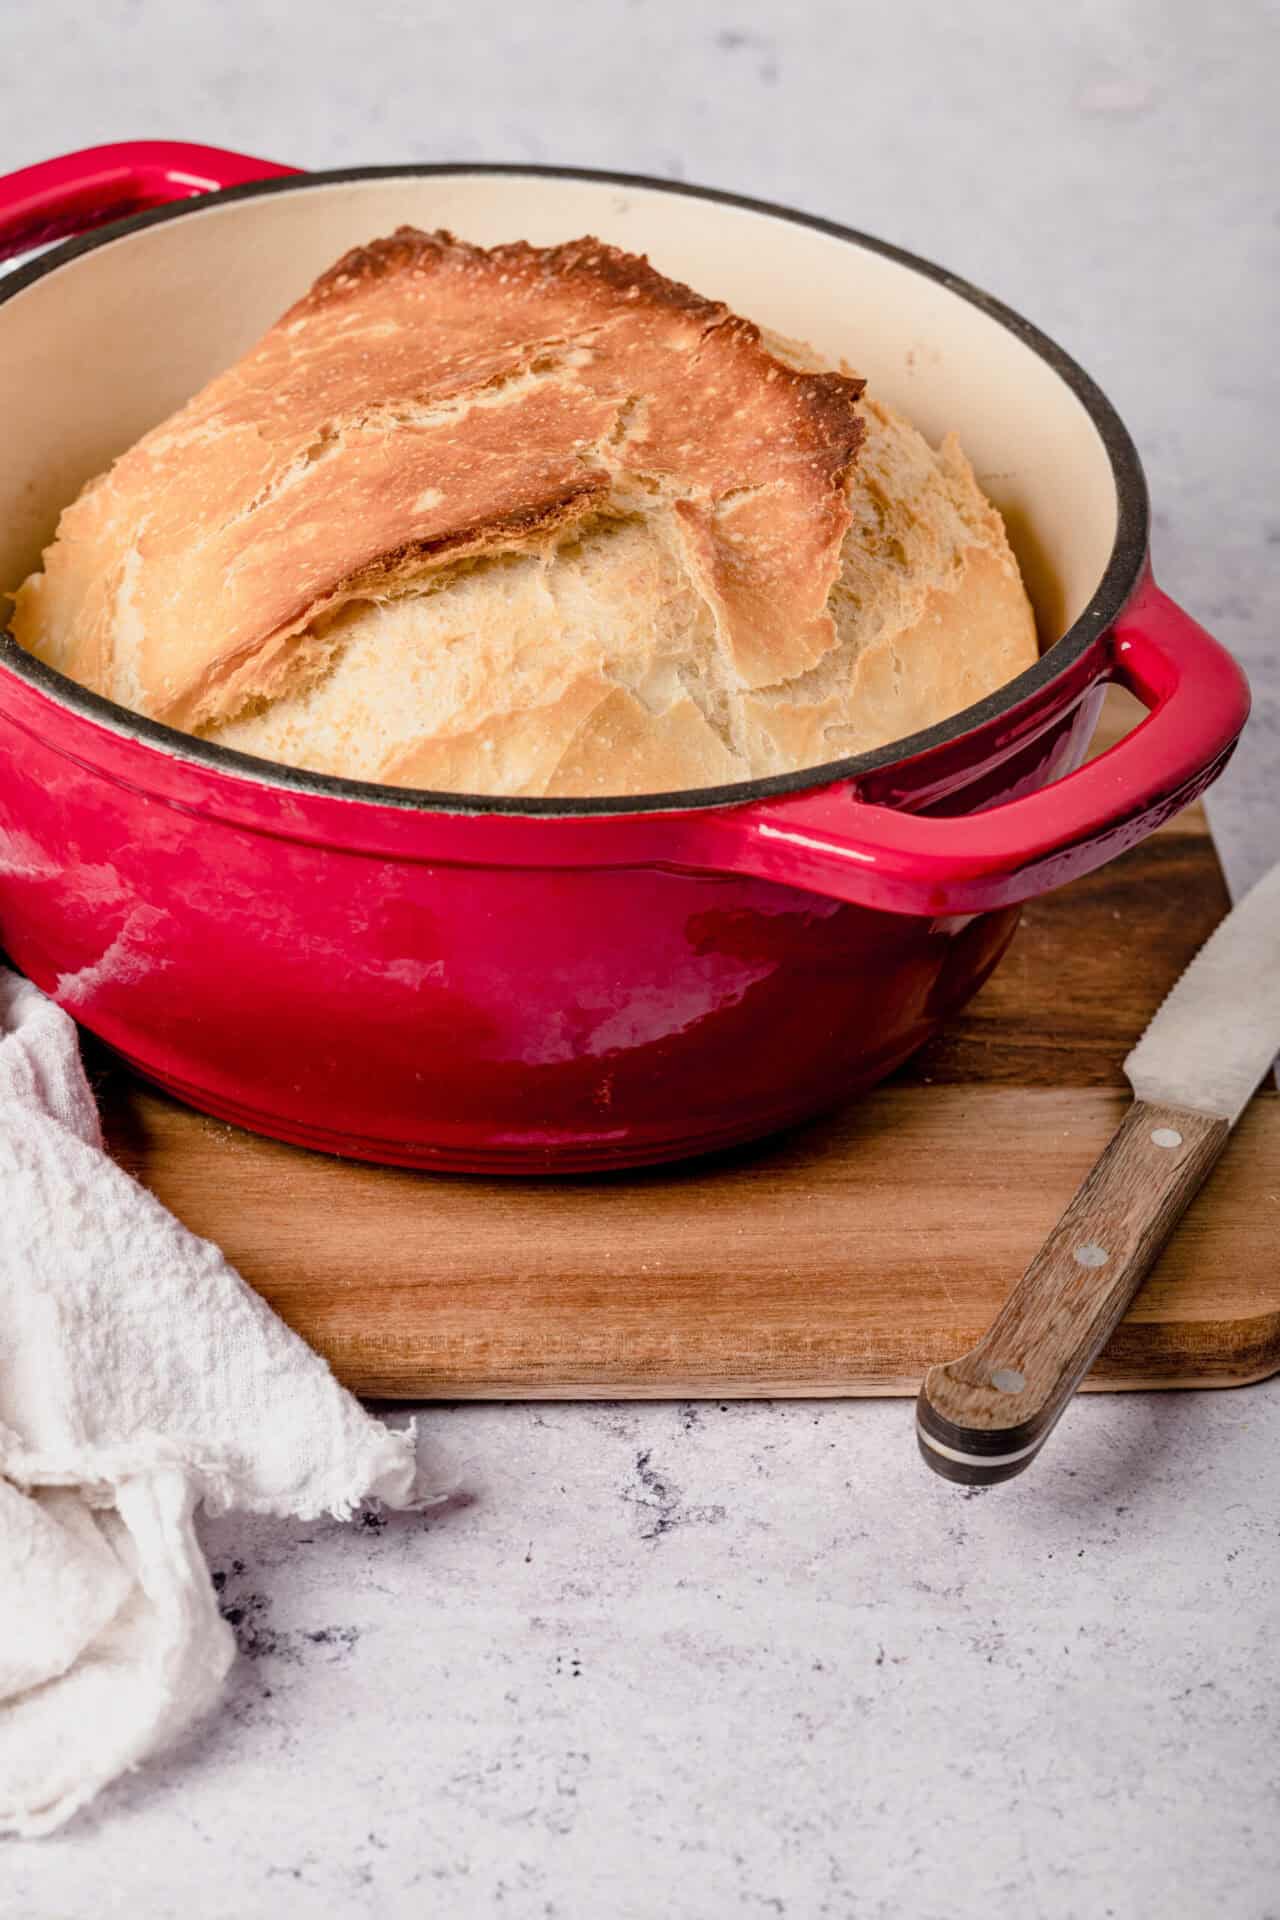
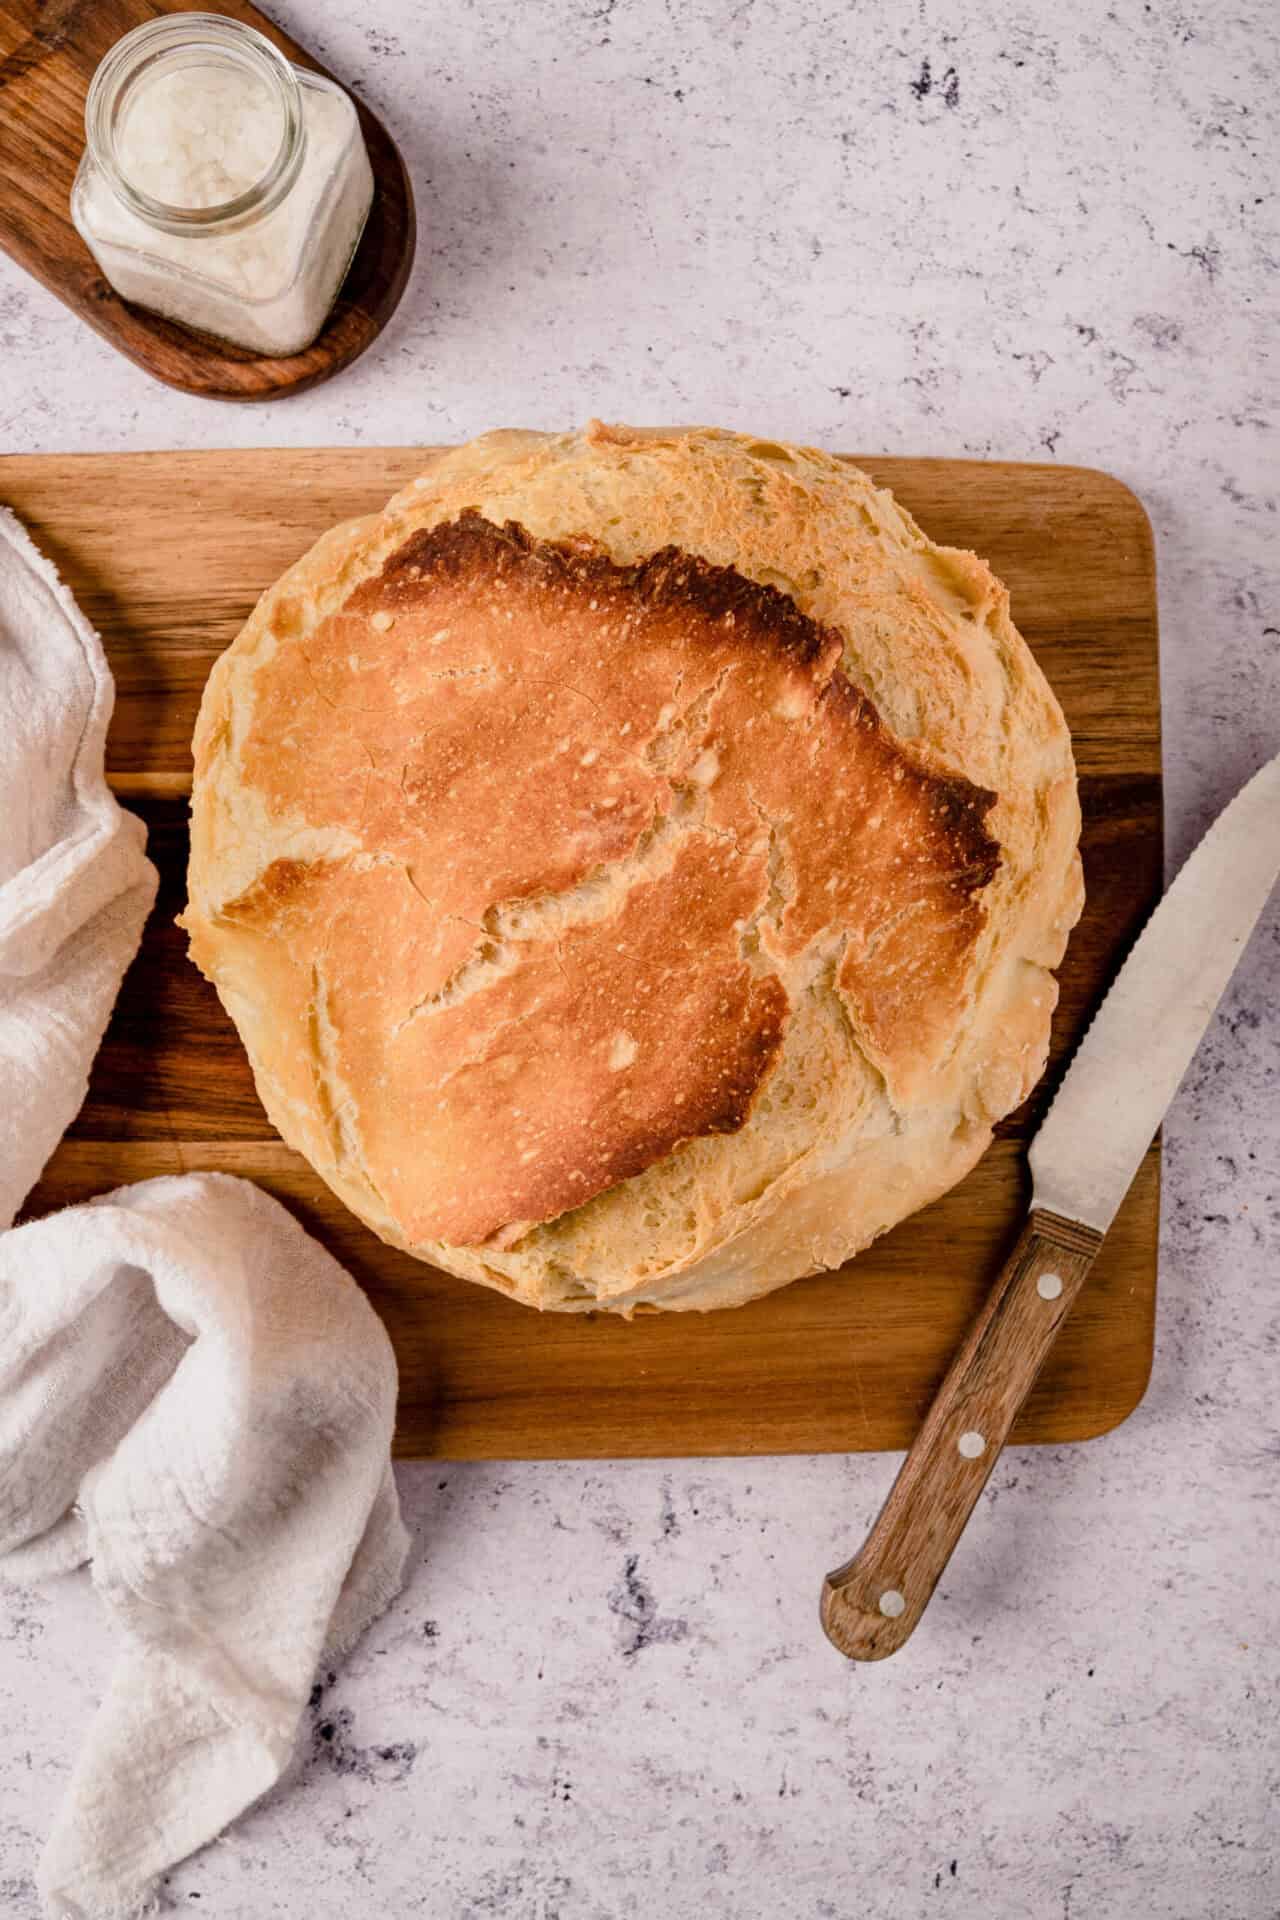
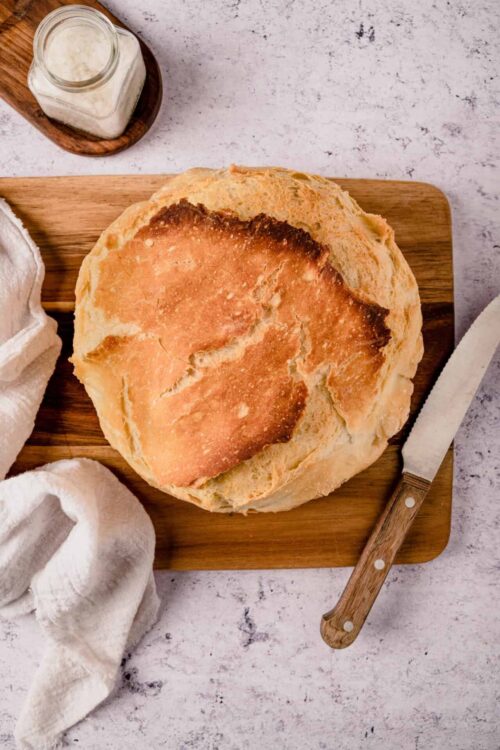
Step 6: Bake for 35 minutes, then remove the lid and bake for an additional 10-15 minutes until the crust is golden brown and it feels hollow when you tap on it.
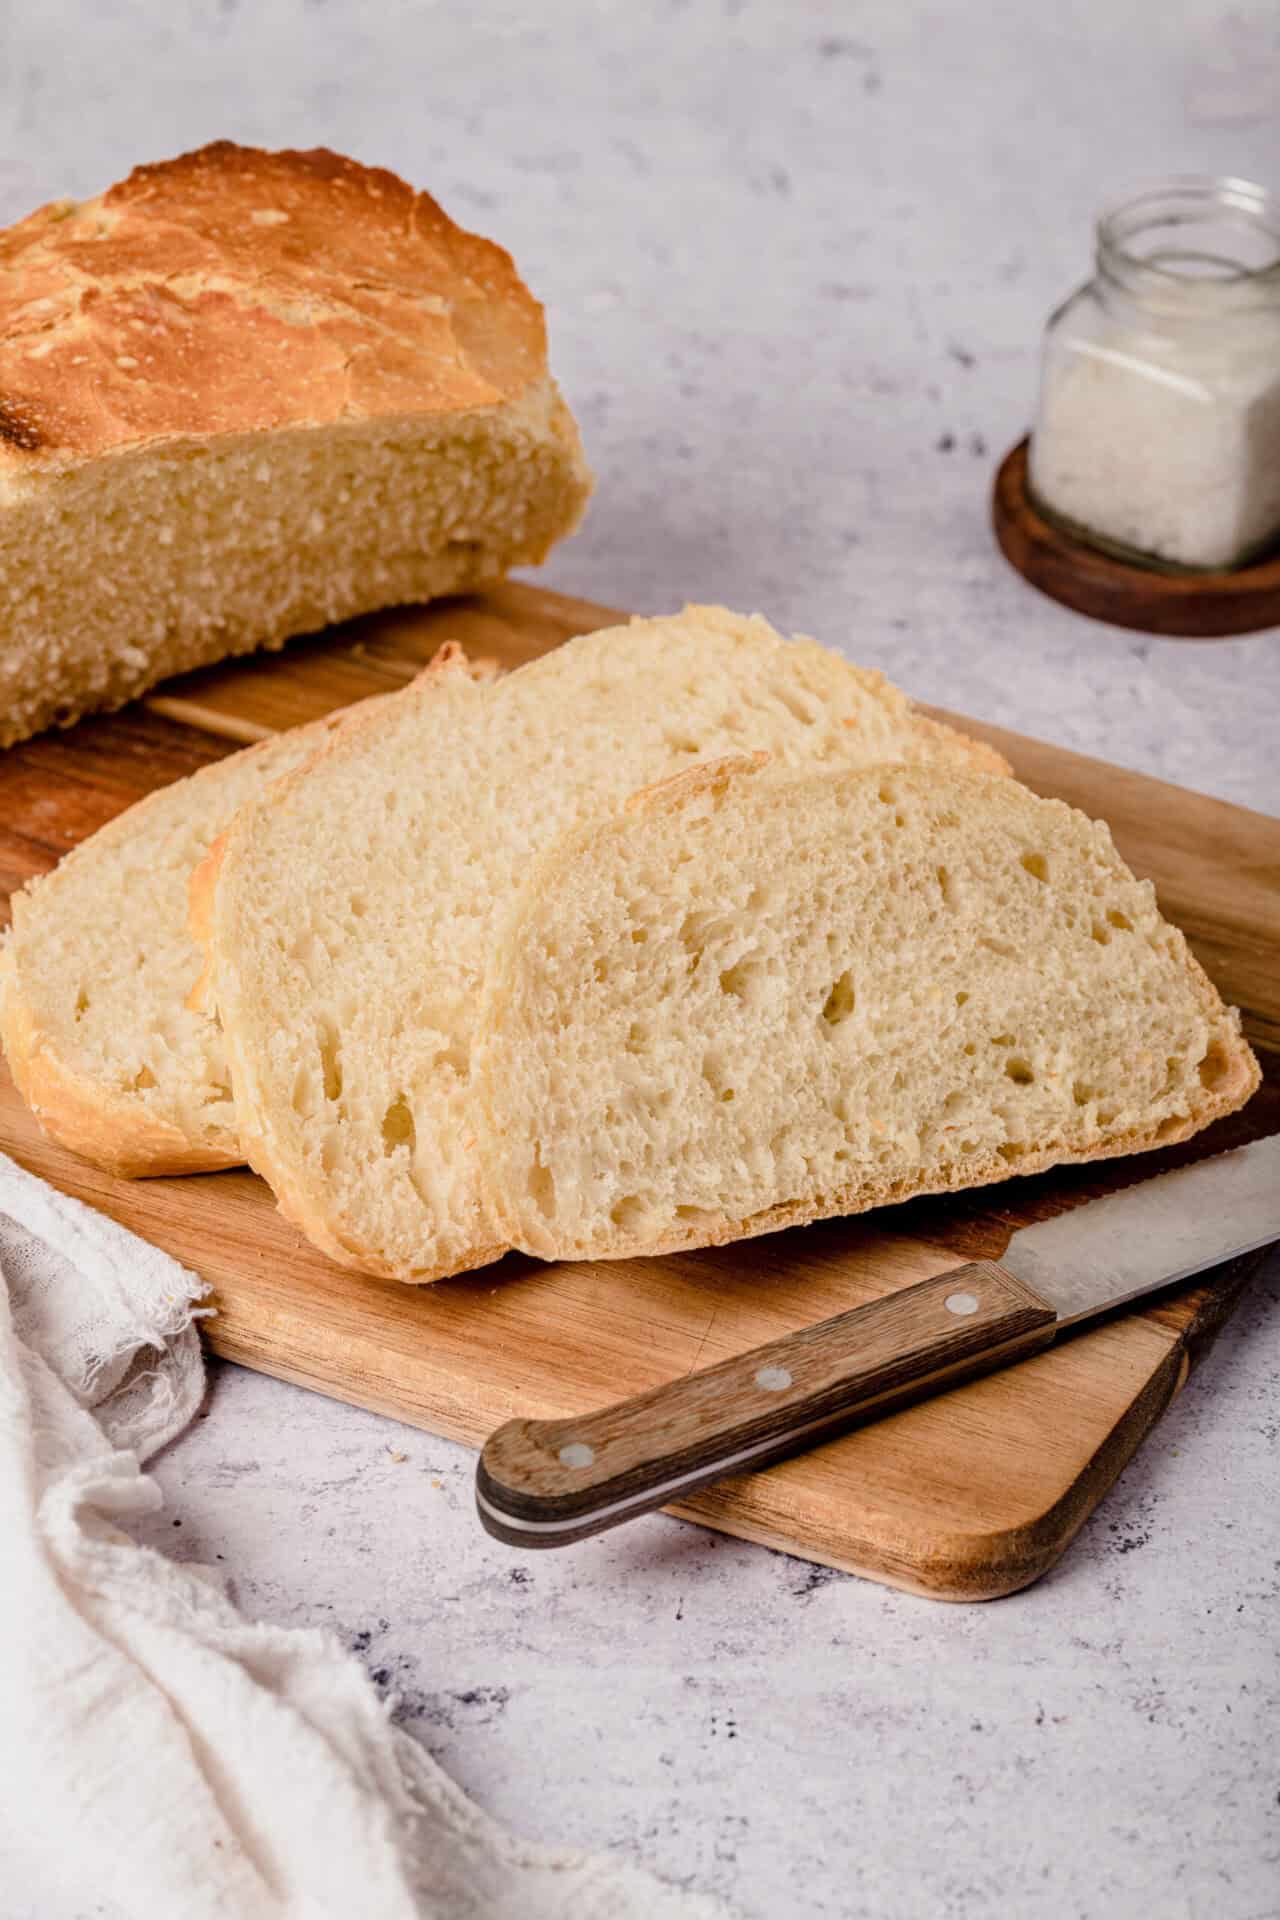
Step 7: Remove the Dutch oven from the oven, and carefully lift the bread out using the parchment paper. Let it cool on a rack for about 30 minutes before slicing.
FAQs & Tips
How Do I Store Leftovers?
Once baked, your loaf will stay fresh at room temperature for 2-3 days. To keep it longer, wrap it in plastic wrap and freeze for up to 3 months. When you’re ready to eat, pop the thawed loaf back into a preheated oven for 3-5 minutes to bring it back to life.
Do I Need To Preheat The Dutch Oven?
A hot pot is essential for that signature crust. If you put dough into a cold Dutch oven, you’ll miss out on the crispy, crackly exterior that makes this bread so good.
Can I Let The Dough Rise Overnight?
Absolutely. A slow overnight rise develops deeper flavor and improves the bread’s texture. Just pop it in the fridge after mixing and let the yeast do its thing while you sleep. Let it sit at room temperature for about 30-45 minutes before baking.
Serving Suggestions
I recommend serving Dutch oven bread with this Boursin Cheese Pasta, or this incredible Baked Ziti. During winter, this flavorful Beef Stew is also a great choice for a hearty meal. Alternatively, Dutch oven bread works beautifully in this Open-Faced Hot Honey And Ham Grilled Cheese.
Dutch Oven Bread
Ingredients
- 3 1/4 cups all-purpose flour
- 1 1/2 teaspoons kosher salt
- 2 pinches granulated sugar
- 1 packet active dry yeast 2 1/4 teaspoons
- 1 1/2 cups warm water
Instructions
- In a large bowl, combine the flour, salt, sugar, and yeast. Gradually add the warm water and stir until a sticky dough forms. If the dough seems dry, add 1 more tablespoon of water at a time until it's no longer dry.
- Cover the bowl with a clean, damp dish towel and set it in a warm place to rise for 2 hours or up to overnight in the fridge. If the dough is refrigerated overnight, let it sit at room temperature for about 30-45 minutes before baking.
- About 30 minutes before the dough is done rising, preheat your oven to 450°F, placing a covered 2 3/4 quart Dutch oven (or similar size baking dish) inside to preheat.
- Place a large square of parchment paper on the counter and sprinkle it with flour. Transfer the dough to the floured parchment paper, gently folding it on top of itself a few times to form a round loaf. Let it rest on the parchment while the oven finishes preheating.
- Carefully remove the hot Dutch oven from your oven. Using the parchment paper, transfer the dough into the Dutch oven and replace the lid.
- Bake for 35 minutes, then remove the lid and bake for an additional 10-15 minutes until the crust is golden brown and it feels hollow when you tap on it.
- Remove the Dutch oven from the oven, and carefully lift the bread out using the parchment paper. Let it cool on a rack for about 30 minutes before slicing.
Leave a Comment