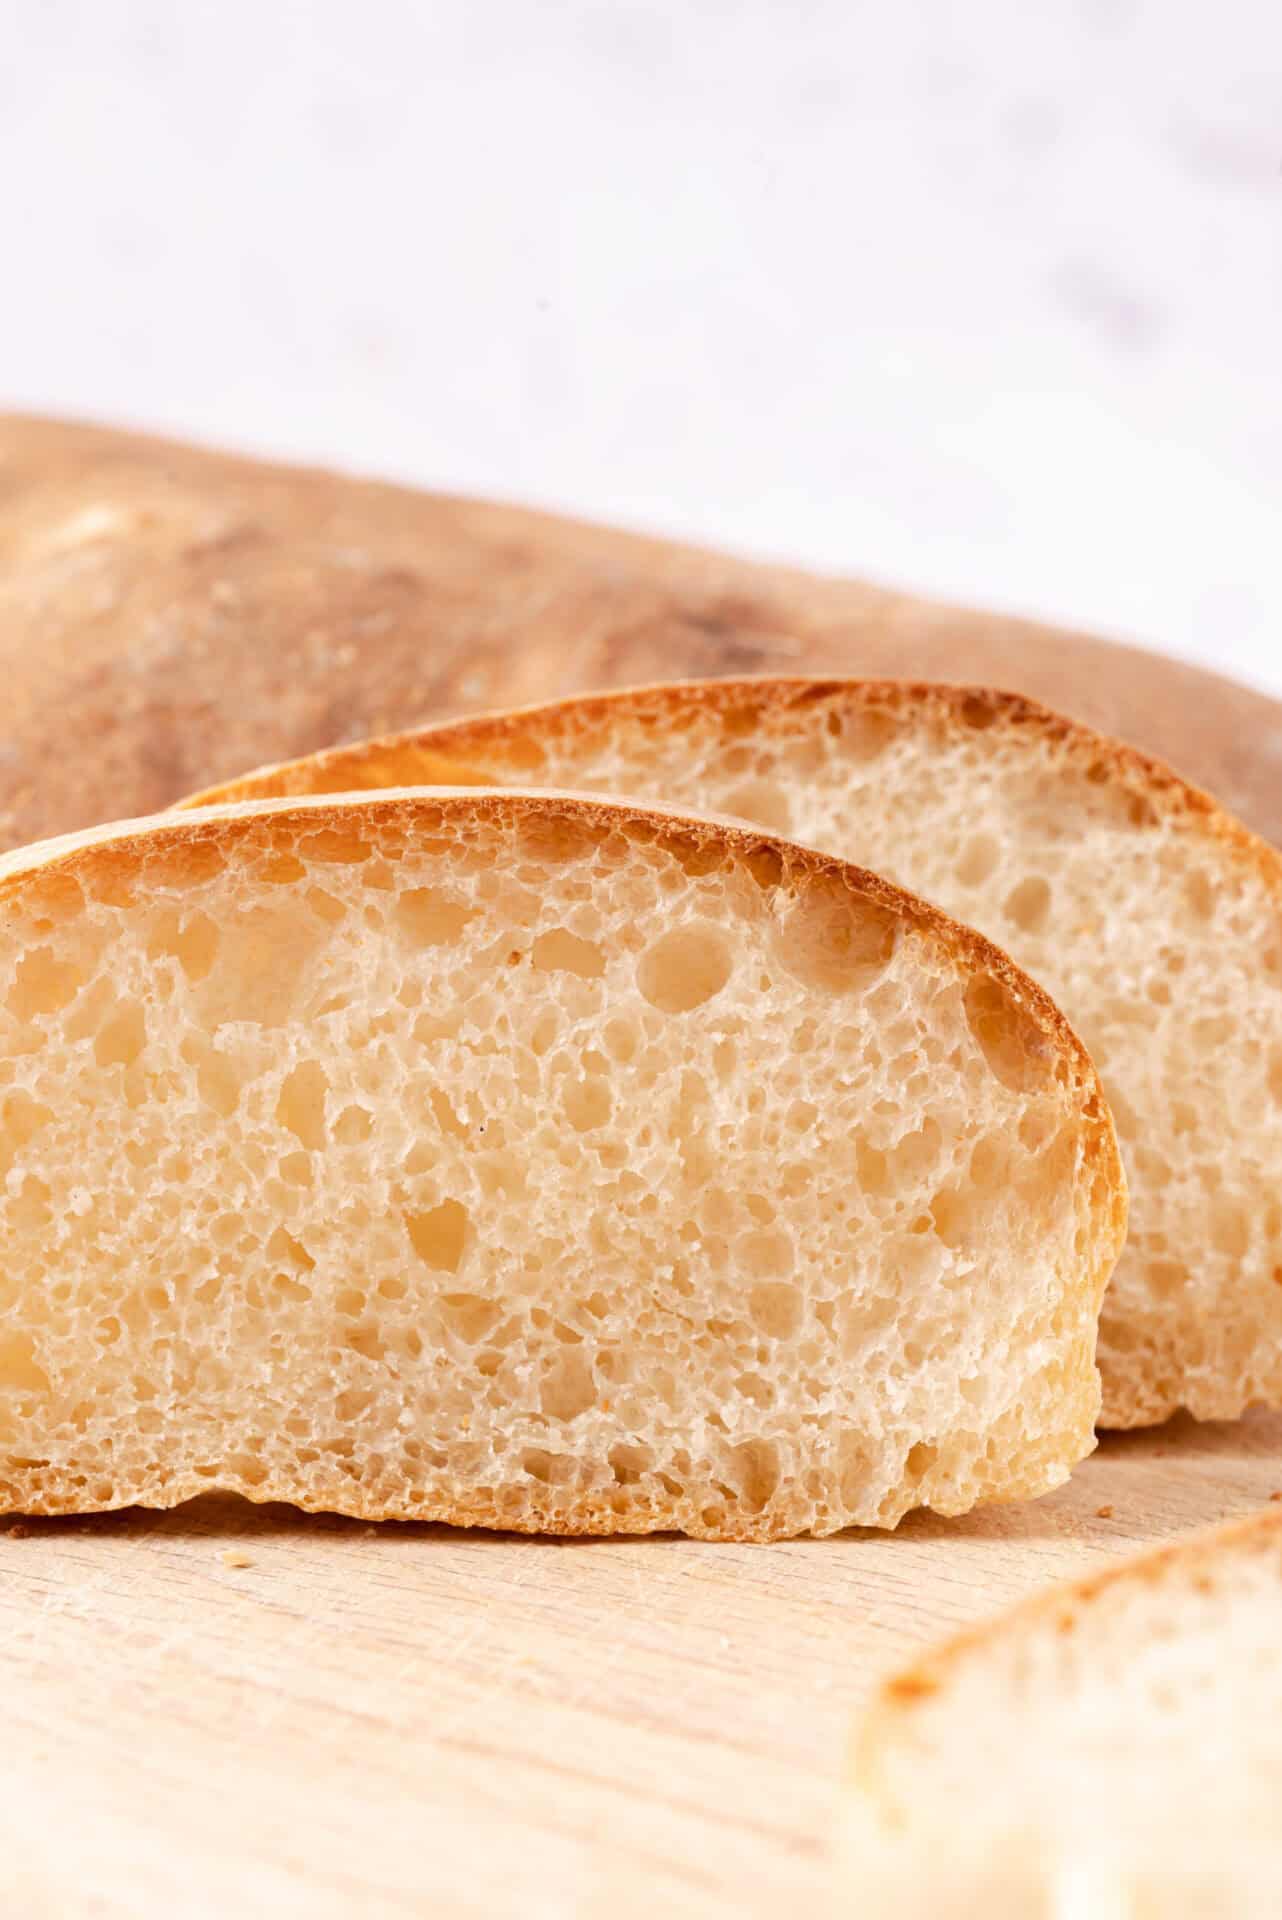
Perfectly chewy with a crisp crust—this homemade Ciabatta Bread Recipe is easier than you think!
While you might imagine that ciabatta bread is an Ancient Roman recipe, handed down through the centuries by devoted Italian bakers, it is, in fact, a modern bread recipe. A modern bread recipe with a mission, in fact. In 1982, small-town Italian bakers were feeling the downsides of increased globalization. In bread terms, at least. The French baguette was becoming more and more popular, and these bakers felt not only annoyed that it was a French interloper disrupting their business, but they realized they didn’t have anything Italian that was comparable to offer their customers. Enter baker Francesco Favaron and flour mill owner Arnaldo Cavallari from Polesine, who produced a white bread with a thin but crisp crust they named ciabatta polesana, after the region they lived in.
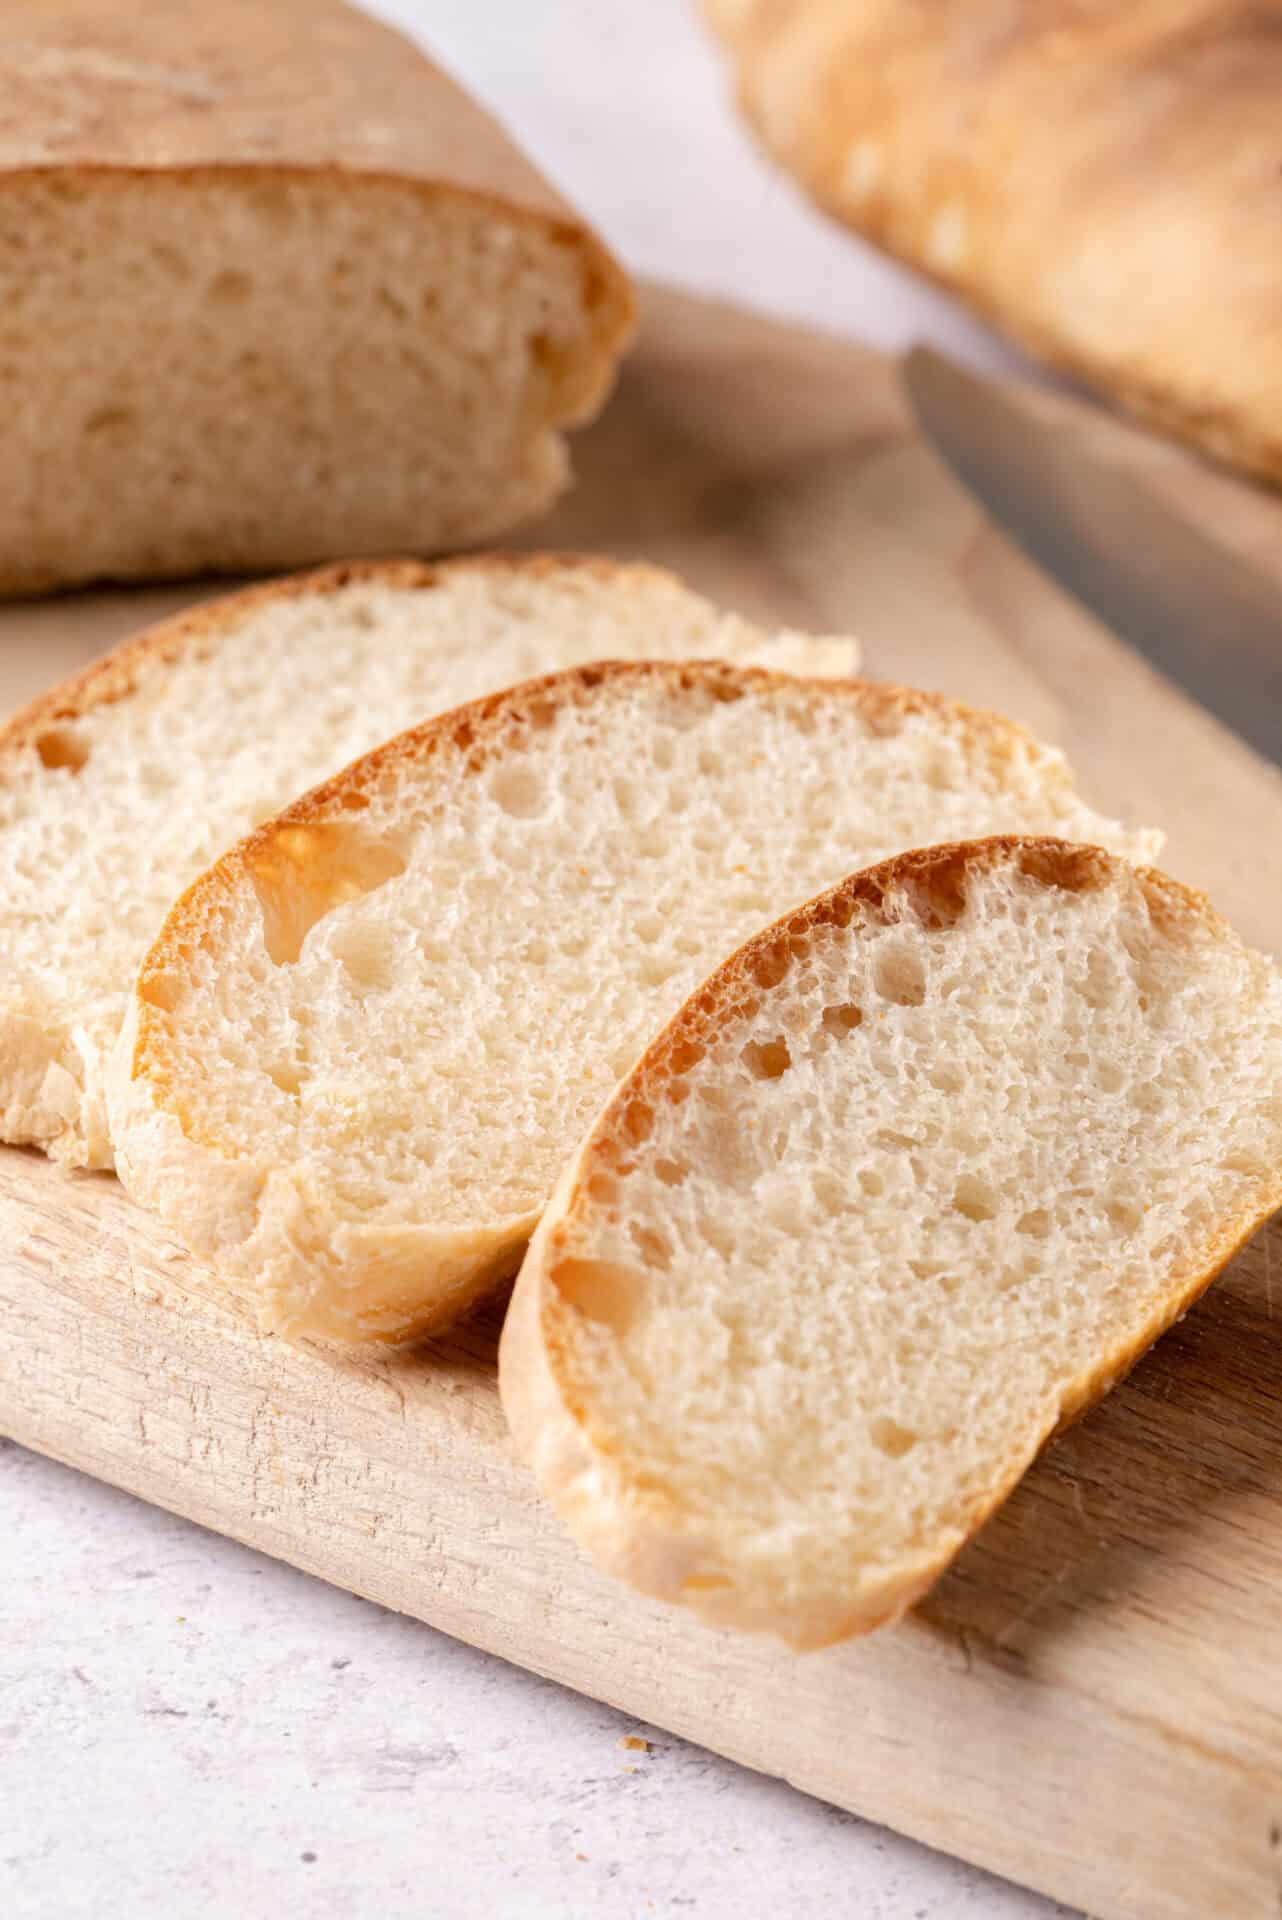
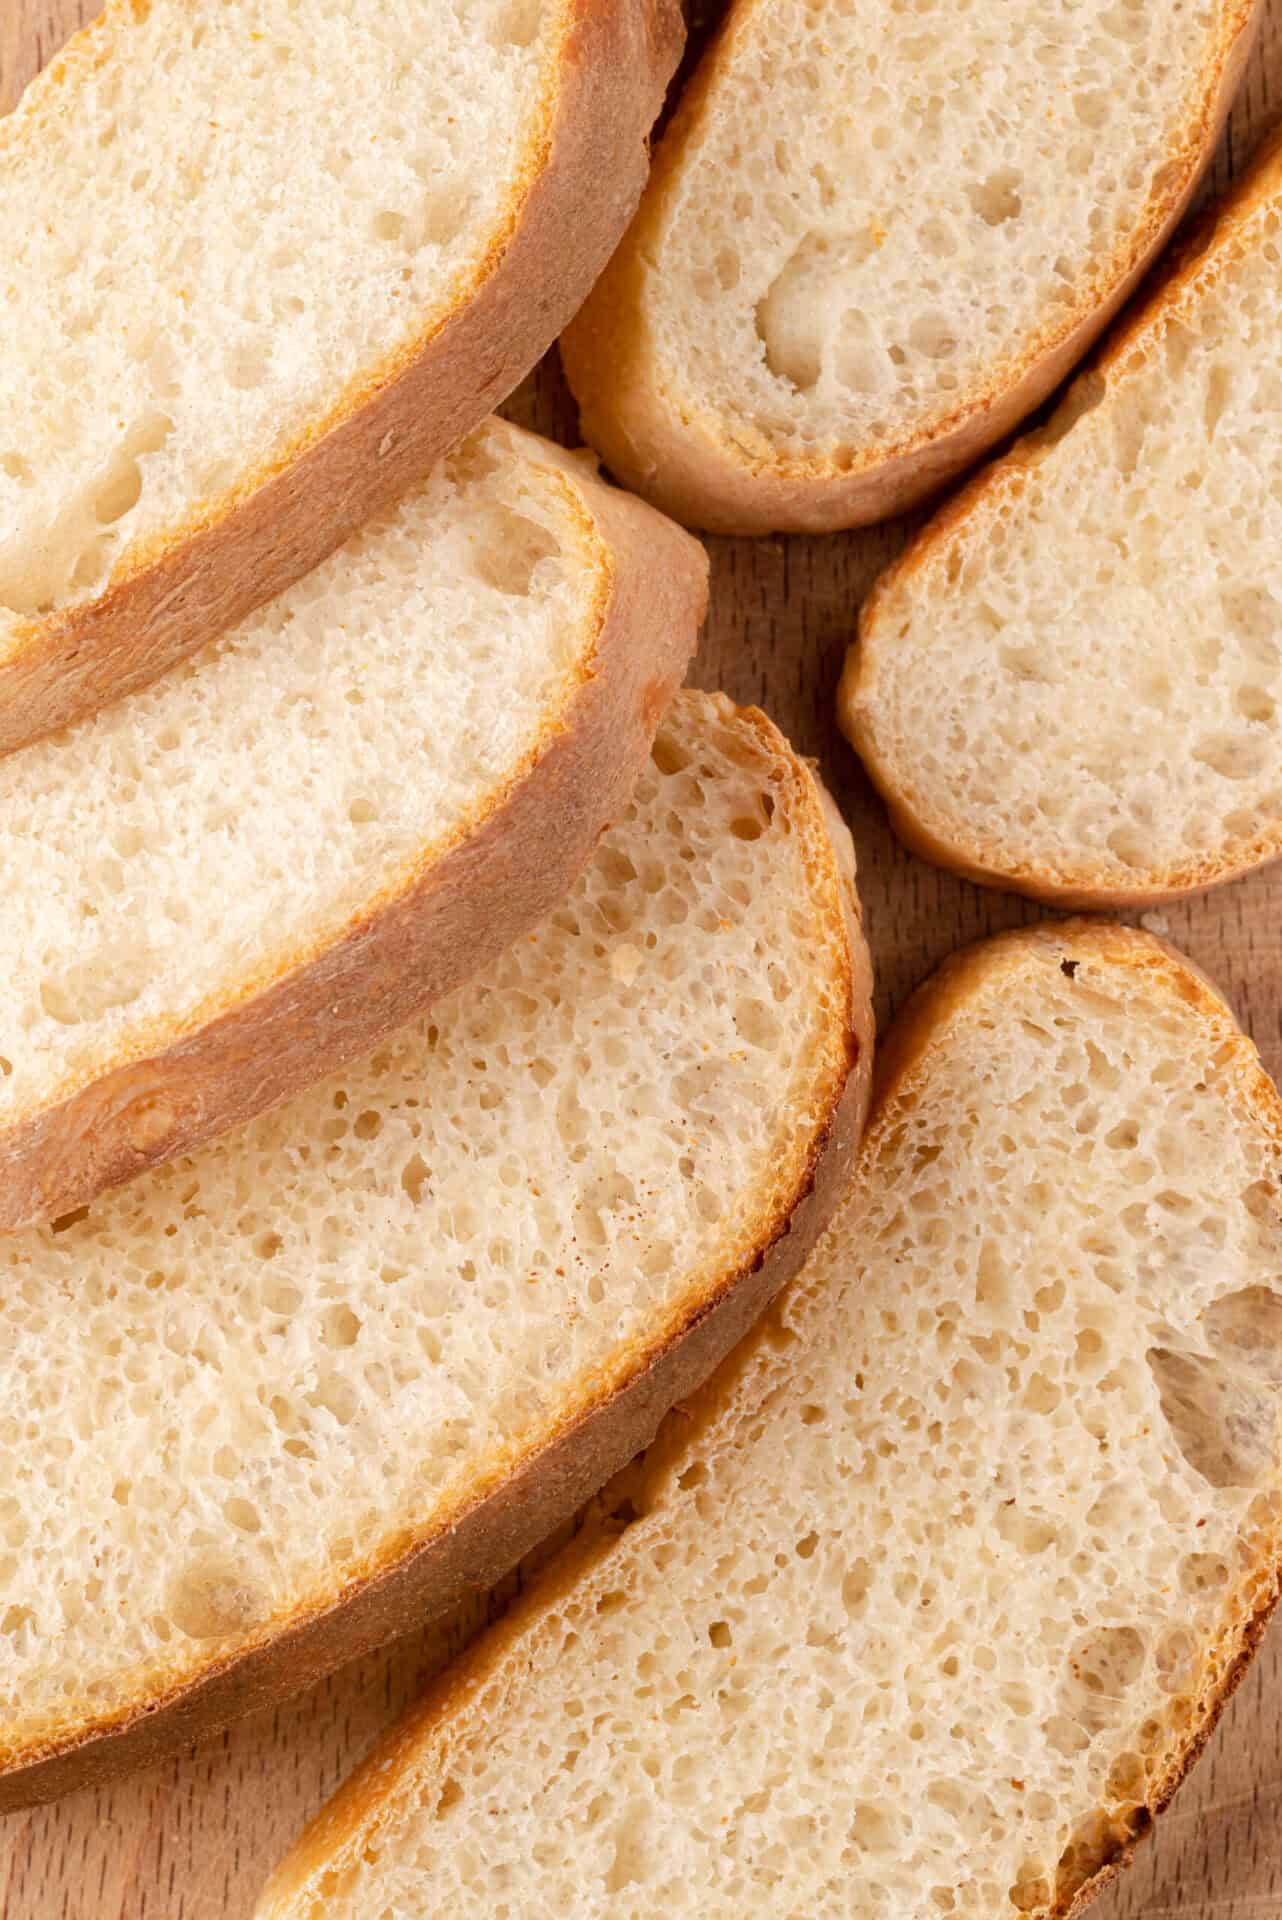
The word ciabatta actually means “slipper” in Italian, a reference to its long shape. It’s oblong, but not as narrow as the French baguette. The wider dimensions make the loaves resemble slippers—the big, puffy kind you might slip on during the winter months to pad around the house.
Even if you are a novice baker, you will love this ciabatta bread that you can bake at home. It’s a simple recipe and nearly foolproof. You might never buy a loaf of ciabatta from the store again! While it’s in the oven, it smells amazing, and there’s nothing like warm, home-baked bread for breakfast, sandwiches, or to accompany your main dish. Finally, if you think, “I don’t have time to bake bread!” don’t panic. Ciabatta bread freezes beautifully, so you can bake it on a weekend and put it in the freezer with little fuss and a big payoff.
Yeast 101
If you’re new to bread baking, you may be surprised that there are choices when it comes to yeast. Standing in the baking aisle, you might see active dry yeast, rapid rise yeast, and instant yeast. Active dry yeast (the one we’re using here) needs to be activated in room temperature water before mixing into dry ingredients, allowing the yeast to “proof.” Instant yeast is easy to work with, can be added directly to dry ingredients, and makes for a fairly quick rise time. It is user-friendly and forgiving. Rapid rise yeast is actually a type of instant yeast. However, it is milled into such tiny granules that you actually don’t have the same span of time to work, making rapid rise a bit tricky for beginners.
How To Make Ahead And Store
Ciabatta bread is a great make-ahead bread. If you want to make it for use at a later time, simply let the loaves cool. Wrap them in plastic wrap and then foil, or if they fit into resealable freezer bags, place them in bags. You can freeze the loaves for up to 3 months. To thaw, simply set out at room temperature for about 1 hour. Once you serve the bread, wrap any leftovers in plastic wrap or place in a resealable bag. Leftovers will keep at room temperature for up to 2 days.
Serving Suggestions
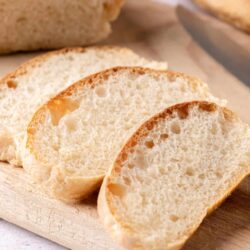
Personally, I love freshly baked ciabatta bread with a hearty pasta dish like Cheesy Baked Ziti. A side salad and a glass of red wine, and I am very happy. Or, on a chilly night, it is wonderful with a bowl of Beef Stew In Red Wine Sauce. But ciabatta actually has a lot of diverse uses. It’s wonderful toasted and topped with a mixture of diced tomato, garlic, fresh basil, salt, and olive oil as a quick bruschetta. Or, it can certainly be used for sandwiches, like Turkey And Hot Pepper Jelly Sandwiches. Finally, if you need breakfast or a snack, pop a slice of ciabatta bread in the toaster, slather with good butter, and enjoy bread at its simplest. Delicious!
Ciabatta Bread Recipe
Ingredients
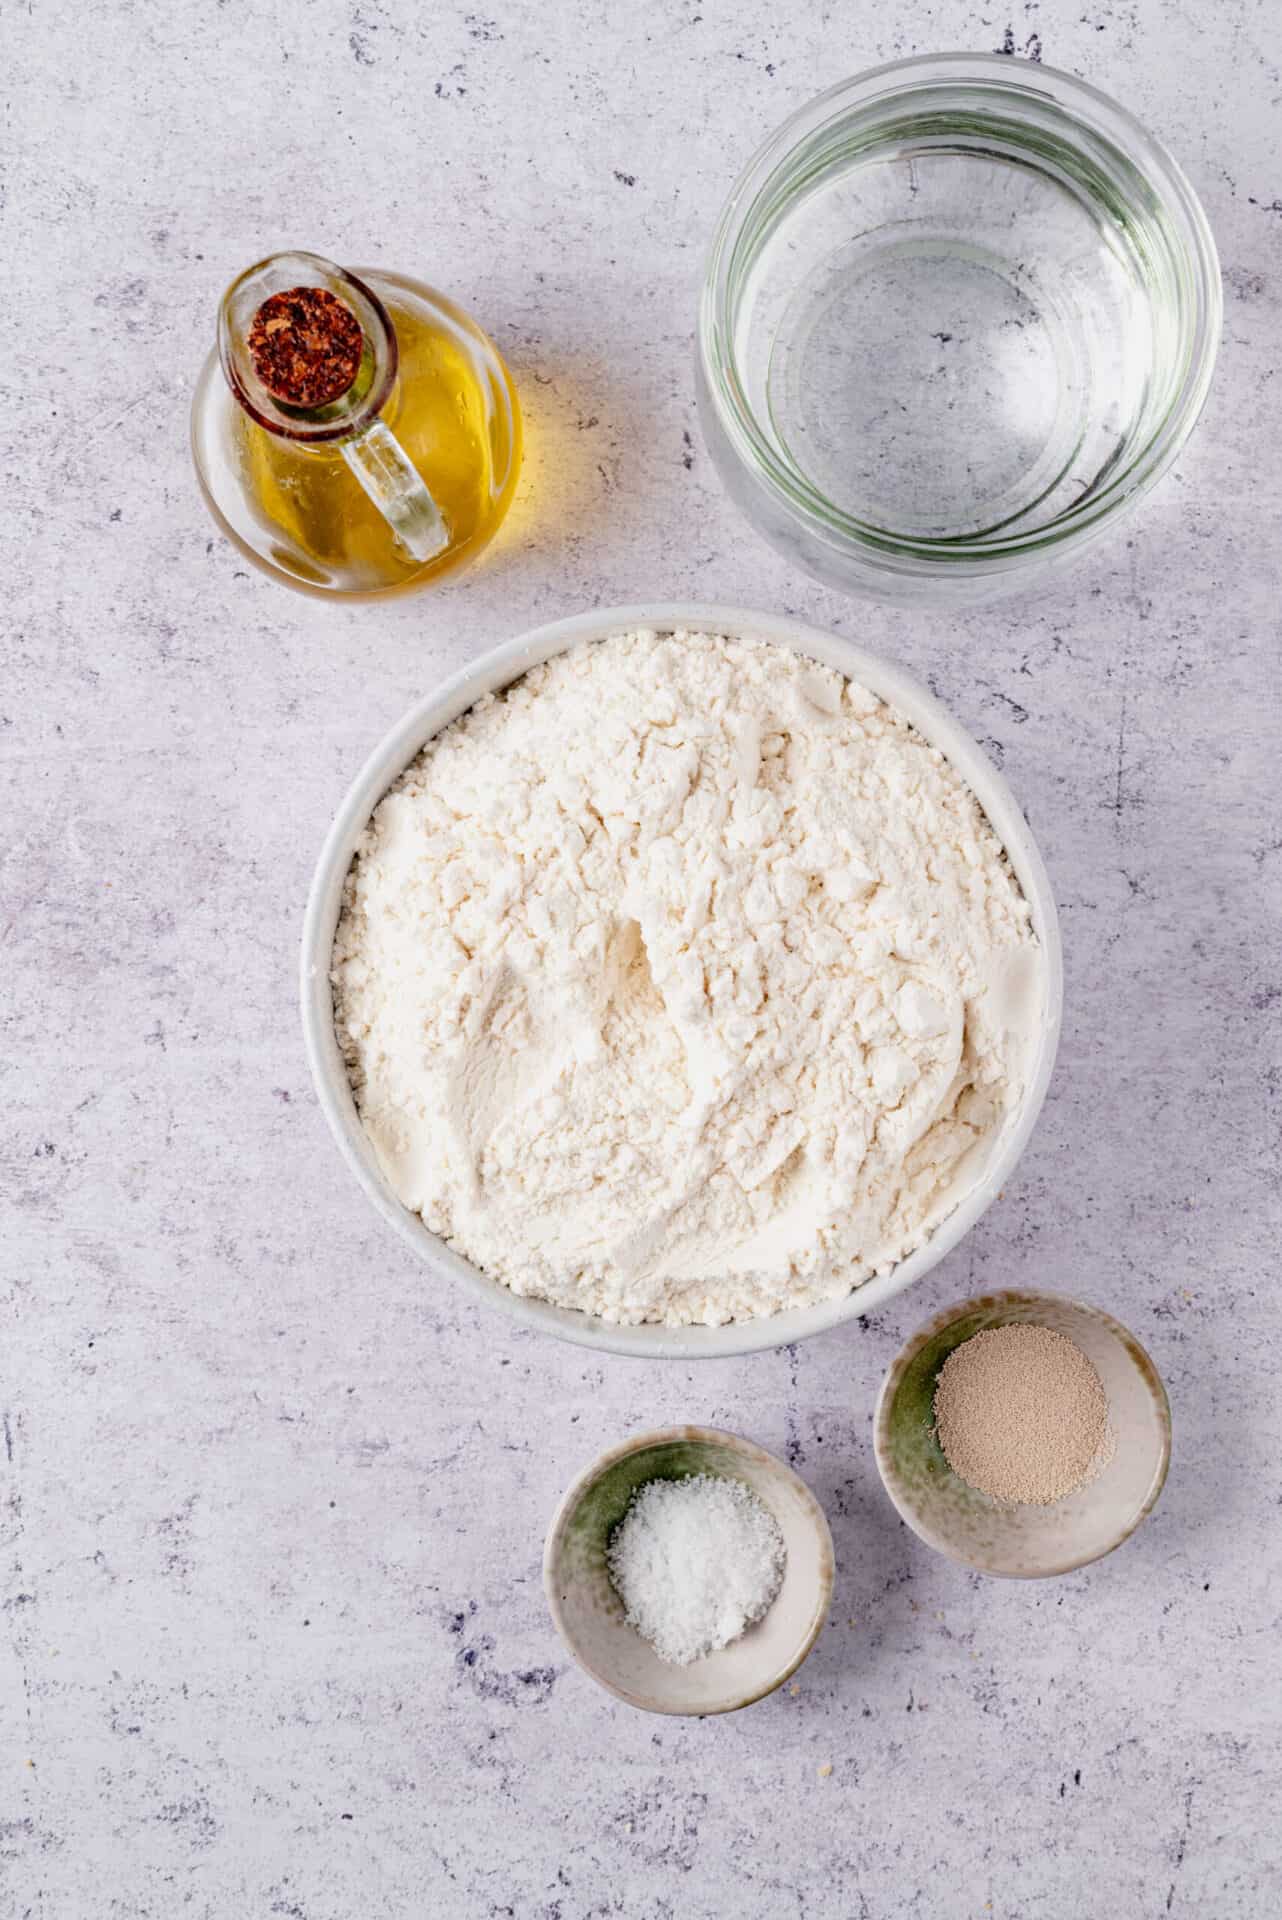
- 1 3/4 cups water divided (room temperature)
- 1/2 teaspoon active dry yeast
- 4 cups all-purpose flour
- 1 1/2 teaspoons salt
- Vegetable oil to lightly oil the bowl
Instructions
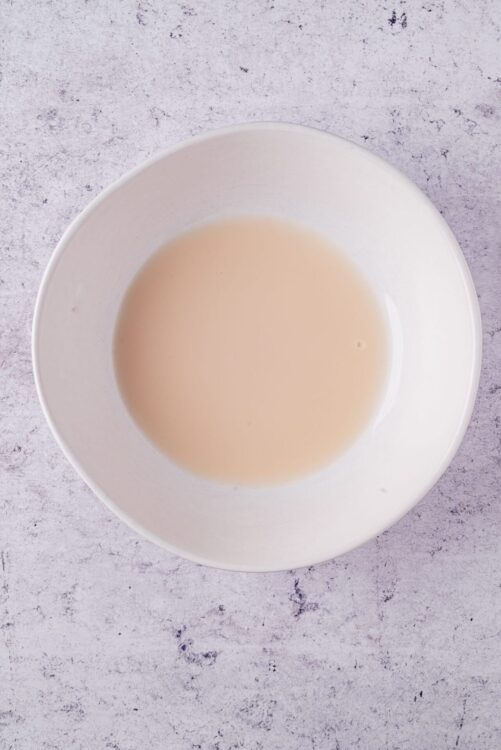
- In a large bowl, combine 1/4 cup of water and the yeast. Allow to sit for 5 minutes until foamy.
- Add 3 cups of flour and the remaining 1 1/2 cups of water to the yeast mixture. Stir until a shaggy dough forms.
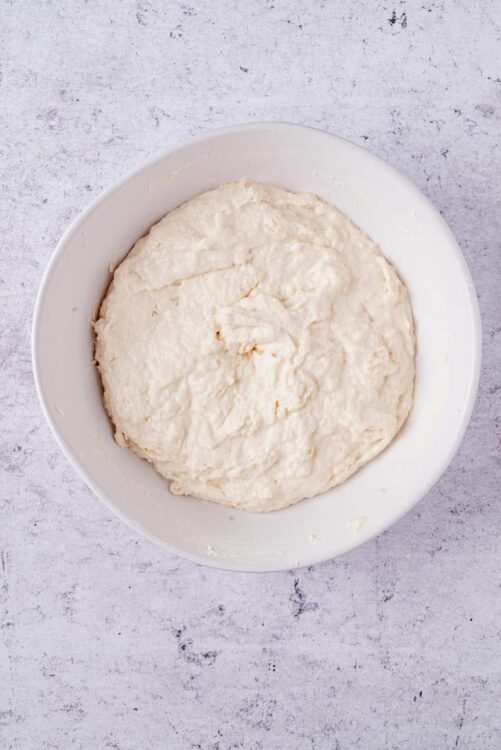
- Cover the bowl with a damp cloth and let it rest for 20 minutes. This allows the flour to absorb the water.
- Add the remaining 1 cup of flour and salt to the dough. Mix until combined. Transfer the dough to a well-floured surface and knead for about 10 minutes, until smooth and elastic.
- Place the dough in a lightly oiled bowl, cover with plastic wrap, and let it rise at room temperature for 1 1/2 hours, or until doubled in size.
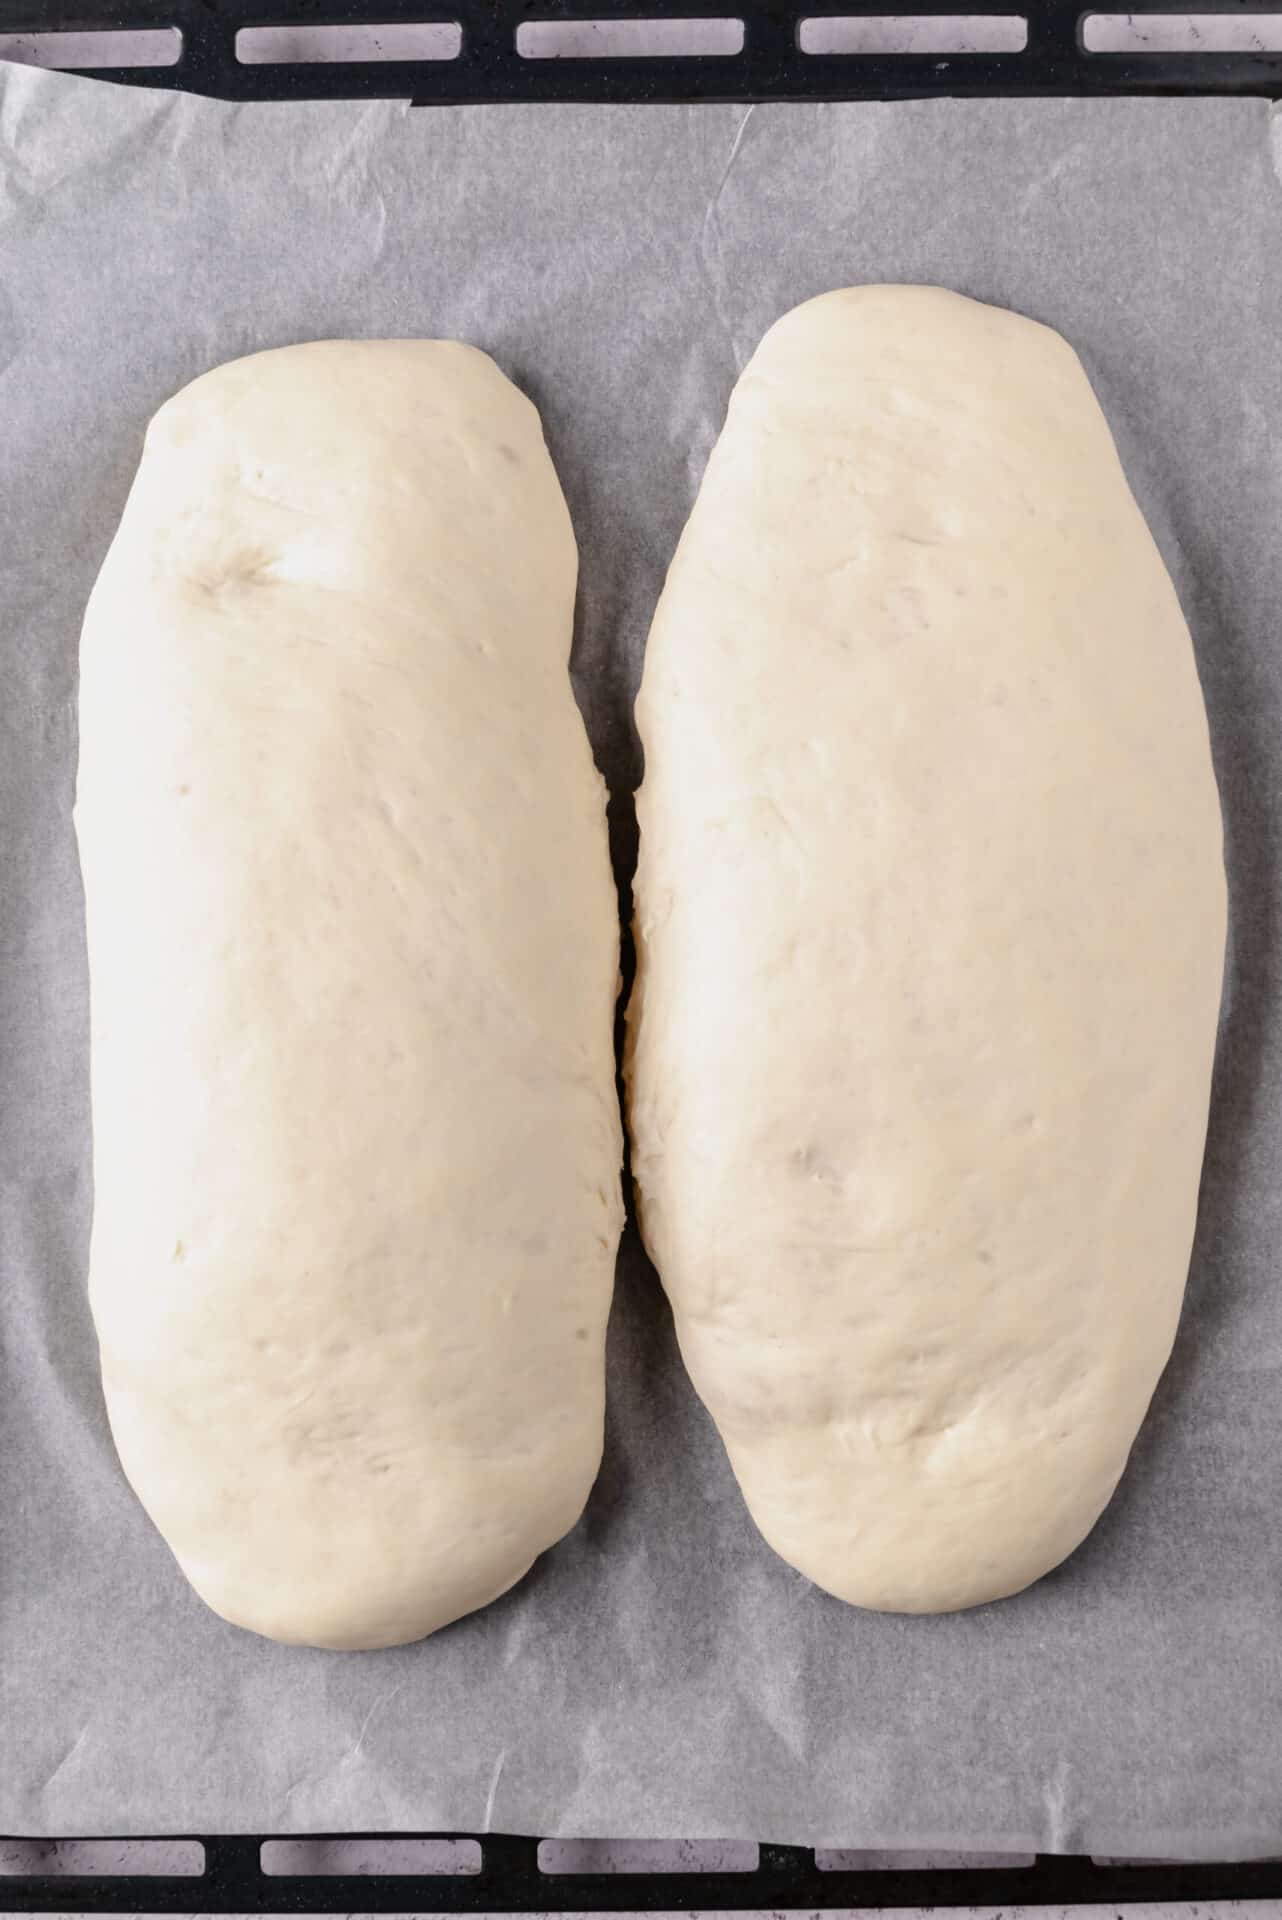
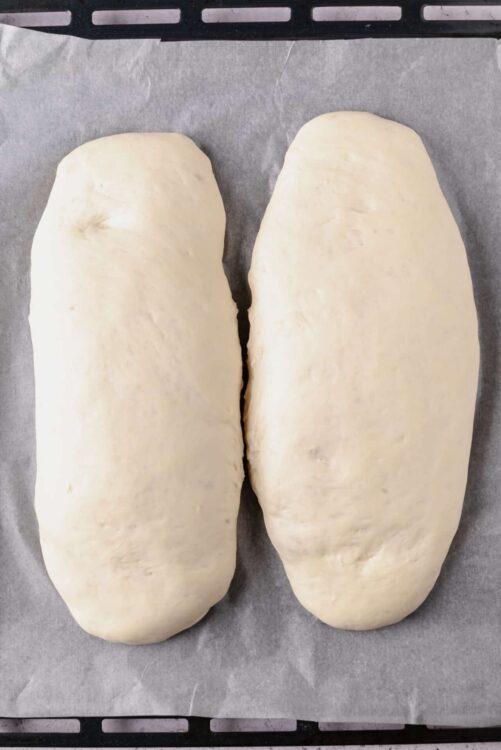
- Gently deflate the dough and divide it into two equal parts. Shape each part into a rough rectangle and place on a parchment-lined baking sheet. Cover with a damp cloth and let rise for another 1 1/2 hours.
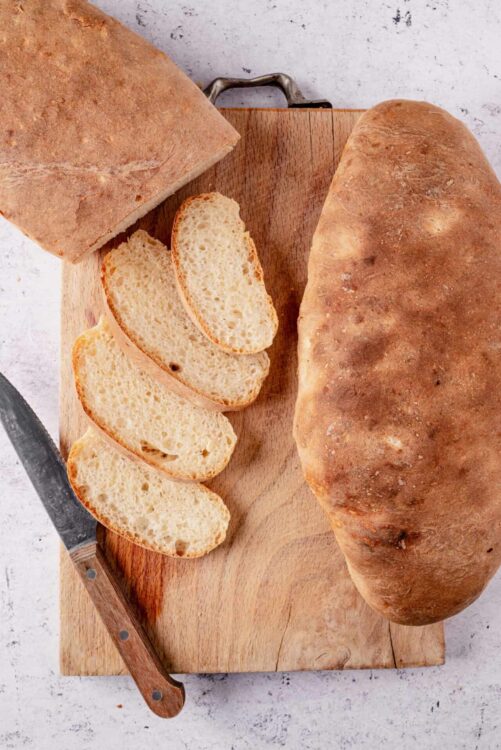
- Preheat the oven to 425°F. Bake the loaves for 25 minutes, or until golden brown and hollow-sounding when tapped. Transfer to a wire rack to cool.
Leave a Comment