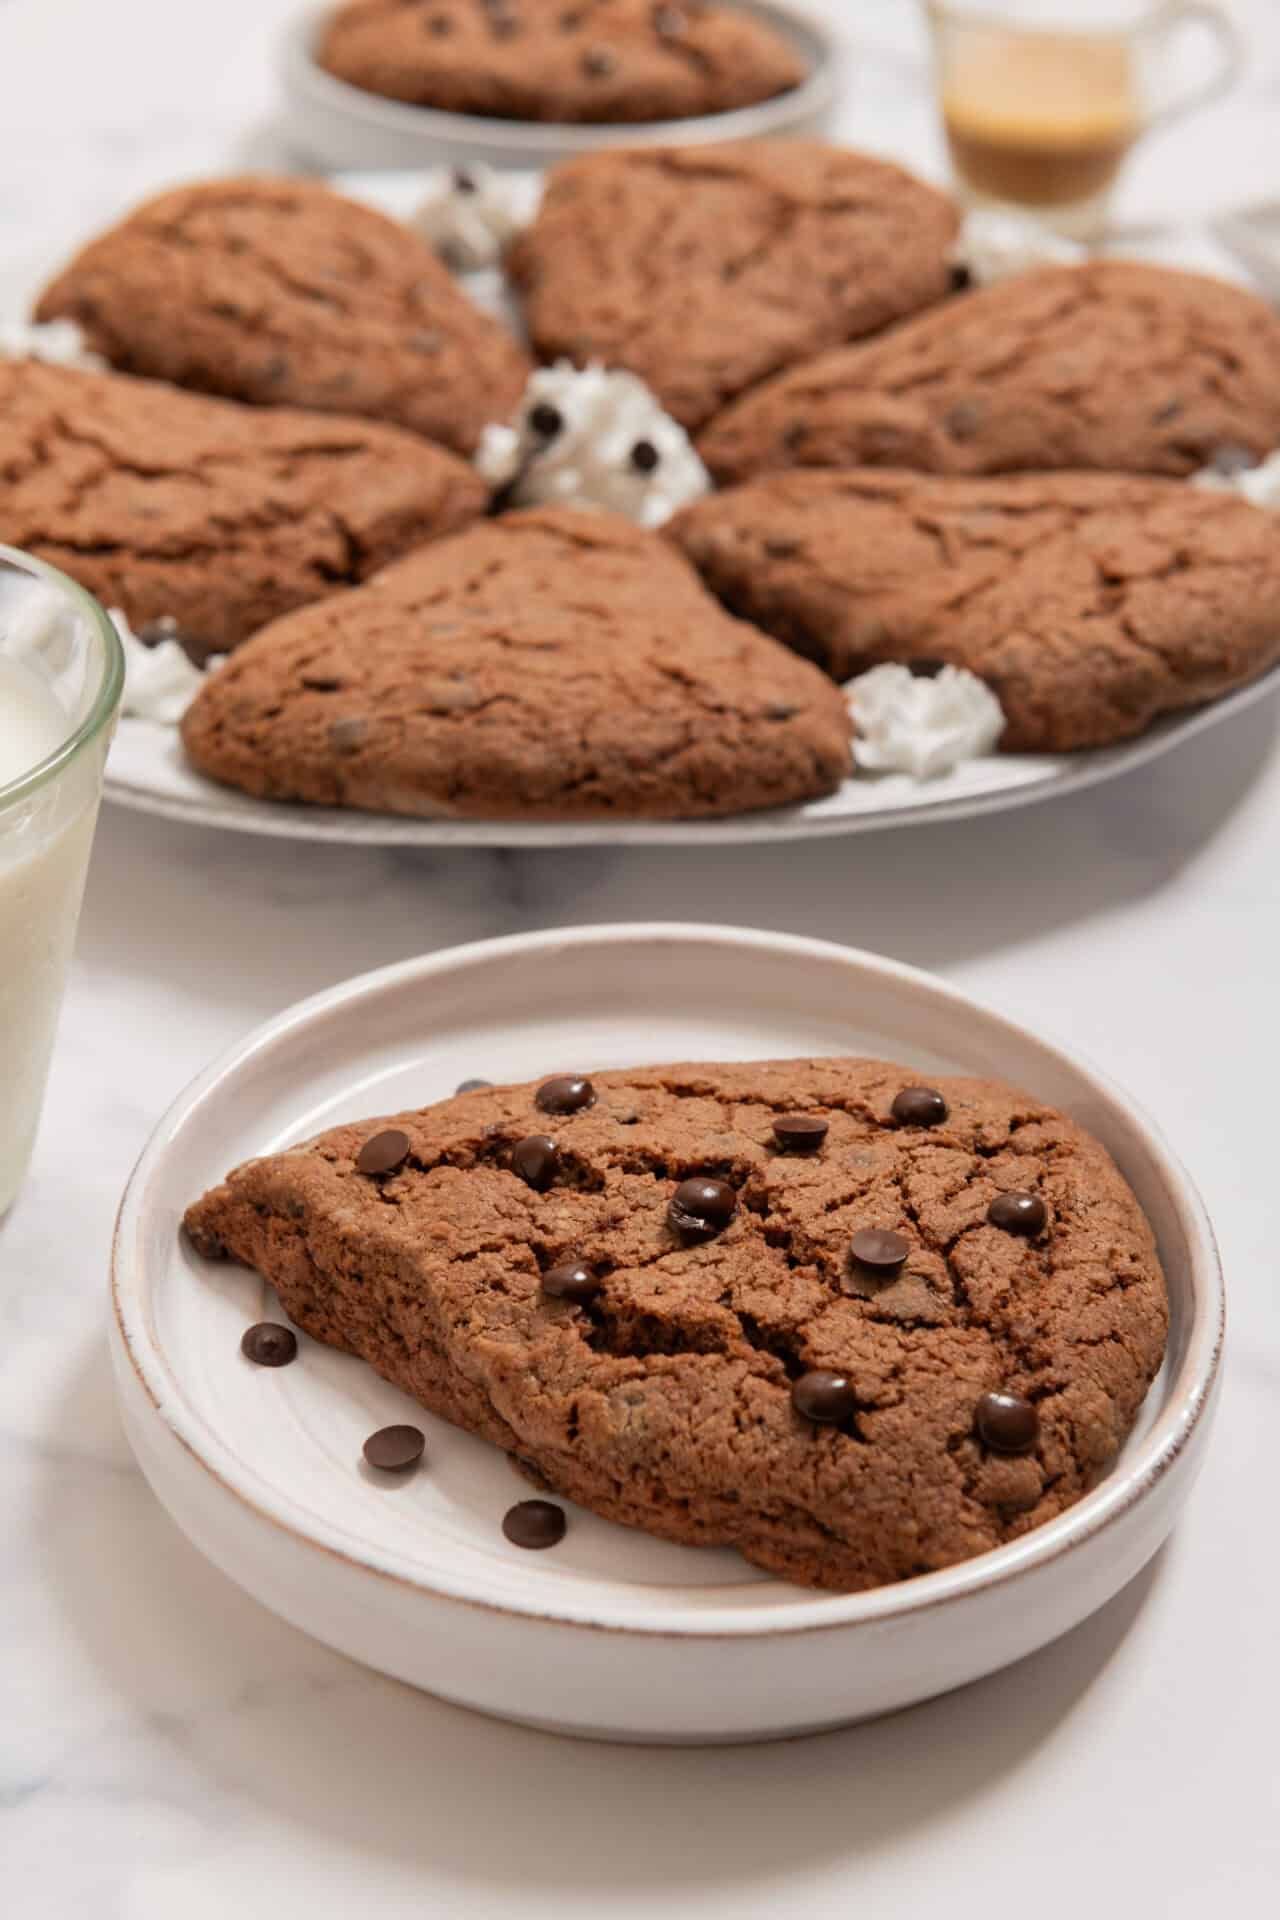
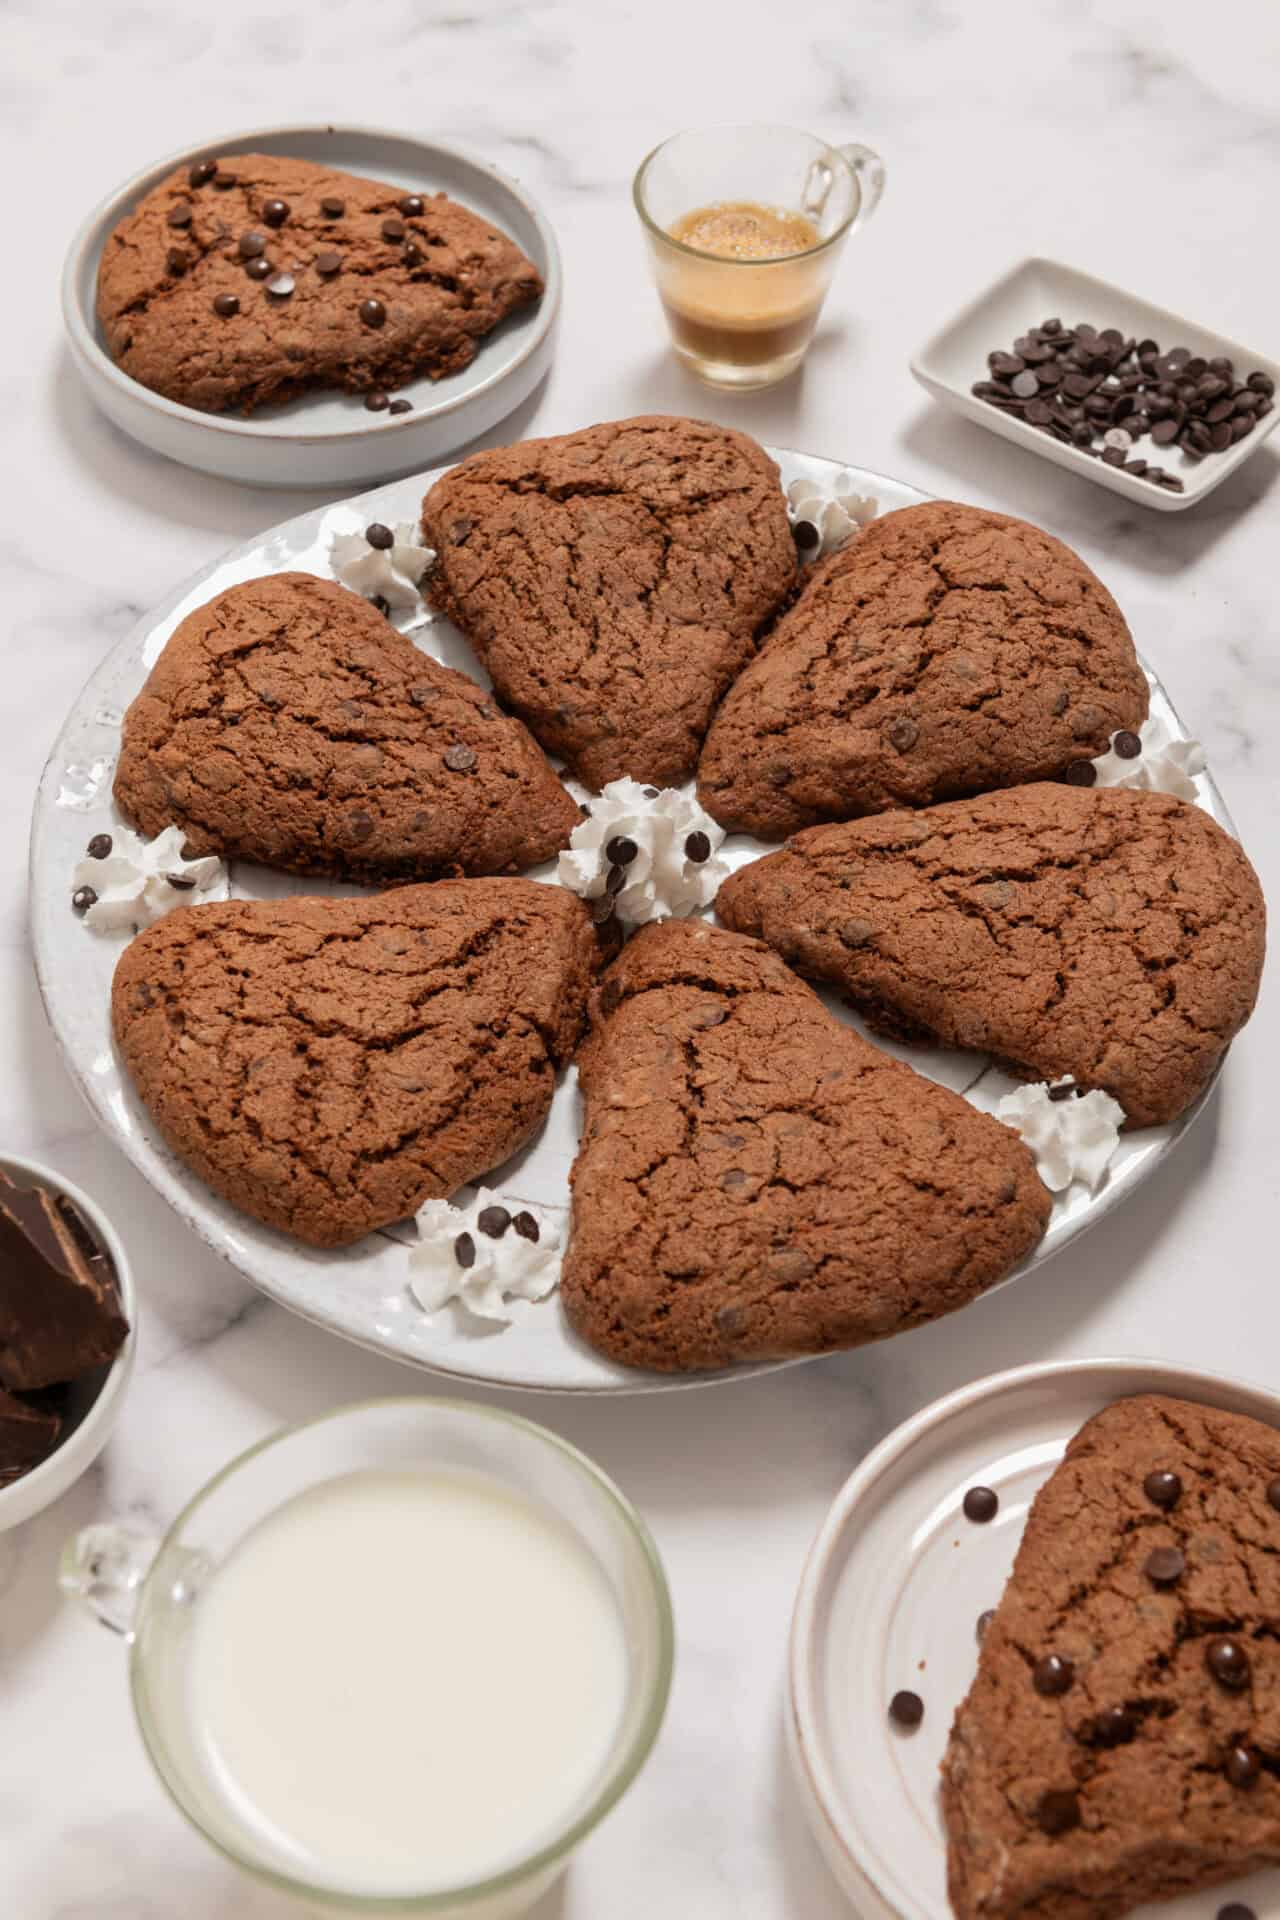
These easy-to-make Chocolate Scones are the missing piece you’ve been looking for to shake up your usual breakfast plans.
If you’re on the hunt for something to make your typical breakfast feel a bit fancier, look no further than this chocolate scone recipe. Despite the scone having some fairly humble beginnings (touting Scottish origins, the word scone itself possibly derived from a Gaelic word meaning “shapeless mass” or “large mouthful”), it is now a baked good that is often consumed on holidays, special occasions, or simply added to the bag on “treat yourself” trips to the bakery. Lucky for you, this recipe takes the scone off its little pastry pedestal and makes it an easily accessible breakfast (or snack!) item straight from your own kitchen.
Admittedly, I always assumed that baking scones myself would be a huge undertaking that I wanted no part of. Although I possess a strong sense of confidence inside the kitchen, baking something like a scone has always felt a little too intimidating. The beauty of this recipe, though, is in its simplicity: wholesome ingredients, straightforward instructions, delicious results.
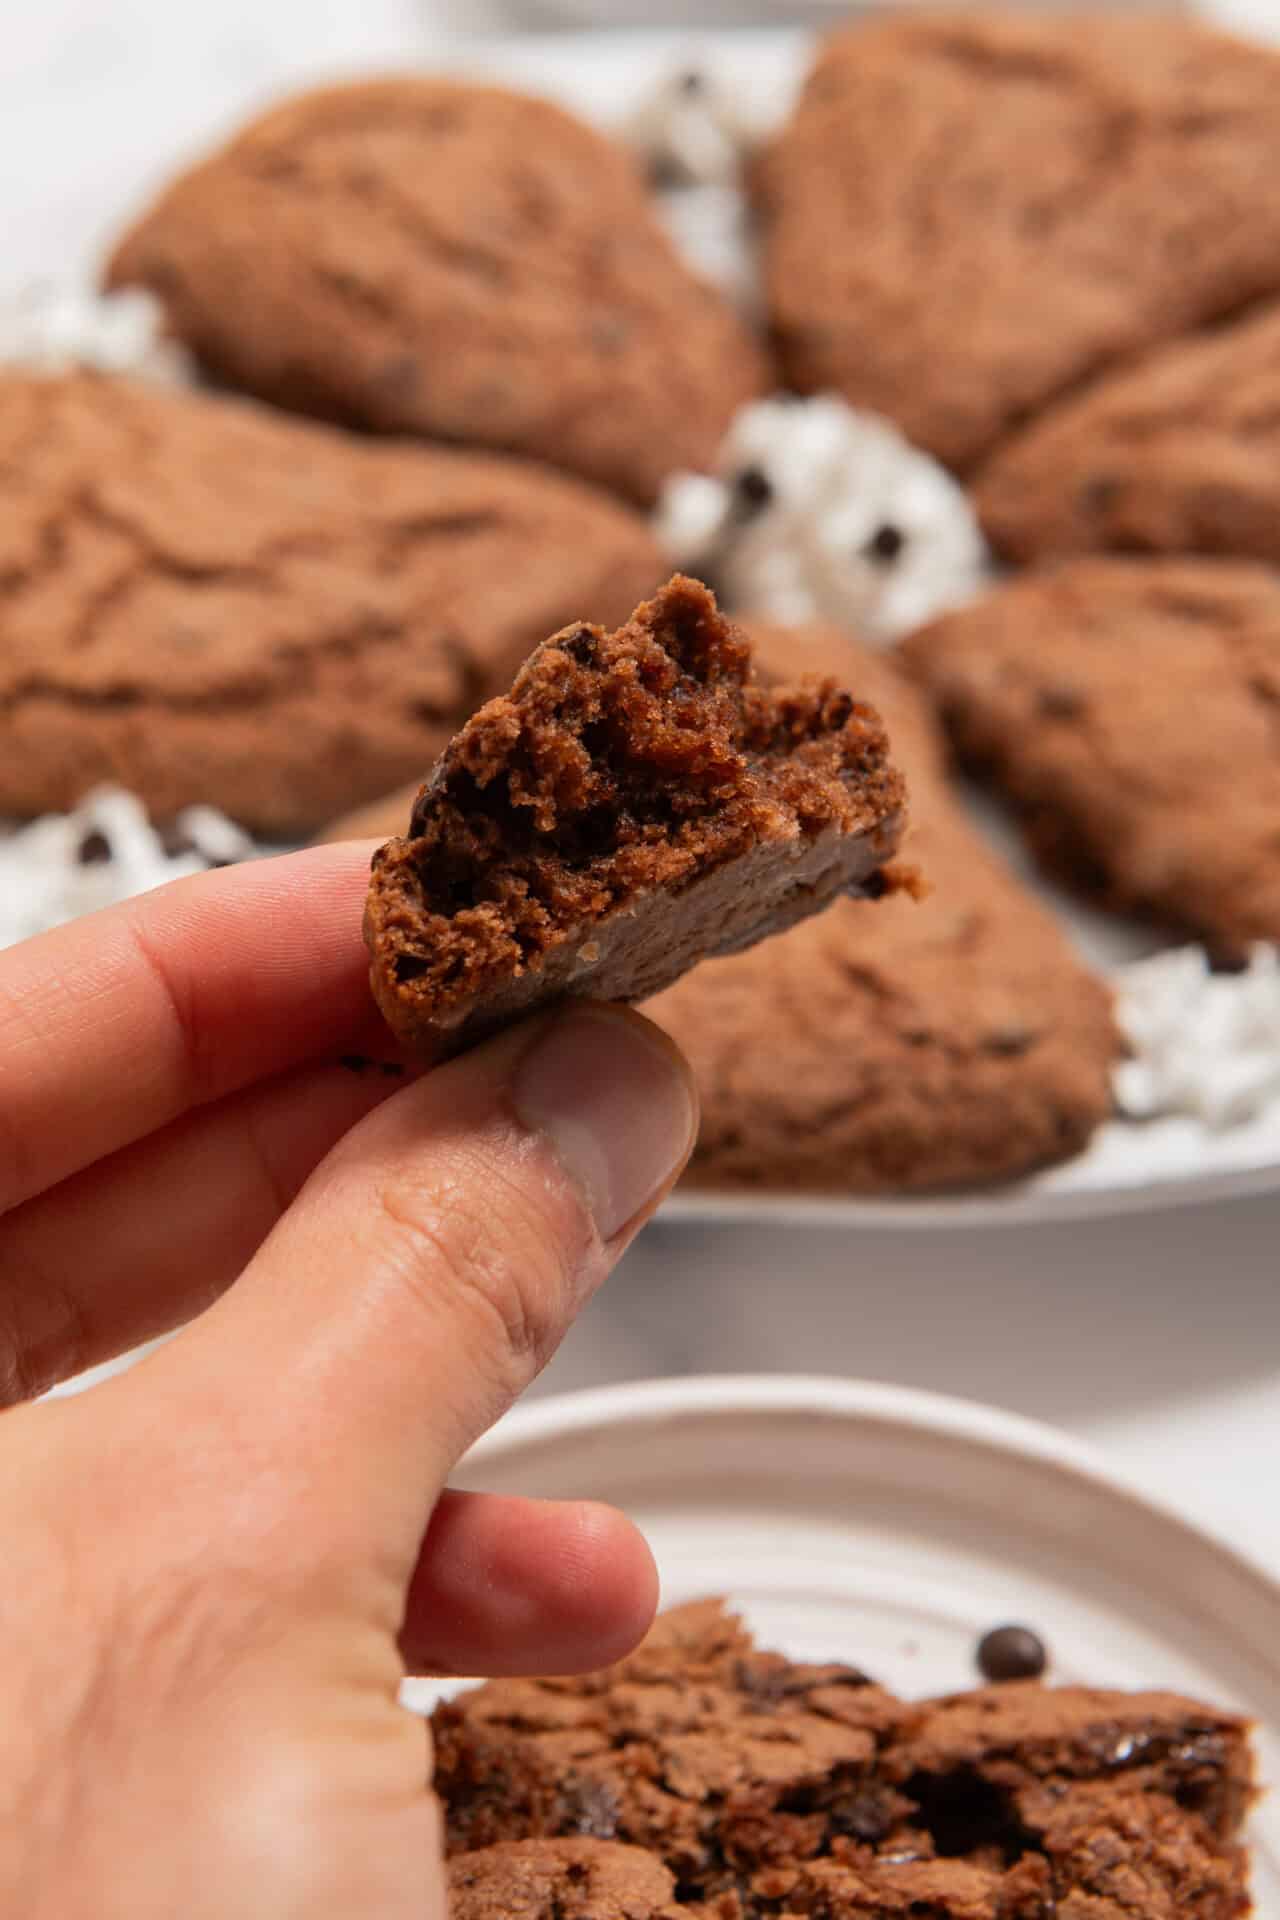
Fair warning, though. If you plan on sharing these with members of your household or making them ahead to enjoy throughout the week, this might present a challenge. It is highly probable that the majority of your freshly baked batch will NOT make it beyond 24 hours. With its soft center and crispy outside – combined with a chocolatey flavor that is not overly sweet – it takes true discipline to consume just one (or two) once they’re out of the oven.
Cold Dairy Is The Key To Success…
If there’s one thing I’ve learned on my home-baked scone journey, it’s that it’s super important to use cold ingredients. This is not something you want to cut corners on, so make it a point to keep your cream and butter as cold as possible until just before adding to the recipe. In particular, making sure that the butter is super cold (near frozen, even) will be crucial to your chocolate scone success. The cold butter helps to create pockets in the dough while baking, resulting in the flaky layers that you’re aiming for in texture. Pro tip: You can make your life a little easier by grating your frozen butter instead of cubing it. You’re welcome!
One other important factor to keep in mind during this process is taking caution NOT to overmix. Nothing will kill your light and crumbly texture faster than an overworked dough. The key here is to use light pressure when working with the dough, and stop working with the dough just as soon as all ingredients come together.
FAQs & Tips
Should I Chill the Dough Before Baking?
Remember, the name of the game here is “cold”! After shaping your scones, it’s best to chill them in the refrigerator for at least 15 minutes, or even as long as overnight and bake the next morning.
How Should I Store My Scones After Baking?
To keep your scones fresh for as long as possible, place them in an airtight container after they have cooled completely. Storing this way will keep them fresh for up to 3 days. Ideally, you’ll want to keep the container in an area that stays cool and out of direct sunlight. You can also freeze the scones after baking for up to 1 month by storing them in a freezer-safe bag after cooling. With either option, you can always warm them back up in a preheated oven (400 degrees F) for just a few minutes!
Can I Make My Dough Ahead of Time?
Another make-ahead option to consider is to make the dough, shape the scones, and freeze them in a freezer-safe bag for up to 1 month. When ready to bake, simply follow the same baking instructions, adding 2-3 additional minutes to the baking time if putting in the oven from frozen.
Serving Suggestions
These chocolate scones are a truly versatile baked good that can be enjoyed at any time of day. While they are a tasty addition to any breakfast or brunch spread, they can also be enjoyed during a quiet few minutes sipping a cup of coffee or tea. While scones are traditionally enjoyed with butter or jam, when paired with a Homemade Whipped Cream these chocolate scones can easily be promoted to a dessert. Really, the serving options are endless – IF you can stop yourself from eating them all in one sitting!
If you’re not done with scones just yet, take a look at these other recipes for Strawberry Scones, Lemon and Vanilla Bean Scones or these festive Christmas Stollen Scones.

Chocolate Scones
Ingredients
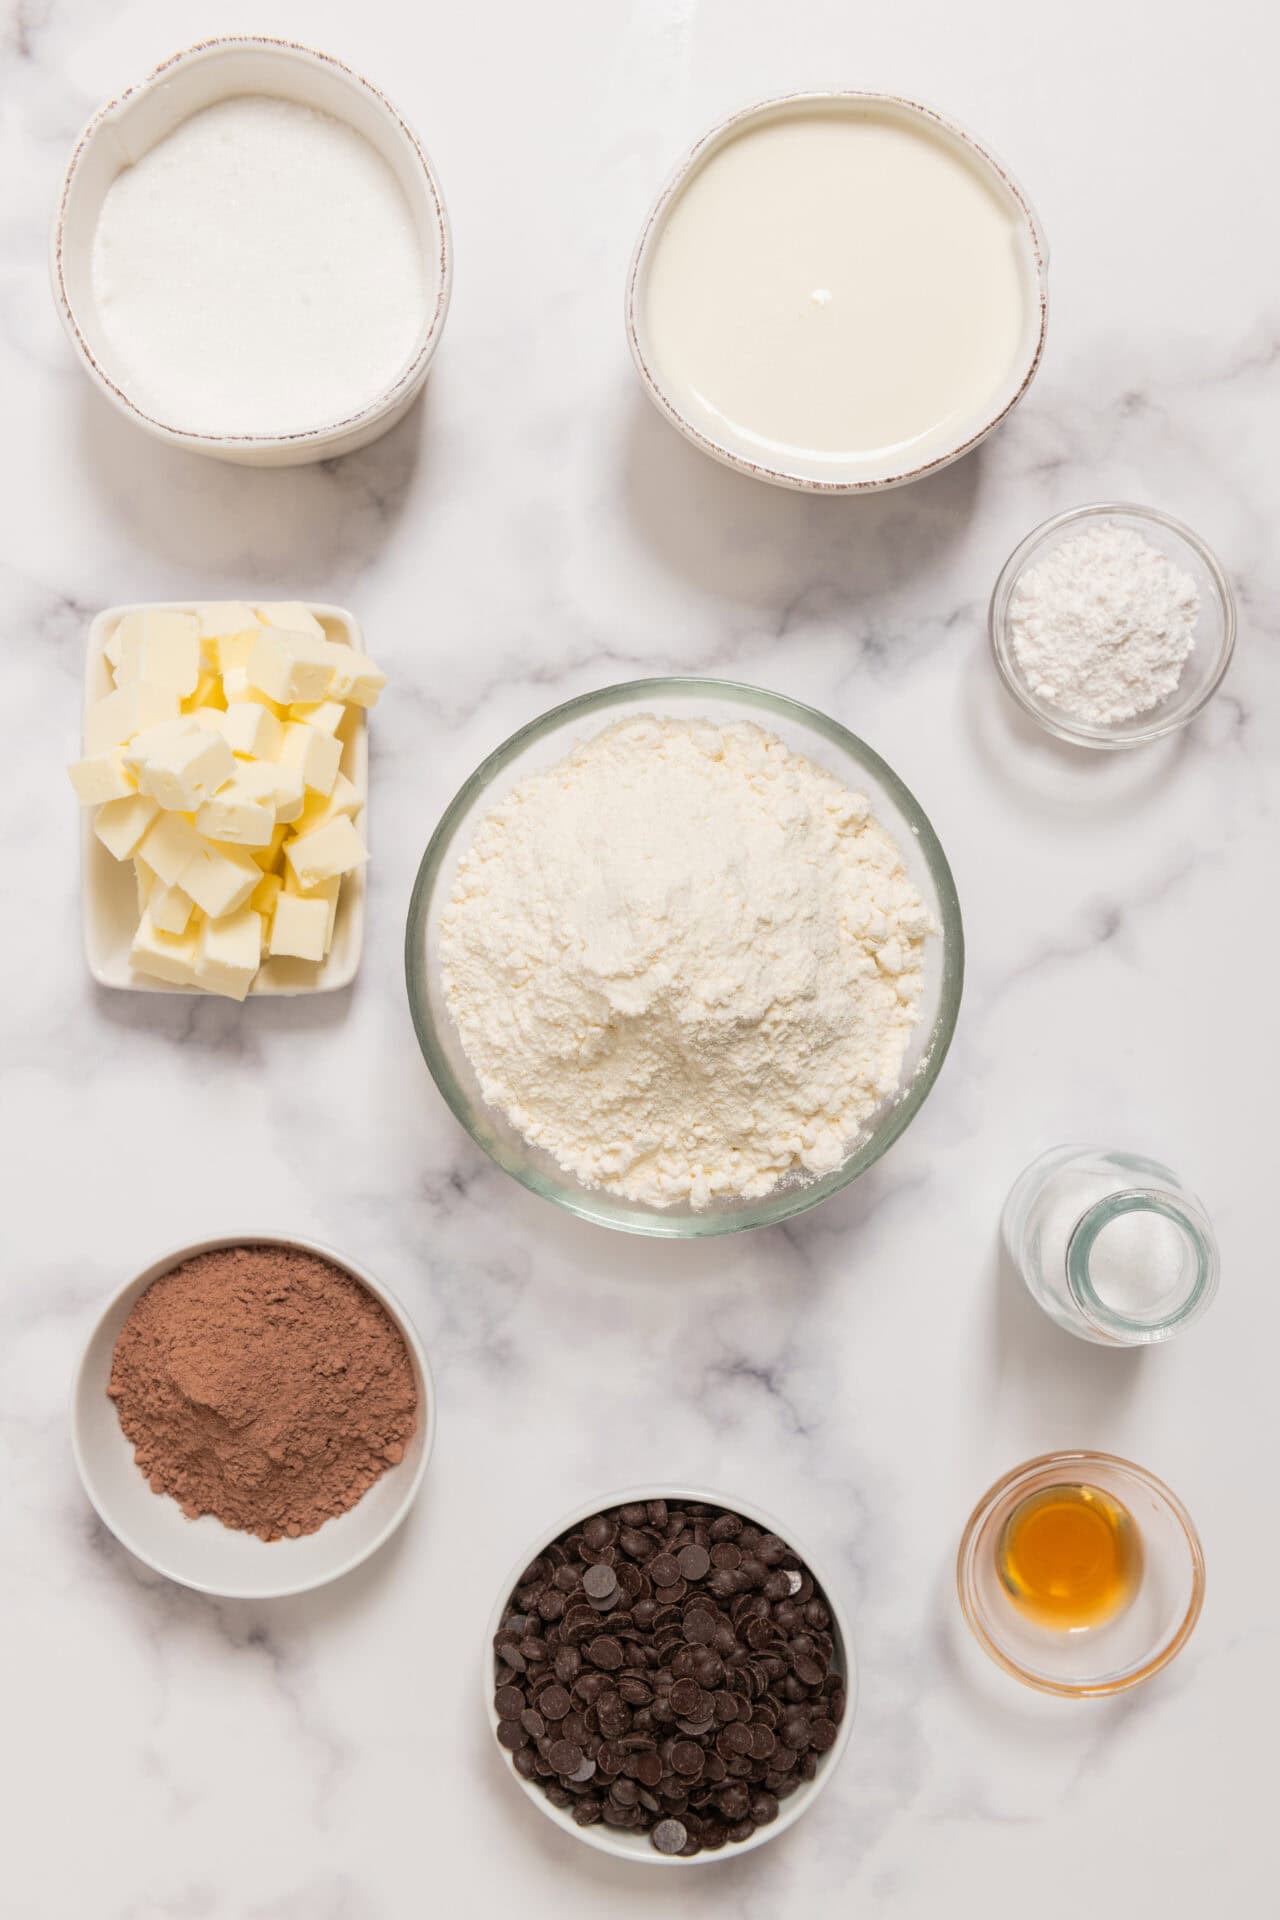
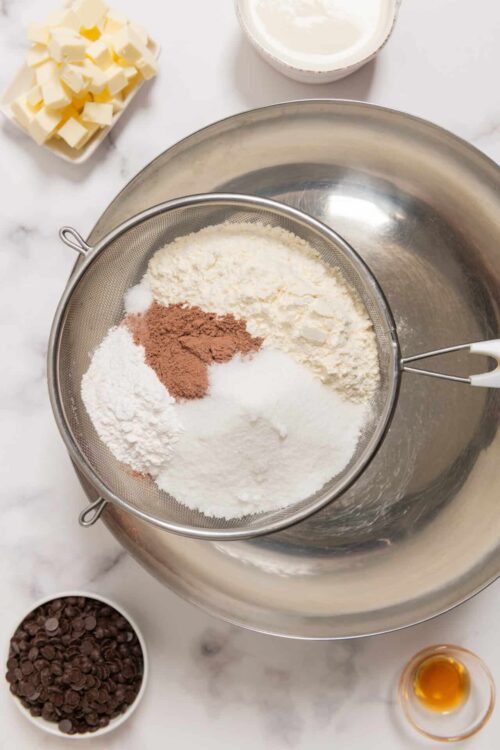
- 2 cups all-purpose flour
- 1/3 cup unsweetened cocoa powder
- 1/2 cup granulated sugar
- 1 tablespoon baking powder
- 1/2 teaspoon salt
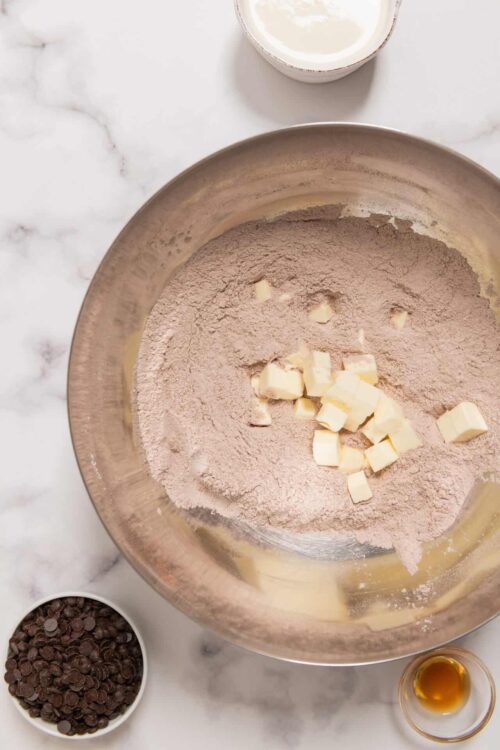
- 1/2 cup unsalted butter very cold and cubed
- 3/4 cup heavy cream cold
- 1 teaspoon vanilla extract
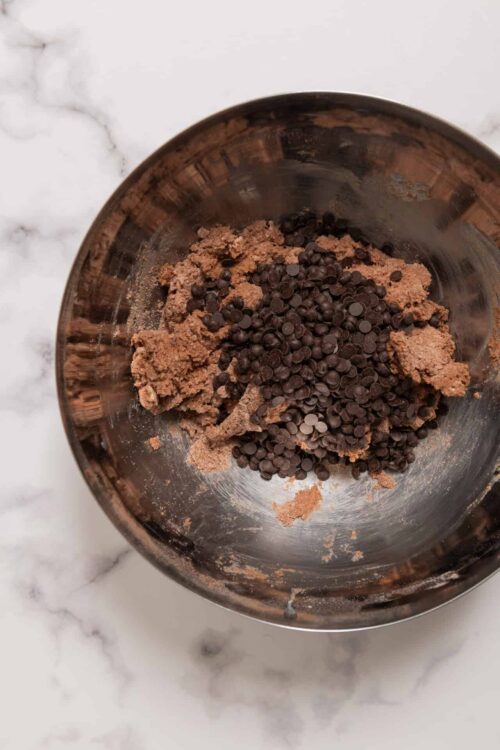
- 3/4 cup semisweet chocolate chips
Instructions
- Preheat your oven to 400°F and line a baking sheet with parchment paper.
- In a large mixing bowl, whisk together the flour, cocoa powder, sugar, baking powder, and salt.
- Add the cold, cubed butter to the dry ingredients. Using a pastry cutter or your fingertips, cut the butter into the mixture until it resembles coarse crumbs with some pea-sized pieces of butter remaining.
- Pour in the heavy cream and vanilla extract. Stir until just combined, then fold in the chocolate chips. Be careful not to overmix.
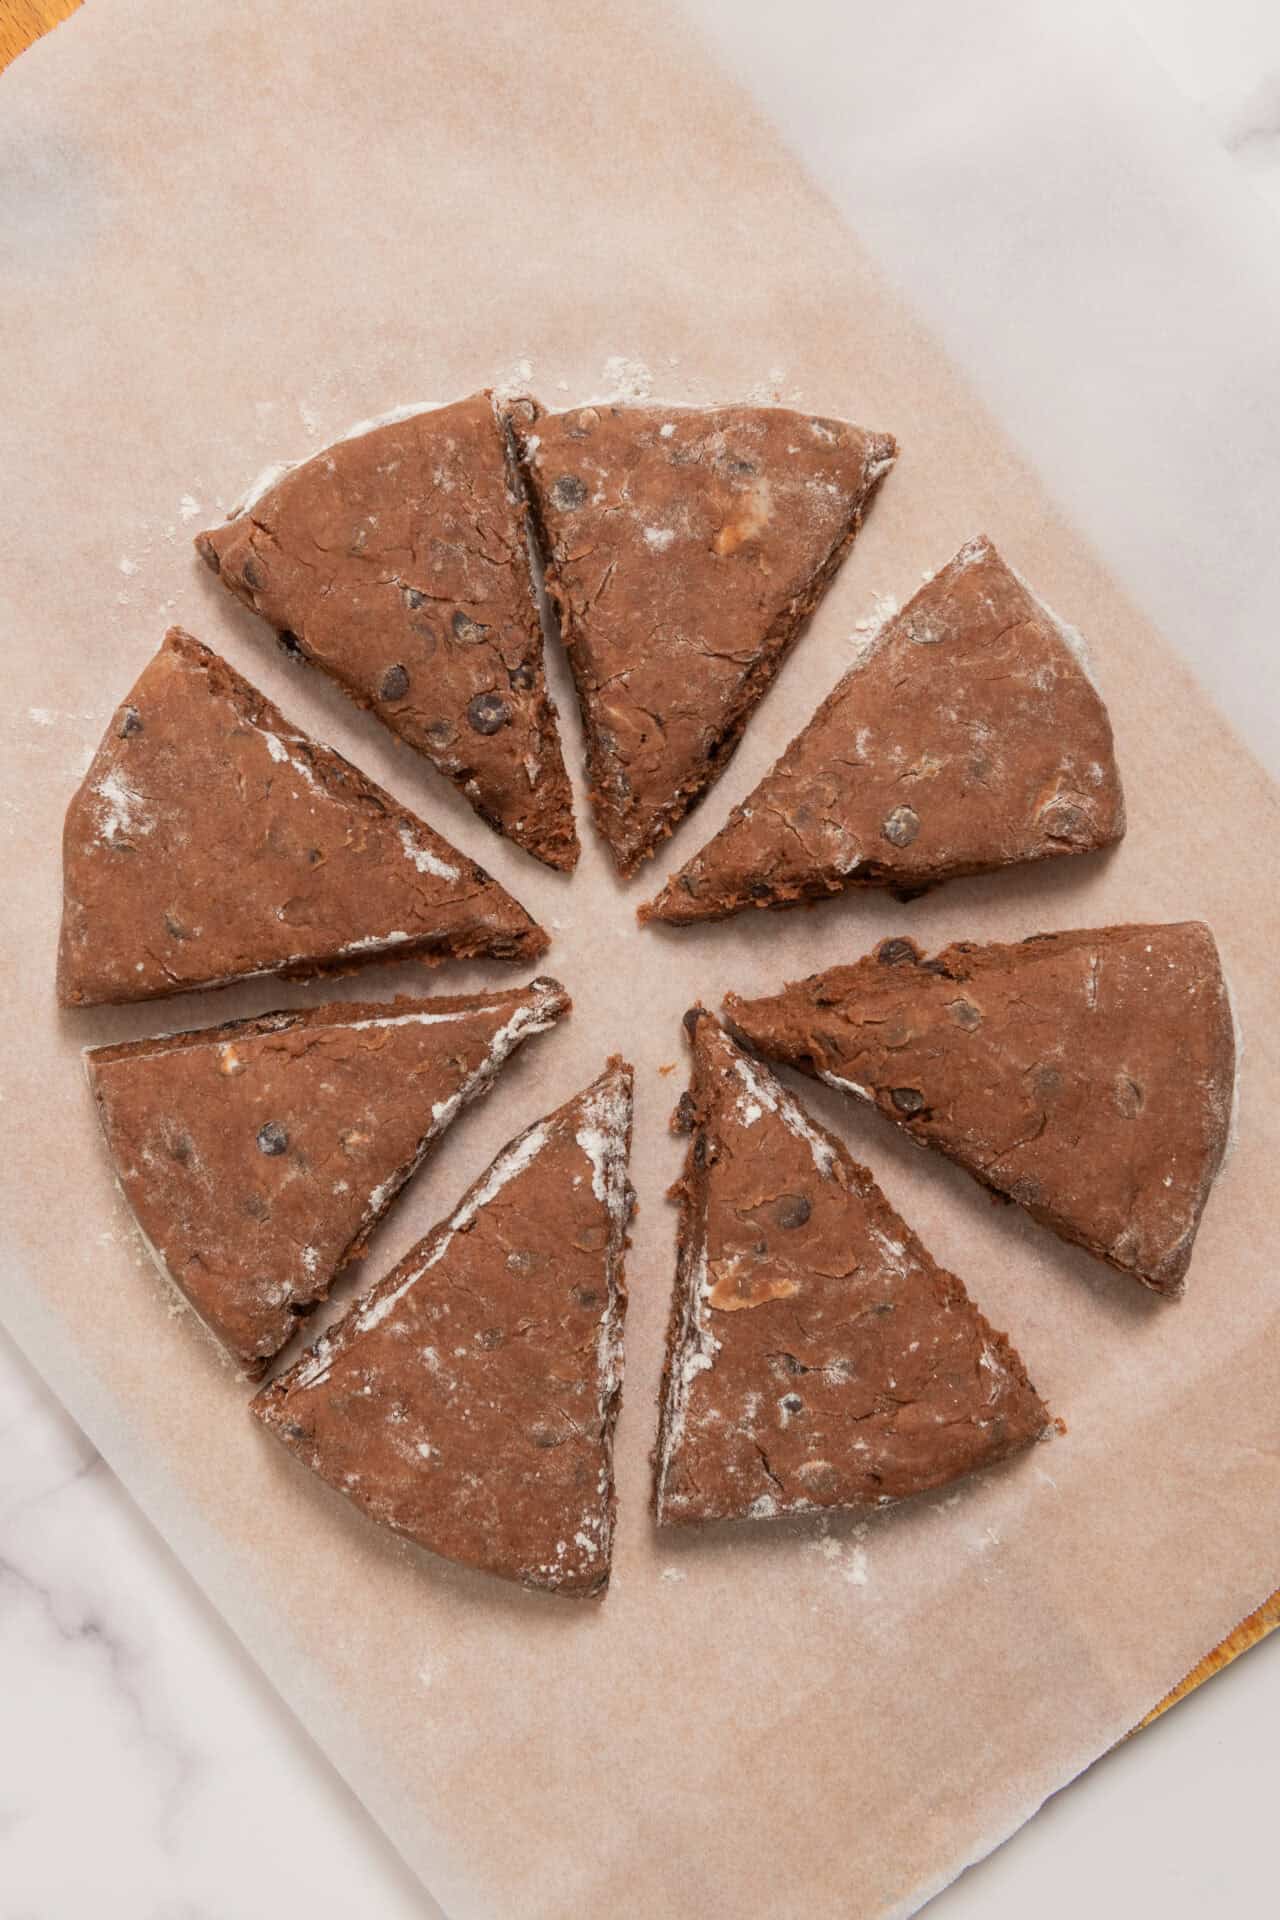
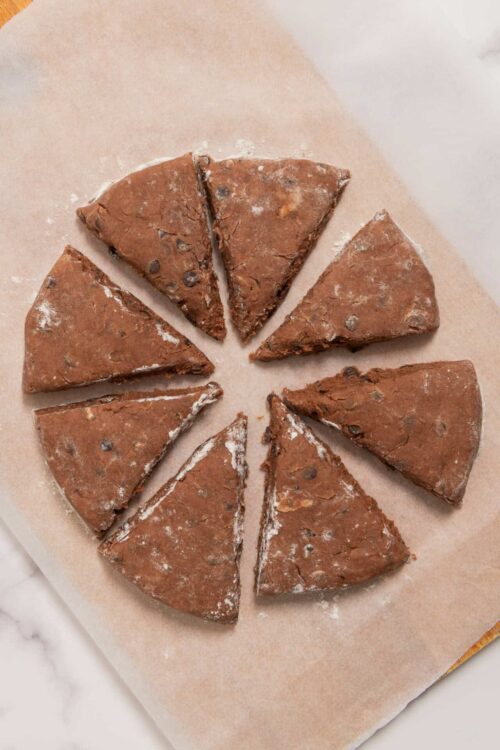
- Turn the dough out onto a lightly floured surface and gently knead it a few times to bring it together. Form the dough into a 7-inch round disc.
- Cut the disc into 8 equal wedges and place them on the prepared baking sheet, spaced apart.
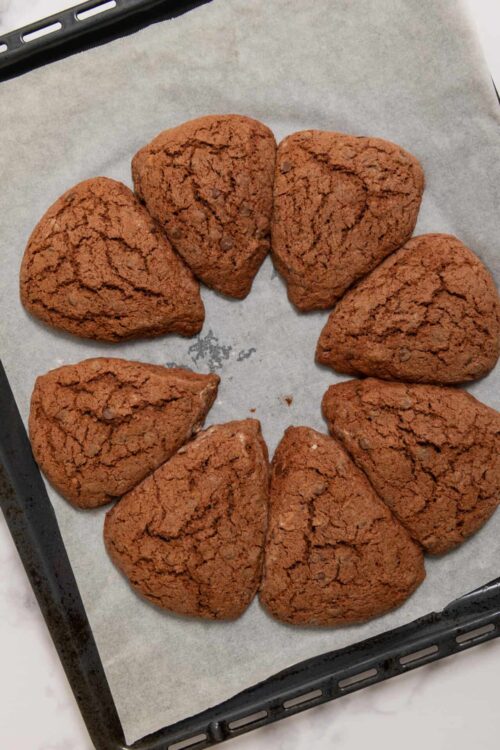
- Bake for about 15 minutes, or until the scones are set and a toothpick inserted into the center comes out clean.
- Remove from the oven and let cool on the baking sheet for a few minutes before transferring to a wire rack to cool completely.


Leave a Comment